
Every winter, horse owners across the Pacific Northwest, New England, and other wet regions face the same frustrating cycle. Your pastures turn into mud pits, grass roots get trampled, and you spend thousands trying to repair what spring rains destroyed. The good news? A properly built sacrifice paddock stops this cycle for good.
Building a sacrifice paddock for wet climates involves eight key steps: choose high ground with good drainage, excavate topsoil, create a 1-2% slope, install geotextile fabric, add 6-8 inches of compacted gravel base, then finish with 2-4 inches of suitable footing material. This all-weather turnout area protects your pastures while giving horses safe outdoor access during rainy seasons.
In this guide, you will learn exactly how to plan, build, and maintain a sacrifice paddock that handles wet ground conditions. We cover location selection, sizing for your herd, layer-by-layer construction, drainage strategies that work in soggy climates, and footing options that stay functional year-round. Whether you have one horse or ten, this step-by-step approach saves your pastures and your budget.
Table of Contents
What Is a Sacrifice Paddock?
A sacrifice paddock, also called a dry lot, heavy use area, or winter paddock, is a dedicated outdoor enclosure with durable, non-grass footing designed for horse turnout during periods when pastures need protection. The term “sacrifice” refers to giving up that specific area to concentrated hoof traffic while preserving your grass pastures from damage.
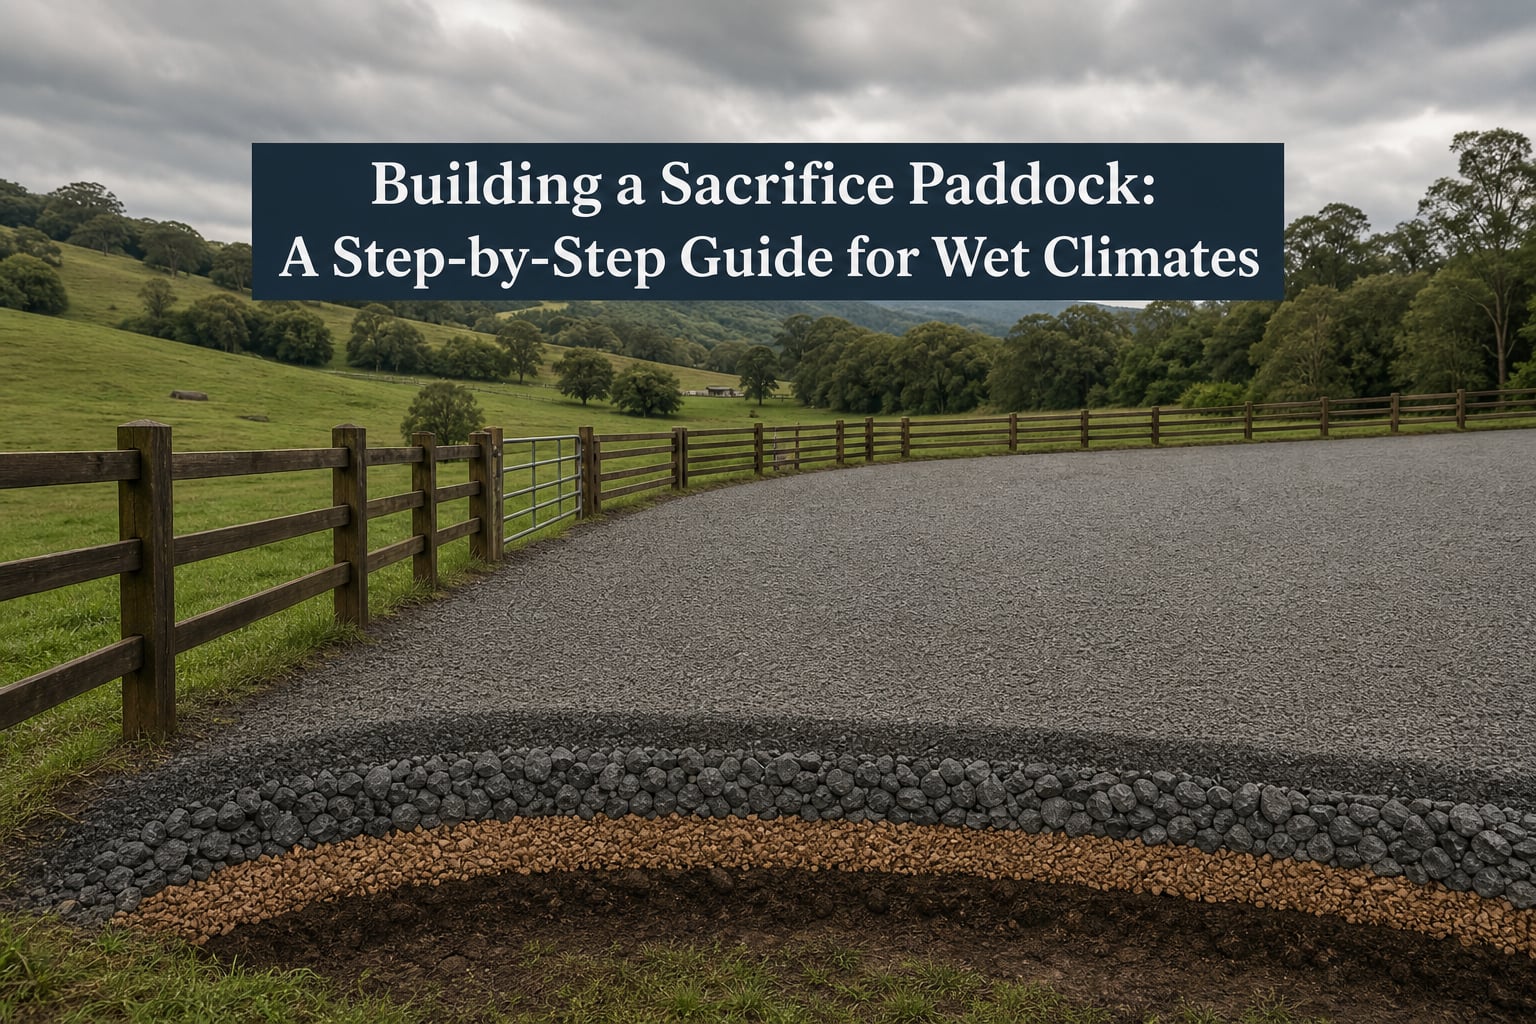
Unlike regular pastures, a sacrifice paddock has engineered footing that handles moisture, drains properly, and stays usable even after heavy rain. The surface typically consists of multiple layers: a subgrade base, geotextile fabric separation layer, compacted gravel, and a surface footing material like crushed stone or sand.
Horse owners use sacrifice paddocks during winter months, after heavy rains, during pasture rest periods, and for horses that need limited grazing due to metabolic conditions. The key difference from regular turnout is that sacrifice areas sacrifice the grass to protect your larger pastures from lasting soil compaction and erosion.
Why You Need a Sacrifice Paddock in Wet Climates
Wet climates present unique challenges that make sacrifice paddocks essential rather than optional. When soil stays saturated, horse hooves act like punches, creating deep holes that collect water and kill grass roots. Within weeks, a productive pasture becomes a muddy mess that takes months to recover.
The damage goes deeper than surface mud. Hoof pressure on wet soil compacts the ground so tightly that grass roots cannot penetrate. Water runs off instead of soaking in. Weeds take over because desirable grass species cannot compete in compacted, oxygen-starved soil. Recovery costs for reseeding, aerating, and fertilizing damaged pastures easily exceed the cost of building a proper sacrifice area.
Beyond pasture health, wet paddocks create real problems for horses. Standing in mud increases the risk of thrush, scratches, and abscesses. Slippery footing causes injuries. Horses confined to stalls during wet weather develop behavioral issues and respiratory problems from lack of movement.
Environmental regulations also factor in. Many states now require horse properties to manage runoff and prevent contamination of nearby waterways. A properly built sacrifice paddock with drainage controls and vegetated filter areas helps meet these requirements while protecting your land investment.
Choosing the Right Location for Wet Ground
Site selection determines whether your sacrifice paddock succeeds or fails. In wet climates, this decision becomes even more critical because you need every advantage against moisture.
Seek High Ground
The most important rule is simple: choose the highest ground available on your property. Higher areas drain naturally, stay drier during rain events, and thaw faster after freezes. Walk your property after heavy rain and note which areas stay driest. Those spots are your best candidates.
Avoid low-lying areas where water collects, even if they seem convenient. A sacrifice paddock built in a depression will always struggle with drainage, regardless of your engineering efforts. You cannot fight gravity and win.
Distance from Water Sources
Locate your sacrifice area at least 100 feet from creeks, ponds, wetlands, and drainage ditches. This buffer protects water quality by allowing runoff to filter through vegetation before reaching waterways. Some jurisdictions require even greater setbacks, so check local regulations.
Also consider distance from wells and groundwater sources. Heavy use areas can leach nutrients and bacteria. The further from water sources, the better for environmental and regulatory compliance.
Assess Soil Type
Your soil type affects construction approach. Clay soils hold moisture and require deeper excavation and more robust drainage. Sandy or gravelly soils drain naturally but may need extra base material to prevent settling. If you have heavy clay, plan for more gravel base and careful grading.
A simple test: dig a hole 18 inches deep after rain. If water fills the hole within 24 hours, you have slow-draining soil that needs extra attention to slope and base layers.
Access and Orientation
Practical matters matter too. Choose a location with easy access from barns, shelters, and hay storage. South-facing slopes dry faster in winter sun. Level areas require less grading but may need more drainage work. Balance convenience against drainage advantages.
Consider how you will muck out the area. You need truck or tractor access for manure removal. Gates should open into the paddock so horses cannot push through. Position gates away from the lowest point where mud accumulates.
Sizing Your Sacrifice Paddock
Proper sizing ensures horses have enough room to move, interact, and avoid conflicts while keeping the area manageable. Too small creates behavioral problems and concentrated wear. Too large increases material costs and maintenance.
Minimum Dimensions
The absolute minimum for one horse is a 30 by 30 foot area, roughly 900 square feet. This provides basic movement but feels tight. For better welfare, aim for at least 400 square feet per horse as a starting point.
For multiple horses, increase the size significantly. Two horses need at least 1500 square feet, not double the minimum, because shared space works differently than individual space. Three or more horses benefit from at least 500 square feet each to establish movement patterns and avoid crowding.
Practical Sizing Guidelines
Many experienced horse owners recommend a 70 by 70 foot minimum for a small herd, which equals about 5000 square feet. This allows horses to trot, play, and establish social distance. Long narrow configurations, such as 30 by 100 feet, encourage movement along the length and work well for active horses.
Consider the height and temperament of your horses. Larger breeds need more space. Dominant horses require extra room to separate from herd mates. Horses prone to kicking or fighting need careful sizing and possibly separate areas.
Expandability Planning
Build for your current needs but plan for expansion. Install fencing that can be easily extended. Prepare the ground for future enlargement by grading adjacent areas during initial construction. A phased approach spreads costs over time while maintaining a functional setup from day one.
Building a Sacrifice Paddock: A Step-by-Step Guide for Wet Climates
Construction follows a specific sequence that builds from the ground up. Each layer serves a purpose, and skipping steps causes premature failure. Here is the complete process for wet climate conditions.
Step 1: Site Preparation and Clearing
Start by marking your boundaries with stakes and string. Remove all vegetation, rocks, and debris from the area. Grass and weeds under the paddock will rot and create soft spots. Use a sod cutter or excavator to strip the topsoil and organic material completely.
Save the removed topsoil for other projects. You will not need it in the paddock, and it makes excellent fill for garden beds or pasture repairs elsewhere on your property.
Step 2: Excavation and Subgrade Preparation
Excavate to a depth of 10 to 14 inches below your final surface grade. The exact depth depends on your planned layer thickness. In wet climates, err toward deeper excavation to accommodate robust drainage layers.
The subgrade is the natural soil surface at the bottom of your excavation. This layer must be solid and stable. If you hit soft spots or springs, dig deeper and fill with gravel to create a stable base. Any weakness here will telegraph through all upper layers.
Step 3: Sloping and Grading
Create a 1 to 2 percent slope across the entire subgrade surface. This equals a drop of 1 to 2 feet for every 100 feet of length. For a 50 by 50 foot paddock, that means roughly 6 to 12 inches of fall from high point to low point.
Decide between a crown, where the center is highest and water sheds to both sides, or a single-direction slope. Crowns work well in wide rectangular areas. Single-direction slopes suit narrow configurations. Either approach works if you maintain consistent grade.
Use a laser level or transit for accuracy. Eyeballing leads to low spots that collect water. The slope must be uniform across the entire surface.
Step 4: Geotextile Fabric Installation
Geotextile fabric is the critical layer that separates your gravel base from the soil beneath. Without it, gravel sinks into the subgrade over time, especially in wet clay soils. The fabric prevents this mixing while allowing water to pass through.
Use non-woven geotextile fabric rated for heavy traffic applications, typically 4 to 8 ounces per square yard. Roll the fabric across the entire prepared subgrade, overlapping seams by at least 12 inches. Do not stretch the fabric tight. It should lay flat without wrinkles.
Secure the edges with landscape staples or by placing base material directly on top. The fabric should extend slightly beyond your planned paddock boundaries to prevent edge failures.
Step 5: Adding the Base Layer
The base layer provides structural support and drainage. Use crushed gravel in the 3/4 to 1.5 inch size range. This size compacts well while allowing water to flow through. Avoid rounded river rock, which shifts under load and does not lock together.
Spread the base material 6 to 8 inches deep after compaction. This means placing 8 to 11 inches of loose gravel to account for settling. Use a tracked vehicle or plate compactor to compress the layer in lifts of no more than 4 inches at a time.
In wet climates with clay soils, consider increasing the base layer to 10 to 12 inches. The extra depth provides more drainage capacity and prevents the base from saturating during extended wet periods.
Step 6: Compaction of the Base Layer
Proper compaction creates a stable platform that resists settling and shifting. Each lift of gravel must be compacted individually. A jumping jack compactor or heavy roller works best. Make multiple passes in different directions.
Test compaction by walking across the surface. Your boots should not leave deep impressions. A properly compacted base feels solid and resists penetration by a shovel driven by hand pressure.
In wet conditions, compact when moisture content is optimal. Too dry and particles do not bind. Too wet and you push water through the fabric. If your base is saturated, allow drainage time before compacting, or compact in stages as moisture permits.
Step 7: Installing Surface Footing
The surface footing layer is what your horses stand on. It should be comfortable for hooves while providing drainage. Common options include stone dust, coarse sand, or wood chips. Each has advantages and tradeoffs.
Apply the footing layer 2 to 4 inches deep over the compacted base. Stone dust, also called screenings or fines, compacts to a firm surface that stays cleaner than sand. Coarse sand stays softer but can mix with manure and require more maintenance. Wood chips provide cushion but decompose over time.
For wet climates, stone dust often performs best. It packs into a semi-solid surface that sheds water yet remains permeable. Avoid fine sand, which shifts too much and can cause horses to slip.
Step 8: Fencing and Finishing Touches
Install fencing after the footing layer is complete. Use durable materials appropriate for horses: wood boards, no-climb wire mesh, or rigid vinyl. Fencing should be at least 5 feet high for most horses.
Add kickboards at the bottom of wood fencing to prevent hooves from pushing through. Position gates in convenient locations on firm ground. Consider a concrete pad or additional gravel under gates where traffic concentrates.
Install waterers, feed tubs, and any shelters. Position these fixtures on high spots or add extra base material underneath. Heavy use areas around feeders need reinforcement to prevent localized mud.
Drainage and Sloping for Wet Climates
Proper drainage transforms a sacrifice paddock from a seasonal solution to an all-weather asset. In wet climates, drainage design separates functional paddocks from perpetual mud problems.
Maintaining Proper Slope
The 1 to 2 percent slope created during excavation must extend through all layers to the final surface. Each layer should mirror the underlying grade. If you lose slope during construction, the finished surface will collect water.
Check slope after each layer by setting stakes and measuring grade. Minor variations are acceptable, but any area that dips below 1 percent risks ponding. Regrade problem spots before adding the next layer.
French Drains for High Water Tables
In areas with high water tables or springs, you may need subsurface drainage beyond surface slope. French drains consist of perforated pipe surrounded by gravel installed below the paddock base.
Install French drains at the lowest point of the subgrade, running perpendicular to the slope direction. The drain should outlet at least 20 feet beyond the paddock edge, ideally into a vegetated swale or existing drainage.
French drains add cost and complexity but solve persistent wetness that surface slope alone cannot address. If your subgrade stays saturated despite proper grading, subsurface drainage is worth the investment.
Vegetated Filter Areas
Runoff from your sacrifice paddock carries nutrients, bacteria, and sediment. A vegetated filter area at the low edge of the paddock captures these contaminants before they reach streams or drainage ways.
Establish a 20 to 50 foot wide grass strip below the paddock outlet. The vegetation slows runoff, allowing particles to settle and nutrients to be absorbed by plants. Maintain this area as permanent grass, never grazed, solely for filtration.
Crowned vs Single-Direction Slope
Crowned surfaces shed water to both sides, which works well when you have adequate drainage space on both edges. This design reduces the depth of flow at any one point and speeds drying across the surface.
Single-direction slopes concentrate all runoff to one edge. This simplifies drainage design but requires more robust handling at the outlet. Use this approach when one edge has better natural drainage or where you can install a collection system.
Footing Material Options Compared
The surface footing directly contacts horse hooves and determines daily usability. Different materials suit different budgets, horse needs, and management styles.
Crushed Stone and Stone Dust
Crushed stone screenings, also called stone dust, quarry fines, or screenings, provide a firm surface that compacts into a semi-solid layer. Sizes range from 1/4 inch down to fines. This material stays relatively clean, drains well, and requires less maintenance than sand.
Advantages include durability, low cost, and resistance to shifting. Disadvantages include hardness for sensitive horses and the need for periodic top-dressing. Use 3 to 4 inches for best results.
Sand
Coarse construction sand provides a soft, forgiving surface that many horses find comfortable. However, sand mixes with manure, requires frequent leveling, and can become slippery when wet.
Best for dry climates or covered areas. In wet regions, sand tends to shift and migrate, requiring more maintenance. If using sand, choose coarse angular sand rather than fine river sand.
Wood Chips and Hog Fuel
Wood-based footing provides cushion and absorbs moisture. Chipped or shredded wood products, sometimes called hog fuel, break down over time and require replenishment. Fresh chips provide more cushion than decomposed material.
Advantages include softness and moisture absorption. Disadvantages include decomposition, potential for hiding debris, and variable quality. Some wood products contain splinters or bark that irritate hooves. Source from reputable suppliers.
Geocell Grids
Geocell systems consist of honeycomb plastic grids filled with gravel or other base material. The grid holds material in place and prevents migration. This option works well for high-traffic areas or where the base layer tends to shift.
Higher cost than loose footing but excellent stability. Geocell systems reduce maintenance and extend the life of the base layer. Consider for gate areas, feed zones, or small paddocks where traffic concentrates.
Maintenance Best Practices
A sacrifice paddock requires ongoing maintenance to function properly. Regular attention prevents small problems from becoming expensive repairs.
Daily and Weekly Tasks
Remove manure at least twice weekly, daily if possible. Manure mixes with footing material and creates a messy, unsanitary surface. Regular cleaning also reduces fly populations and odor.
Inspect the surface for low spots, holes, or areas where footing has migrated. Fill and level as needed. Small divots become larger problems with freeze-thaw cycles and concentrated traffic.
Seasonal Maintenance
Refresh footing material annually or as needed. How often depends on the material, traffic level, and weather conditions. Stone dust may need topping every 1 to 2 years. Sand requires more frequent attention.
Check fencing for loose boards, stretched wire, or damaged posts. Winter weather stresses fence lines. Repair damage before it becomes a safety hazard.
Inspect drainage areas for sediment buildup or erosion. Clear French drain outlets. Maintain vegetated filter strips by mowing periodically and removing accumulated material.
Long-Term Care
Every 3 to 5 years, assess whether the base layer needs refreshing. Compacted gravel can settle or become contaminated with fine material that impedes drainage. Adding a fresh layer of base material restores drainage capacity.
Keep records of material additions and maintenance activities. This helps predict future needs and budget for renewal work.
Common Mistakes to Avoid
Learning from others’ errors saves time and money. These mistakes appear frequently in horse properties across wet regions.
Skipping Geotextile Fabric
The single most common mistake is omitting the geotextile separation layer. Without fabric, gravel sinks into clay soil within months. The surface becomes soft and muddy despite your base material investment. Install fabric even if budget is tight.
Insufficient Slope
Many paddocks fail because the surface is too flat. Without proper slope, water collects in low spots and the entire system struggles. Do not skip laser leveling. The time spent on accurate grading pays for itself quickly.
Undersizing the Area
Building too small creates behavioral problems and concentrates wear. Horses need adequate space to move and establish social distances. A paddock that is too small costs nearly as much to build as one properly sized but fails to serve its purpose.
Poor Footing Choice
Choosing footing based on price alone often leads to regret. Fine sand shifts and mixes with manure. Rounded gravel never compacts. Wood chips from unknown sources may contain debris. Invest in appropriate material for your climate and horse needs.
Cost Considerations and Budget Planning
Building a sacrifice paddock requires upfront investment but prevents far larger costs in pasture damage and renovation.
Material Costs
Base materials vary by region but expect roughly 2 to 4 dollars per square foot for a complete installation with fabric, gravel base, and surface footing. A 2000 square foot paddock costs approximately 4000 to 8000 dollars in materials, depending on local prices and layer depths.
Geotextile fabric runs 0.10 to 0.25 dollars per square foot. Gravel base costs 15 to 35 dollars per cubic yard delivered, with one yard covering about 80 square feet at 4 inches depth. Stone dust footing costs similarly to base gravel.
DIY vs Professional Installation
Handy property owners can build sacrifice paddocks themselves with rented equipment. Excavator rental, compactor, and labor add roughly 1000 to 2000 dollars to material costs. Professional installation costs more but ensures proper compaction and grading.
If DIY, rent appropriate equipment and take time with each step. Rushing leads to failures that require costly corrections.
Phased Construction
If budget is limited, consider building in phases. Install the fabric and base layer first, then add surface footing later. Or build a smaller paddock initially and expand when funds allow. A partially complete paddock still functions better than a mud pit.
Frequently Asked Questions
How to prepare a paddock for horses?
To prepare a paddock, start by selecting high ground with good drainage. Remove all vegetation and topsoil, excavate to 10-14 inches deep, create a 1-2% slope, install geotextile fabric, add 6-8 inches of compacted gravel base, then finish with 2-4 inches of suitable footing material like stone dust or coarse sand.
What is the minimum size for a horse paddock?
The minimum size for a single horse sacrifice paddock is approximately 30 by 30 feet or 900 square feet. For better welfare and movement, aim for at least 400 square feet per horse. Multiple horses need larger areas: two horses require at least 1500 square feet, while herds of three or more benefit from 500 square feet per horse.
Is 2.5 acres enough for 3 horses?
Yes, 2.5 acres can support 3 horses with proper management. The general guideline is 1 to 2 acres per horse for grazing, but rotational grazing and sacrifice paddocks allow smaller properties to work. With a sacrifice paddock for wet weather turnout, your pastures can rest and recover while horses have safe outdoor access.
How long should you rest a paddock?
Rest a pasture paddock for at least 3 to 4 weeks between grazing periods to allow grass regrowth and root recovery. In wet conditions, rest periods should extend longer. Use your sacrifice paddock during wet months so pastures can rest throughout the rainy season, typically November through March in many regions.
How to fix a wet muddy paddock?
To fix a wet muddy paddock, install drainage by creating a 1-2% slope away from the problem area. Remove saturated top layer, install geotextile fabric, add compacted gravel base, and top with stone dust footing. For severe cases, install French drains below the base layer to handle subsurface water from high water tables.
How to deal with muddy horse paddock areas?
Deal with muddy paddock areas by building a proper sacrifice area with layered construction. Start with excavation and slope creation, add geotextile fabric to separate soil from gravel base, install 6-8 inches of compacted crushed gravel, and finish with permeable footing material. Maintain the surface with regular manure removal and periodic footing refresh.
Conclusion
Building a sacrifice paddock for wet climates requires planning, proper materials, and careful construction. The eight-step process, from site selection through finishing touches, creates a functional all-weather turnout area that protects your pastures and provides safe horse access during challenging conditions.
The key elements for success in wet regions include choosing high ground, creating proper slope, installing geotextile fabric, using adequate gravel base depth, and selecting appropriate surface footing. Regular maintenance extends the life of your investment and prevents problems before they require expensive corrections.
Your sacrifice paddock becomes the foundation of a rotational grazing system that maintains healthy pastures year after year. During wet seasons, horses have safe turnout while grass recovers. The initial investment pays for itself through reduced pasture renovation costs, improved horse health, and peace of mind knowing your property handles weather challenges effectively.
Start with accurate site assessment, follow the construction steps without shortcuts, and maintain your paddock through regular attention. In return, you gain a functional, all-weather turnout solution that serves your horses and protects your land for years to come.