
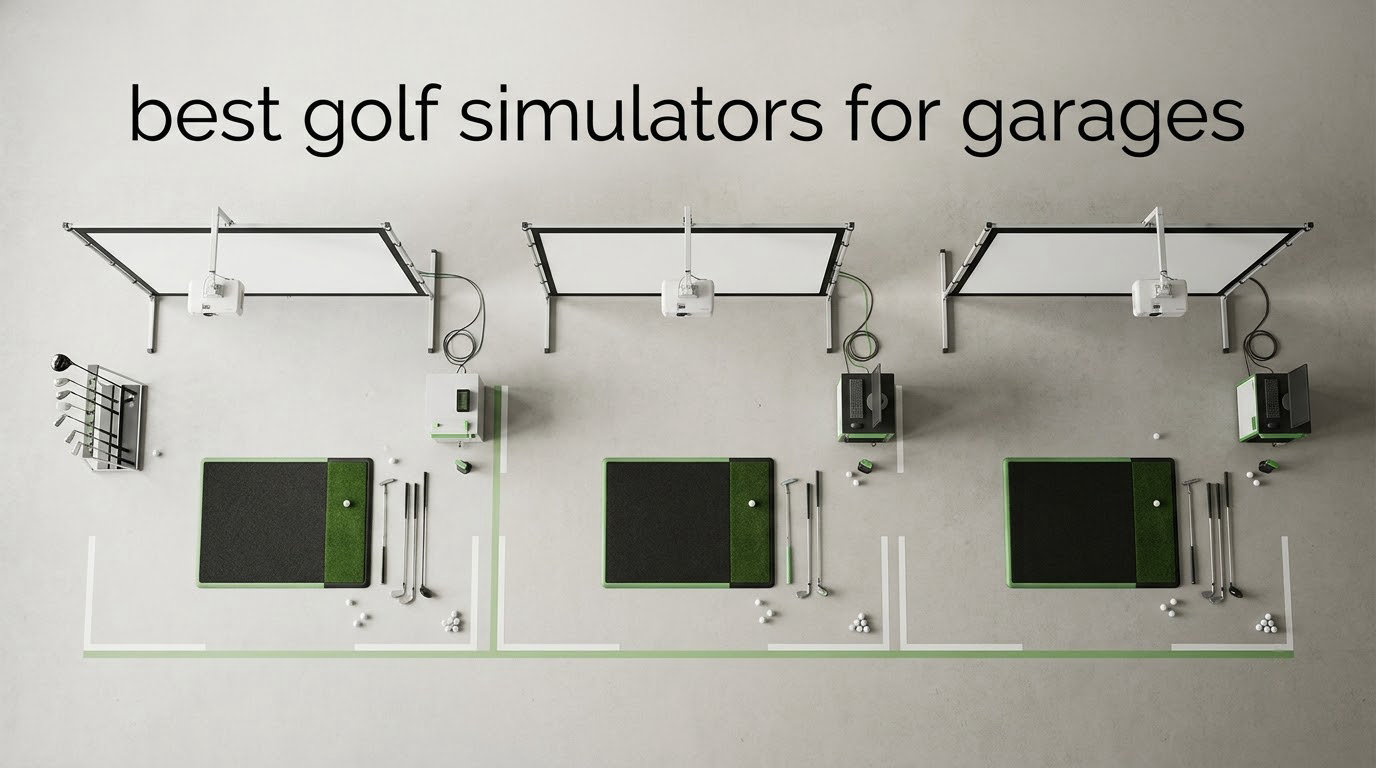
A golf simulator for garage use is a different shopping problem than a simulator in a spare room, and that difference explains why so many builds go wrong. The garage is the most popular home golf location in the country, and it is also the most unforgiving one: low joists, a concrete slab, door tracks hanging at head height, and a bay that may double as the parking spot for the family car.
That is the filter we used for this roundup of the best golf simulators for garages. Instead of ranking by price alone, we ranked by what each system needs to work in a real residential bay. Does it need eight feet of empty space behind the ball? Does the hardware live at floor level where a mishit can break it? Does the enclosure swallow the car bay, or does it fold away? These questions turned a list of launch monitors and nets into twelve genuinely different answers.
Over six weeks we worked through the list in a working garage with a 9 foot ceiling, comparing what each one actually gives you after setup time, calibration and the monthly software bill. Some of the results surprised us. The most expensive hardware in this roundup is not the one that produces the cleanest data indoors, and the cheapest setup here is not the one we would put in a two-car bay. We will explain why in each section.
One note before we start: everything here links to current listings through the buttons under each pick, and we earn a commission when you buy through them, at no extra cost to you. We paid for every piece of this ourselves.
Table of Contents
Top 3 Best Golf Simulators For Garages (October 2026)
These three cover the widest range of garage situations, from a bay you use ten minutes at a time to a full swing data machine. If you only read one section, read the one that matches your bay.

All 12 Garage Golf Simulators at a Glance
Everything in the roundup, in the order we recommend it. The technology type matters more than most buyers expect, because sensor type decides how much room you need behind the ball.
| Product | Specifications | Action |
|---|---|---|
| PHIGOLF Home Golf Simulator PG2 Flex |
|
Check Latest Price |
 Garmin Approach R10 Garmin Approach R10 |
|
Check Latest Price |
 Rapsodo MLM2PRO Rapsodo MLM2PRO |
|
Check Latest Price |
 GoSports Range Cage 10 x 8 ft GoSports Range Cage 10 x 8 ft |
|
Check Latest Price |
 Haokelball 10x8x6 ft Golf Simulator Cage Haokelball 10x8x6 ft Golf Simulator Cage |
|
Check Latest Price |
 GoSports Golf Simulator Enclosure Kit GoSports Golf Simulator Enclosure Kit |
|
Check Latest Price |
 ANYTHING SPORTS Complete Enclosure Package ANYTHING SPORTS Complete Enclosure Package |
|
Check Latest Price |
 HOMEVOL 2 in 1 Net and Impact Screen System HOMEVOL 2 in 1 Net and Impact Screen System |
|
Check Latest Price |
 Durbles Enclosure Kit with Blackout Curtain Durbles Enclosure Kit with Blackout Curtain |
|
Check Latest Price |
 Garmin Approach R50 Garmin Approach R50 |
|
Check Latest Price |
 Uneekor EYE MINI CORE Uneekor EYE MINI CORE |
|
Check Latest Price |
 FlightScope Mevo Gen2 FlightScope Mevo Gen2 |
|
Check Latest Price |
How Big of a Garage Do You Need for a Golf Simulator?
Plan on a minimum of 10 feet wide by 10 feet deep with at least 8.5 feet of ceiling clearance for a net setup, and 12 feet wide by 15 feet deep with a 9 foot or higher ceiling if you want a projected impact screen and full ball flight. A standard two-car bay gives you all of that. A single-car bay only clears the first set of numbers, so the sensor type you pick has to change with it.
The ceiling number is not negotiable for a driver. A full swing at normal height puts the club somewhere between 8 and 9.5 feet off the floor, and a garage with exposed joists often measures shorter than the floor to the joist rather than floor to the ceiling. Measure in three places along the bay before you buy anything.
Why depth matters more than most guides admit?
Radar monitors read the ball as it flies past them, so they need open space downrange. The commonly cited rule of thumb is at least 8 feet behind the ball before a wall, which is why a 10 foot deep single bay is a tight fit for anything that measures ball flight in flight.
Camera and sensor systems care about the opposite thing. They watch impact, so they need mounting clearance above or beside the ball and a clean line of sight, not empty floor. That makes them the smarter choice in a short bay, and it is the single most useful thing to understand before you shop.
What to check before you commit to a bay?
Ceiling height at the lowest point, including joists, ducting and the garage door opener rail
Depth from the garage door to the back wall with nothing stored in that space
Width between finished walls, not between the studs behind them
Where the outlets are, and how far they sit back from where the screen will hang
Door track swing, which owners cite as a common reason a build gets moved
We also plan the room like a workbench bay. A bench or shelving along one wall is cheap compared with a sim you have to walk around, and we wrote about the bench side of garage fit-out in our stainless steel workbench roundup.
1. PHIGOLF Home Golf Simulator PG2 Flex – Best Overall for a Garage
PHIGOLF Home Golf Simulator, Motion Sensor & 3D Analysis for Practice & Fun
Aluminum body
3 x 5 x 25 inches
0.59 kg
1 year warranty
Pros
- Works with Android and iOS devices
- 9-axis sensor tracks the swing
- 38000+ virtual courses with E6 Connect support
- AI swing coach with pose tracking
- No ball flight tracking so no depth behind the tee required
Cons
- Needs a compatible phone and the Phigolf app
- Simulated play rather than real ball tracking
- Less realistic than a radar unit on full swings
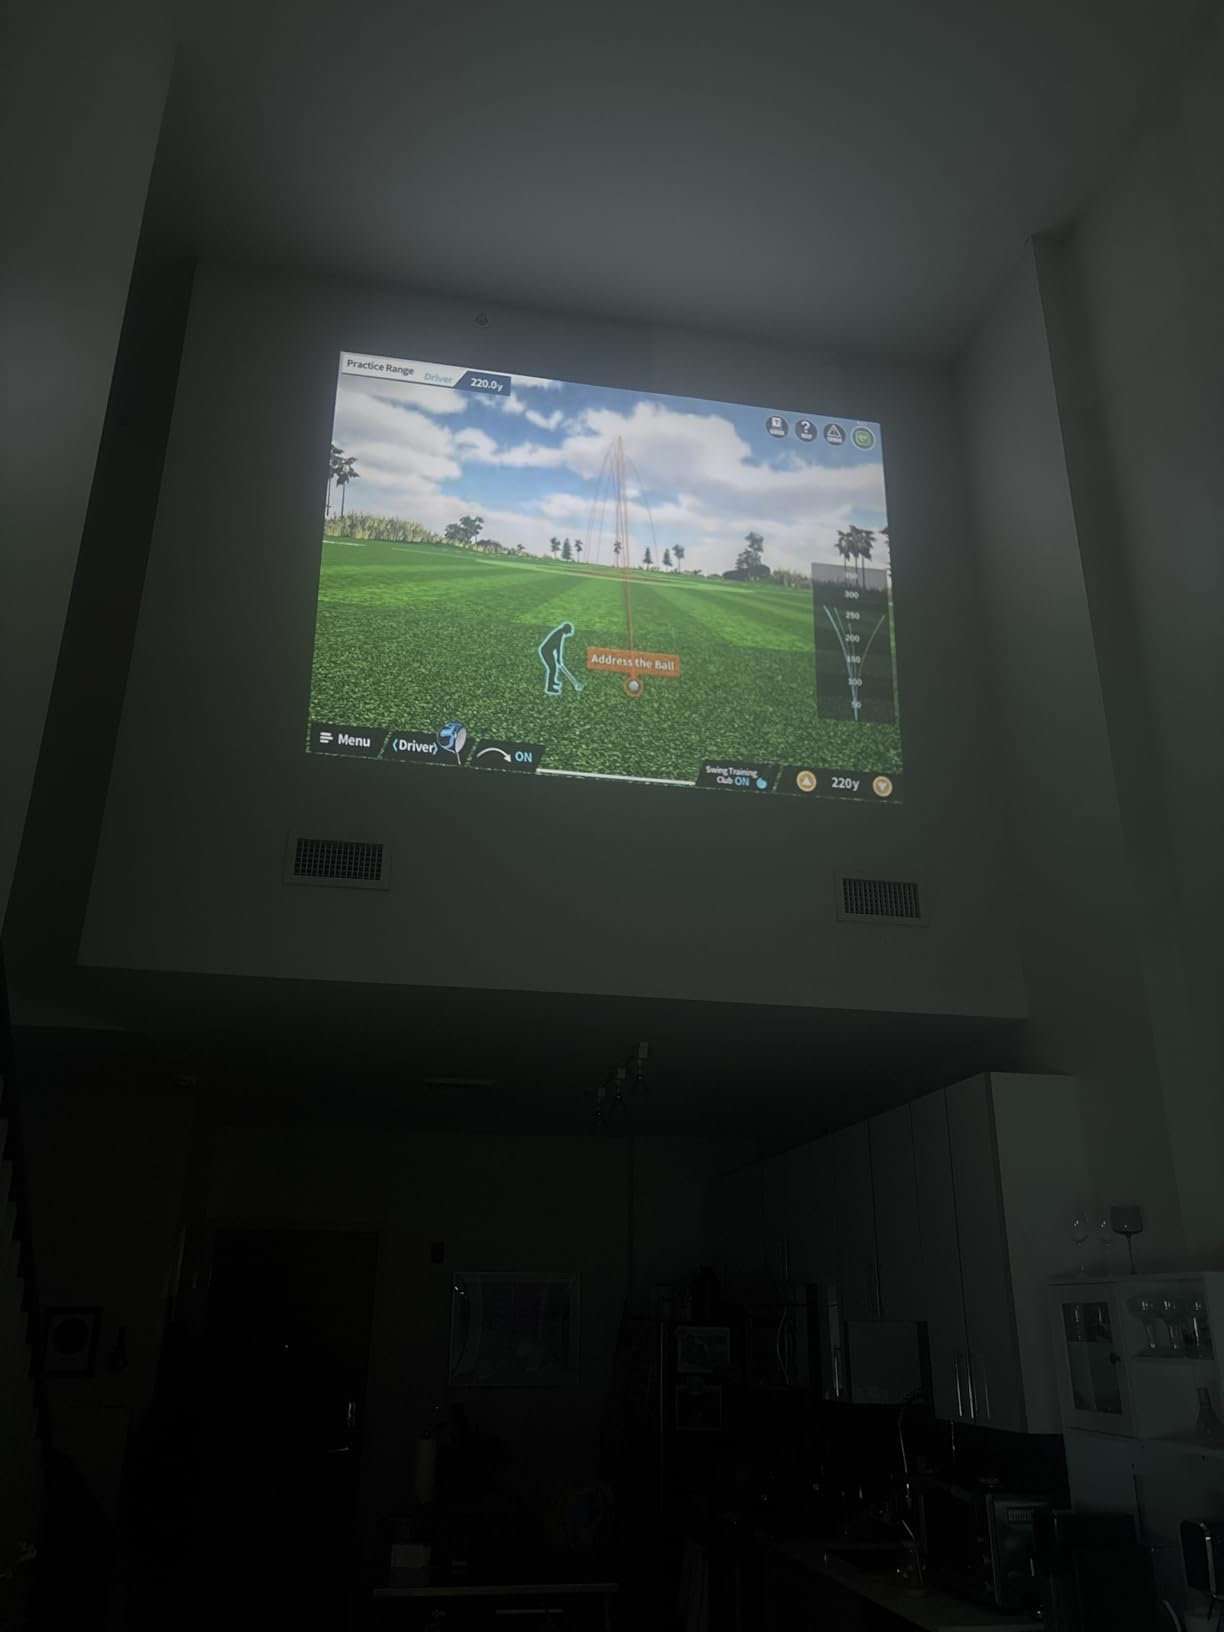
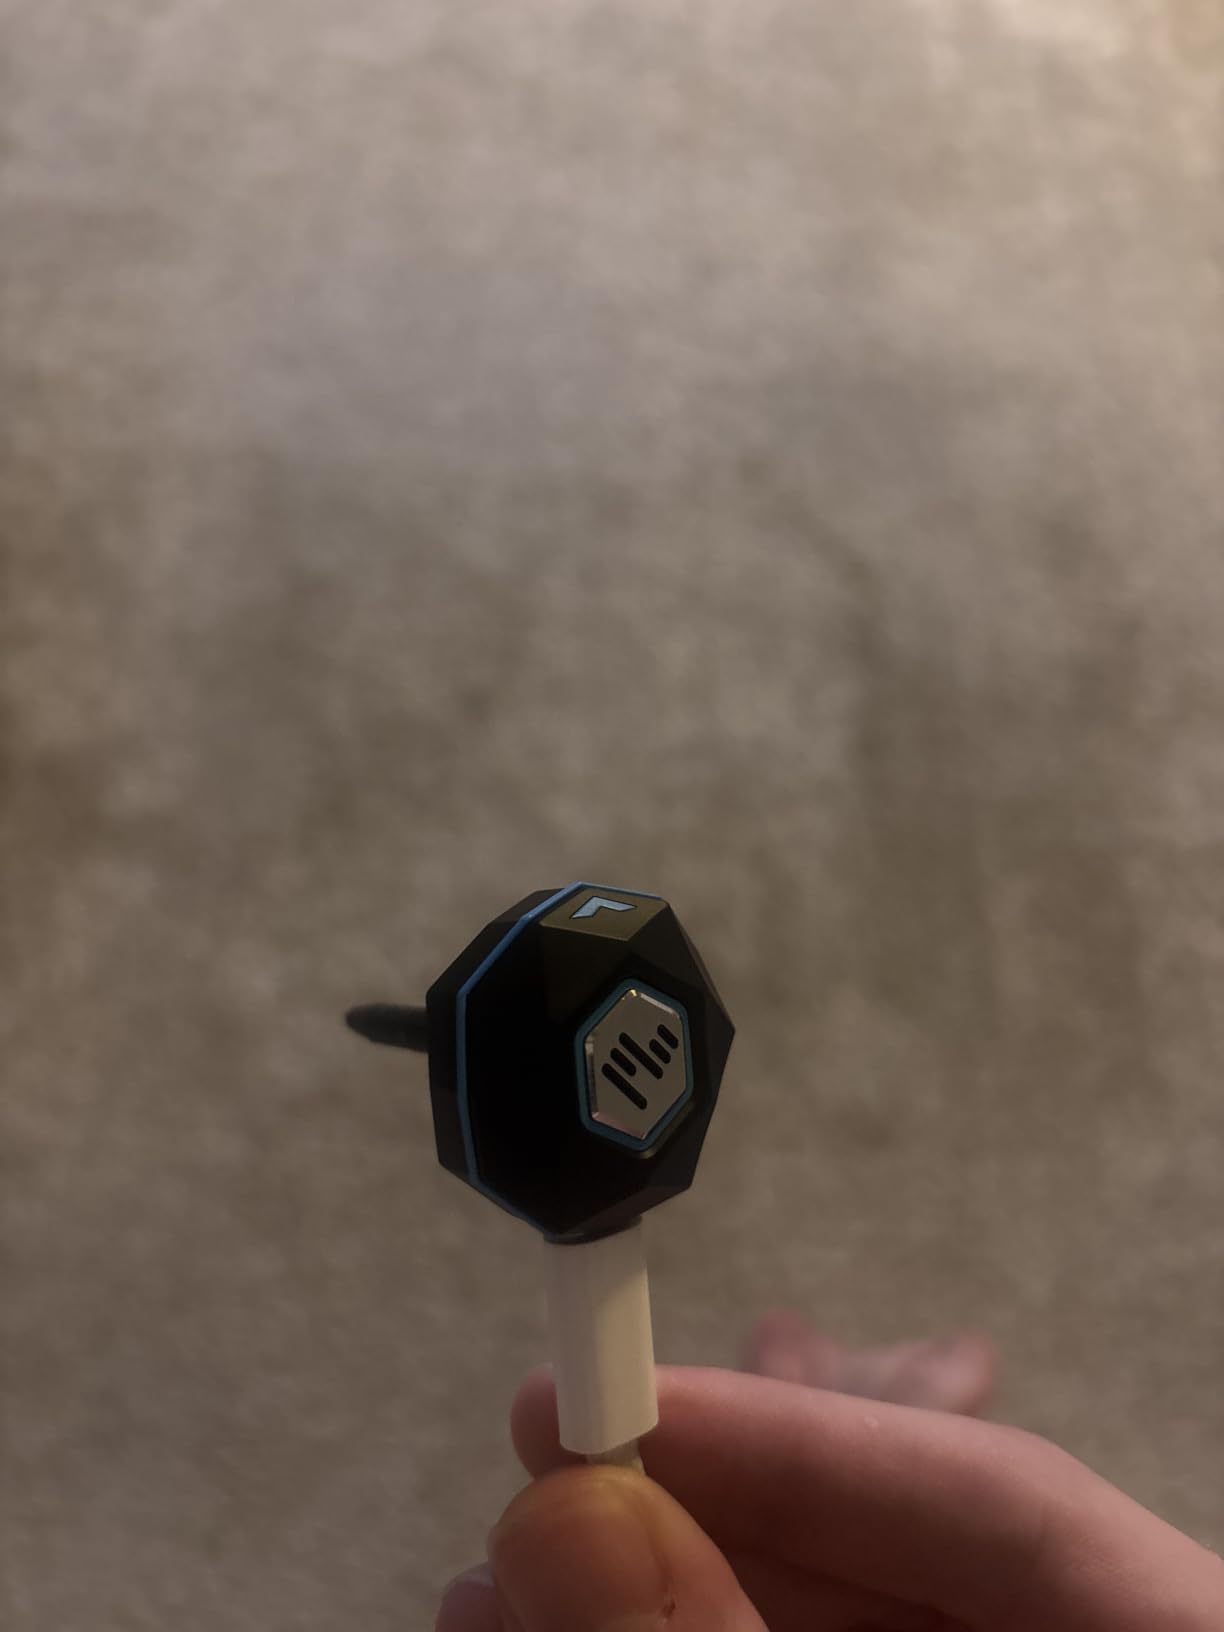
The PG2 Flex is the system we keep coming back to for people whose garage is more of a five-minute-a-day habit than a full practice session. It is a 9-axis motion sensor that clips onto a swing stick or a real club, and it feeds your movement into a phone or tablet app. There is no ball, no net, and no projection required.
That sounds like a compromise, and in some ways it is. You are not getting club path, spin rate or face angle, because there is no ball to measure. What you are getting is a reason to swing, a swing speed figure, and an AI coach that flags body positions in each phase of the swing.
It is also the most forgiving thing in this roundup in a garage. There is no 8 foot radar window to clear, no screen to hang from the ceiling, and nothing at floor level for a mishit to destroy. A 10 foot deep single-car bay is genuinely usable with this. The sensor is 0.59 kg and stands in a corner when you are done.
Our one reservation is honesty about what it measures. Callers who come from a real launch monitor find the visual game engaging but the data thin. For a beginner building a habit, that trade is worth it. For a single-digit handicapper trying to change a delivery, it will not get you there.
Why it wins for most garages?
It is the least destructive install in the roundup. No joist drilling, no concrete anchors, no cable runs across the bay, and the whole thing fits on a shelf the size of a golf bag. If you rent, or you are not sure the car will fit, or you simply want to start without a construction project, this removes every objection.
Where it falls short?
There is no shared screen, so practice alone is the default. If your goal is course play with company, spend up on a projected enclosure instead. Every session also needs your phone, which is fine at a hitting mat but limiting if you want the data on a screen across the bay.
2. Garmin Approach R10 – Best Value Launch Monitor for a Garage
Garmin Approach R10, Portable Golf Launch Monitor, Take Your Game Home, Indoors or to The Driving Range, Up to 10 Hours Battery Life – 010-02356-00
340 g
1 inch by 5.22 inch by 2.8 inch
10 hour battery
IPX7 waterproof
Pros
- Ball speed accurate to plus or minus 1 mph
- Launch angle and direction accurate to plus or minus 1 degree
- Up to 10 hours of battery
- IPX7 waterproof so it works at the range too
- Phone mount included
Cons
- Requires a compatible smartphone and the Garmin Golf app
- Simulated course play needs an active subscription
- Reads the ball in flight so club data is limited
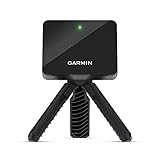
The R10 has been the default recommendation in garage builds for years, and after six weeks in a 9 foot bay we still think it earns the place. It is a small Doppler radar unit, 340 g, that sits on the floor a few feet in front of you and fires at a phone on a tripod or clamp.
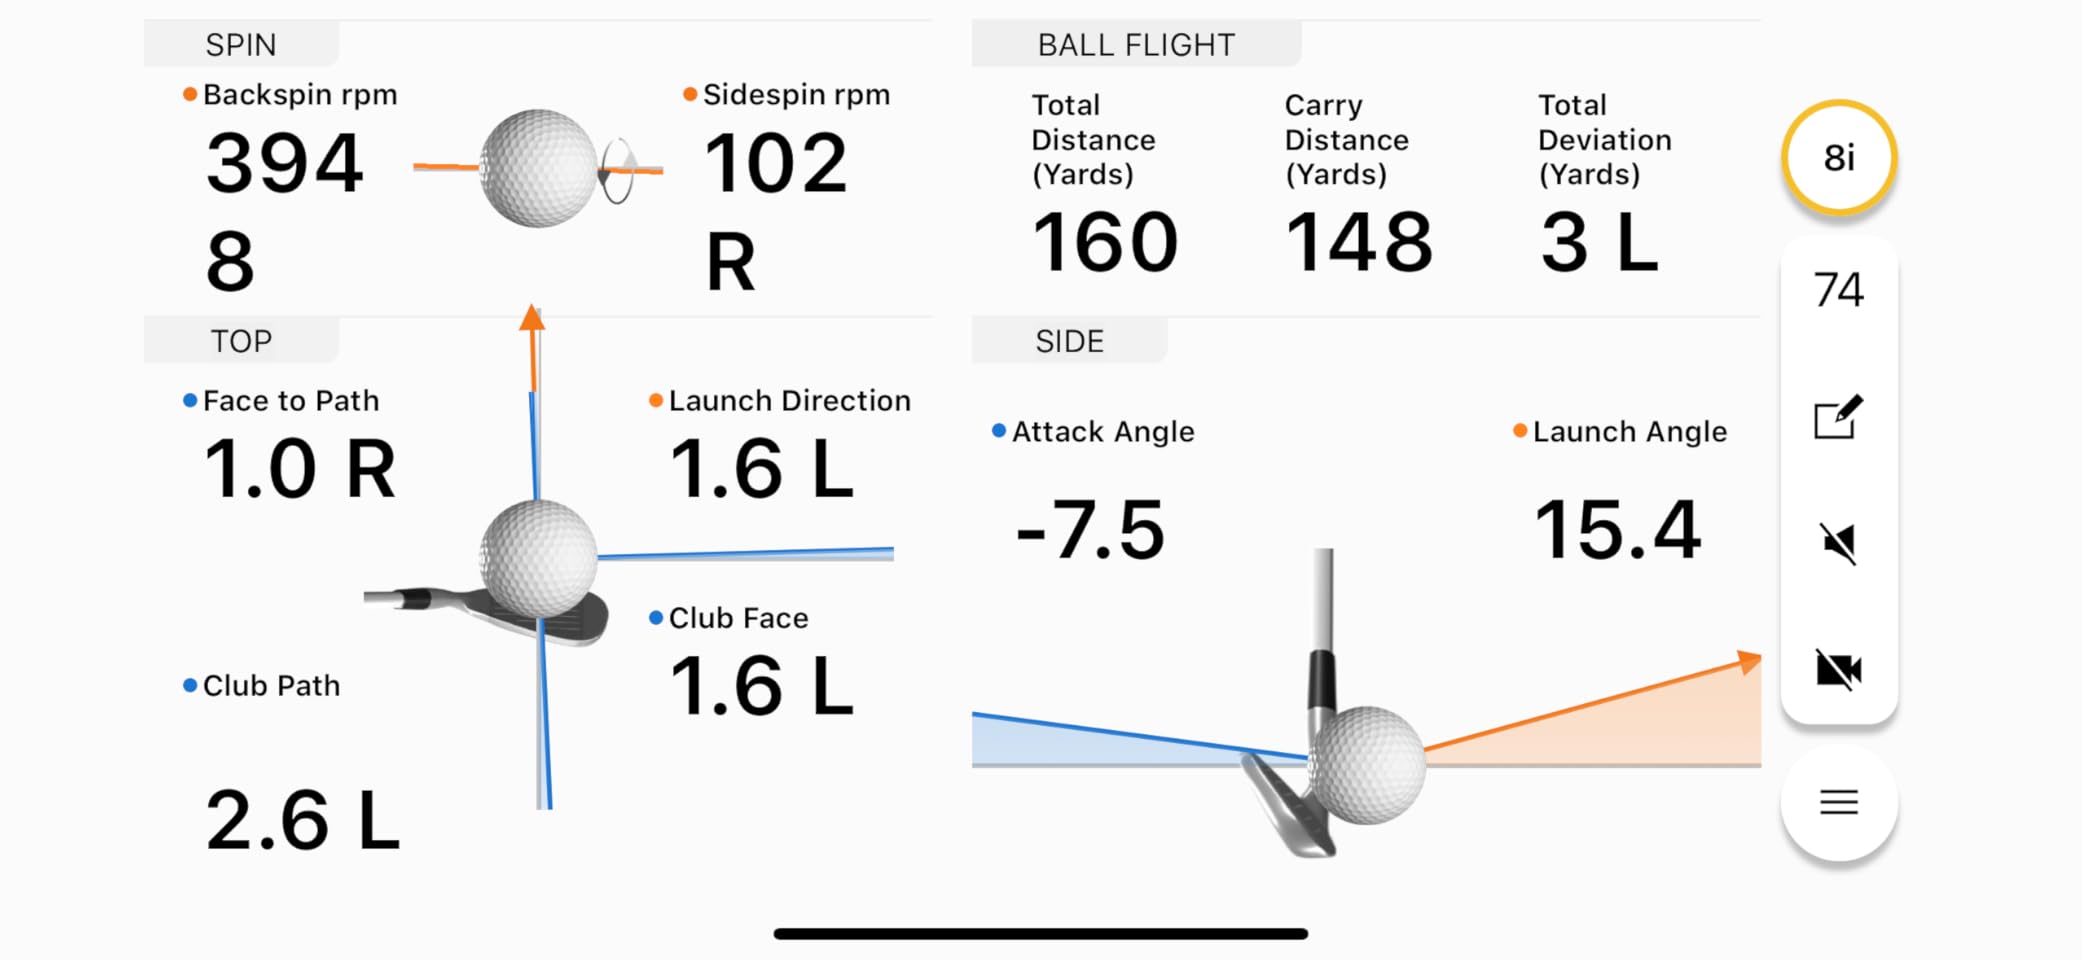
The published accuracy figures are the reason. Ball speed within 1 mph, launch angle within 1 degree, launch direction within 1 degree, and club head speed within 3 mph. In practice that is enough to see a genuine change in attack angle after a session, which is most of what a range would tell you.
Garmin also bundles the awkward parts. The phone mount, the tripod and the carry case are in the box, and the IPX7 rating means the same unit lives in the garage in February and on the range in July. For people who split practice between home and a course, that dual use is genuinely useful rather than a marketing line.
Training mode tracks per-club stats and shows a shot dispersion chart built on an estimated ball flight model, and it records a short video clip with the metrics attached. The auto-trimmed clips are the part reviewers like most, because they cut the review work down to a few minutes.
Why it fits the average garage bay?
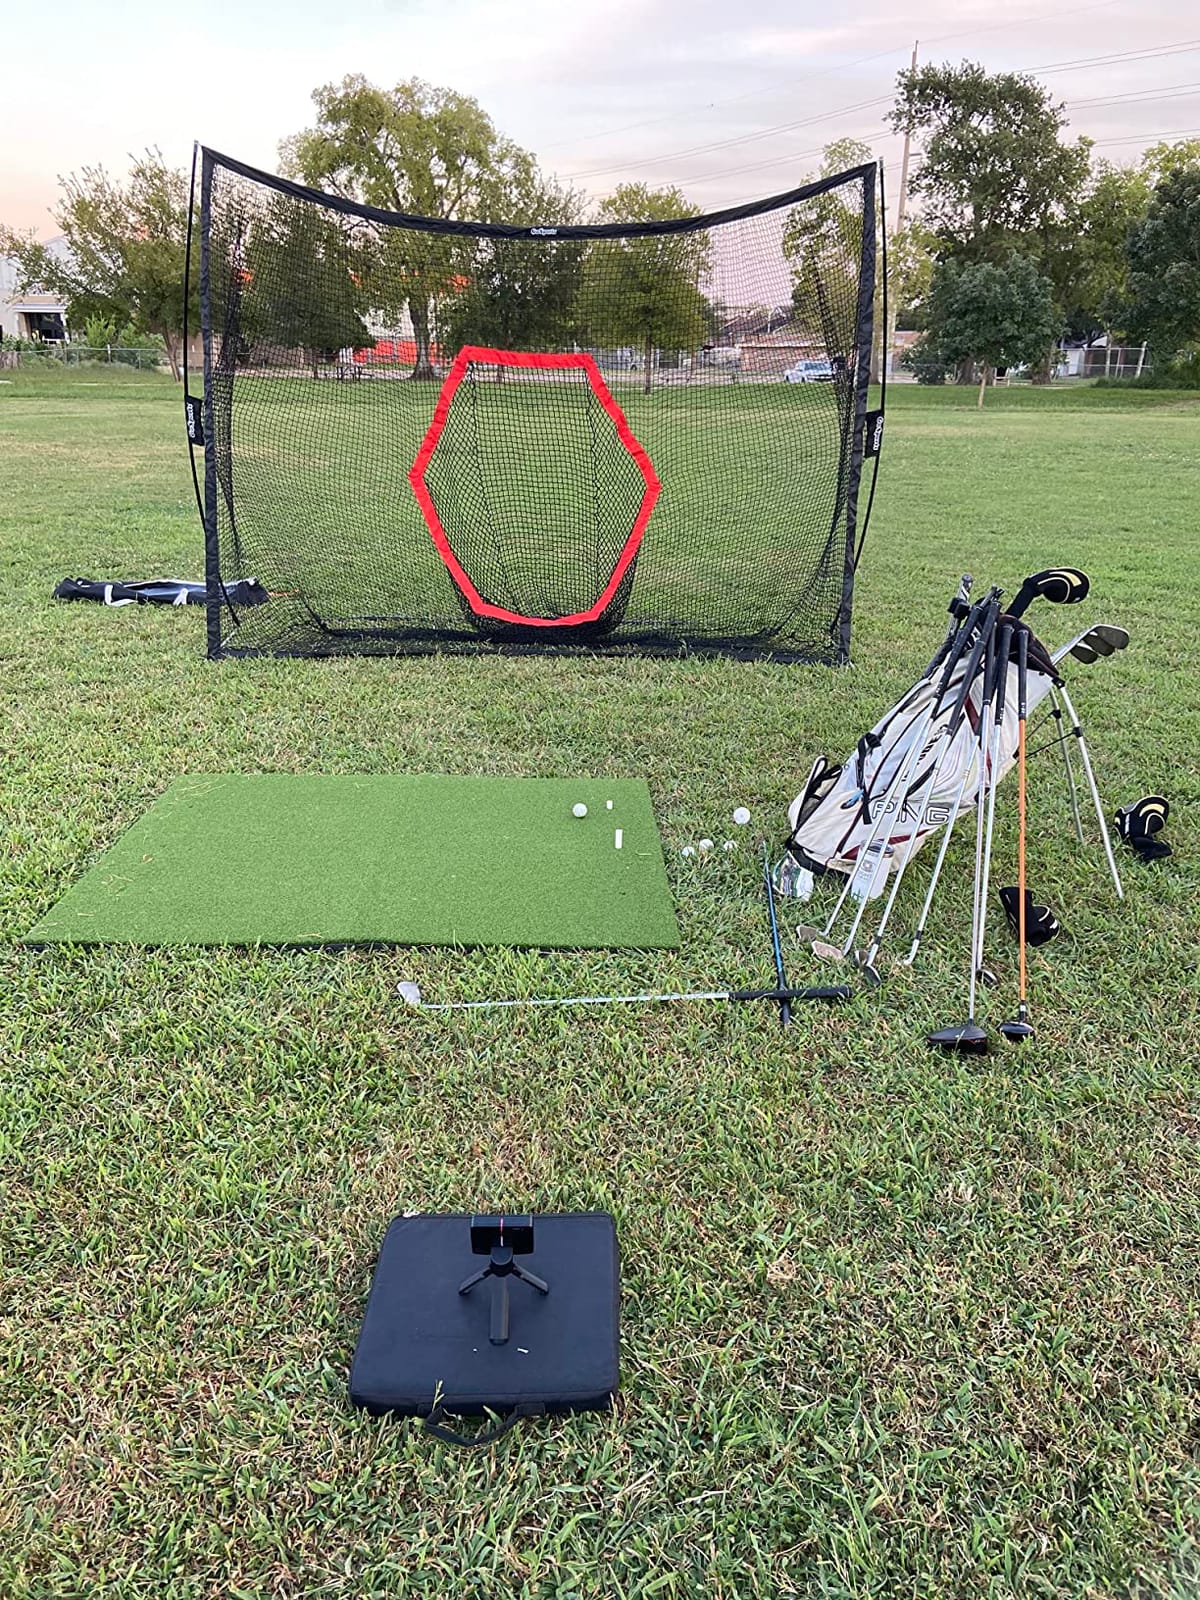
It is small enough to store in a corner and cheap enough to lose in a move, which matters when the bay has to double as a parking space. Set it up, hit thirty balls, break it down, drive the car in. Owners report exactly this rhythm working.
Consistency matters more than range when you are practicing in a bay. Most owners set the tripod on the same spot every session so week-to-week numbers stay comparable, and the R10 rewards that habit because the metric set is broad enough to show slow drift before it becomes a real fault.
What to plan around?
Radar needs downrange depth, and the R10 is a radar unit. In a 10 foot deep bay you are near the practical limit, and in anything shallower you will be reading into walls. Give it the deepest part of the bay and keep the back 8 feet clear.
The other catch is the subscription. Virtual rounds on 42,000+ courses need an active Garmin Golf membership, and the data and video work without one. Judge it as a practice tool first and a course-play tool second.
3. Rapsodo MLM2PRO – Most Versatile for Full Swing Data
Rapsodo MLM2PRO Mobile Launch Monitor Golf Simulator | 3 Chrome Tour Balls
16 ounces
3 inch LCD screen
Bluetooth and Wi-Fi
1 year warranty
Pros
- Doppler radar plus dual cameras
- 15 metrics including club path and spin axis
- Dual camera slow-motion impact view
- Three Callaway RPT Chrome Soft X balls included
- 45 day premium trial included
Cons
- Chipping and short putts read unreliably
- Wi-Fi pairing can be unstable
- Full features need a paid membership after the trial
The MLM2PRO is the one we recommend when someone wants club level data without stepping up a tier. Radar handles the ball data and a pair of cameras capture the club and the impact moment, which is why it reports club path and spin axis at all. That combination usually costs considerably more.
Fifteen metrics come out of it, including spin rate, spin axis, carry distance, club speed, club path and launch angle. In our sessions the club path figure tracked what our own eye was seeing closely enough to be worth trusting, and the slow-motion impact view is a genuinely good teaching tool for strike face contact.
It weighs 16 ounces, has a 3 inch touchscreen, and the box includes a tripod, a carrying case and three Chrome Soft X balls. For a garage build, the included balls matter more than they sound, because marked balls wear out and having spares avoids a session that ends early.
Why it beats its tier indoors?
Dual cameras are far less sensitive to lighting and background than a single camera, which is exactly the indoor problem. A garage with a work lamp on and daylight leaking around the door is the environment that flattens cheaper camera units, and this one holds up.
It also runs on battery, so it does not force a permanent install. The 45 day premium trial covers simulated courses, so you can test the whole experience before deciding whether the membership is worth it.
What to plan around?
Short game is the weak spot. Chipping and delicate putts read unreliably, so treat it as a full swing machine and put your short game work on a putting mat. The membership also arrives on day 46, and the simulated courses share a repetitive background that some reviewers find tiring over a long round.
On connectivity, if pairing is flaky on shared Wi-Fi, connecting directly to the unit is the workaround experienced owners use. Budget for that when you set up the bay.
4. GoSports Range Cage 10 x 8 ft – Best for Small Garages
GoSports Range Cage 10 ft x 8 ft Golf Practice Hitting Net with Impact Screen
10 ft x 8 ft footprint
40 pounds
Fiberglass and polyester
Steel frame with fiberglass poles
Pros
- Side and top netting contain drivers and irons
- High-density impact screen works as a projector backdrop
- Foam-padded base reduces rebound
- Assembles in minutes without tools
- Packs into the included carry bag
Cons
- Bottom edge of the screen can let balls ricochet
- Screen tears and shows divots with real balls over time
- Seams and lower frame parts can loosen
This is the net we suggest when the bay is genuinely small. At 10 by 8 feet it fits inside a single-car bay with a mat in front of it, and it assembles without tools in a few minutes. That last detail is what makes it a parking-bay-friendly choice rather than a permanent room.
The impact screen is high-density polyester and doubles as a projector backdrop, so owners regularly pair it with a Garmin or Rapsodo unit and a short-throw projector to get a full projected setup without a heavy enclosure. The foam-padded base helps on both noise and ball rebound.
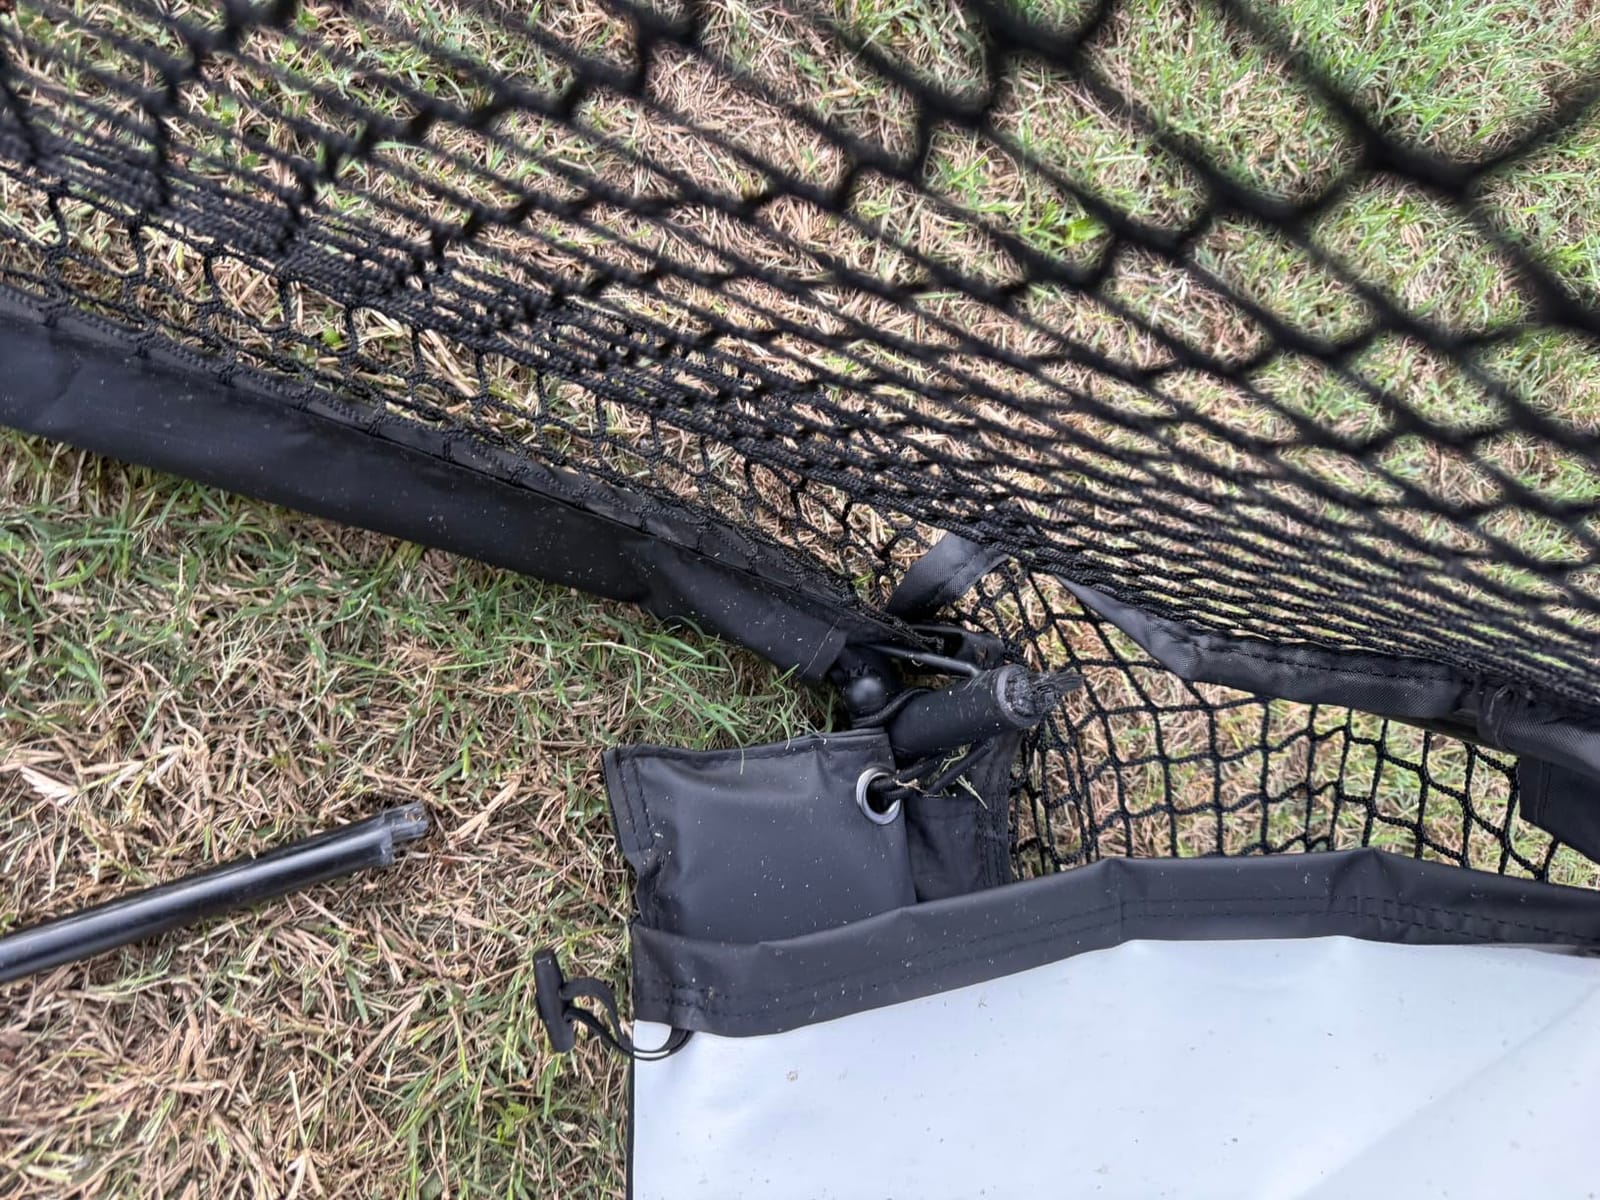
At 40 pounds it is a two-person lift, but it breaks down into a carry bag, which is the point. Ours came out of the bag, took shape in a single-car bay, and was back in the bag before the car needed the space.
The 4.1 rating from 329 reviews reflects a real trade. Owners treat it as an entry-level garage setup and praise containment and value, then flag the lower screen area as the part that ages first. A few add their own foam as a safeguard.
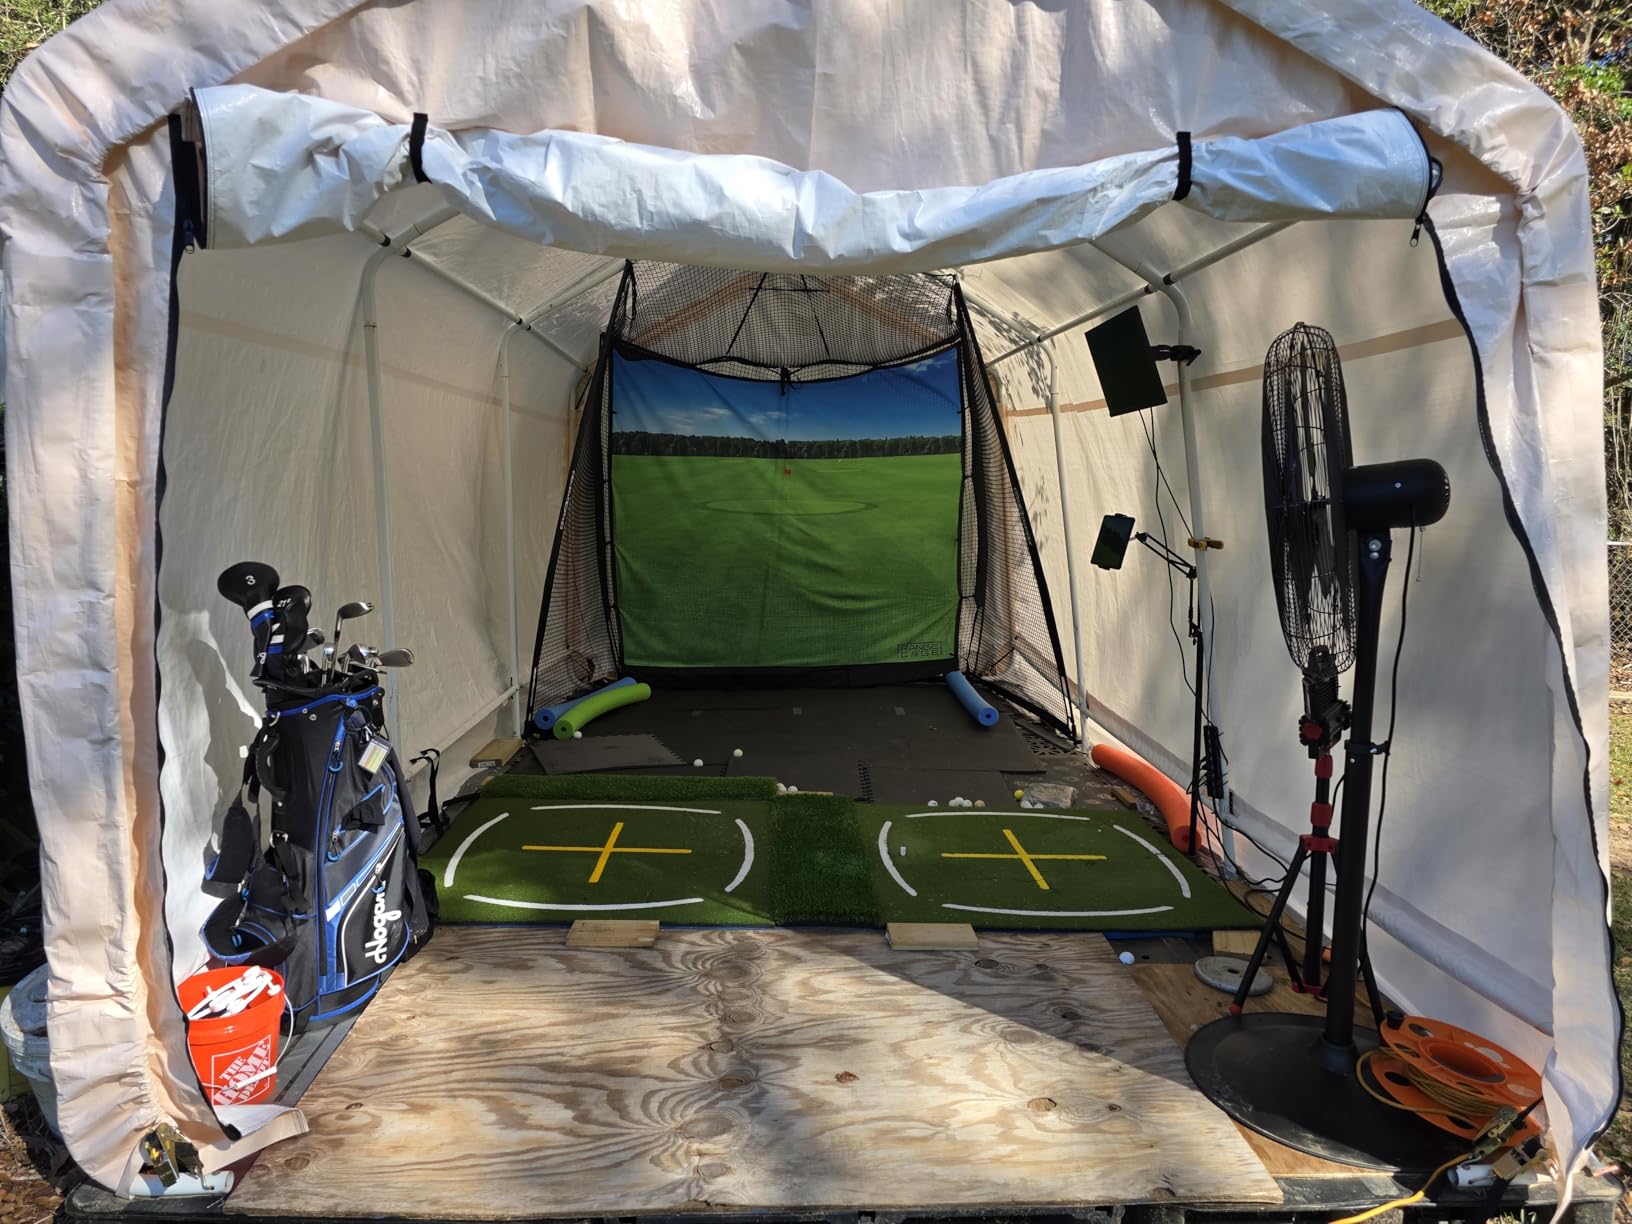
Why it suits a single-car bay?
Portability is the feature. Everything else about it is a normal net, but the ability to clear the bay in minutes changes whether the car gets parked indoors on a wet evening. Owners on tight budgets tend to keep this one up permanently and move the car instead.
It is also forgiving about placement, since it does not need to be anchored into concrete to work. Rental situations and leased bays are usually disqualified by drilling, not by this.
What to plan around?
The bottom edge of the impact screen can sit slightly proud of the ball stop, so a low strike can come back toward you. Put a rubber mat or turf strip in front of that edge and the problem mostly disappears.
With real golf balls rather than foam, expect divots and tears in the lower screen over months of use. Budget for a replacement screen as maintenance, not as a surprise.
5. Haokelball 10x8x6 ft Golf Simulator Cage – Best for Ball Containment
Haokelball Golf Simulator Cage, 10x8x6FT Net with Impact Screen for Home
10 x 8 x 6 ft enclosure
Alloy steel
5-ply netting
1 year warranty
Pros
- Full side netting and overhead coverage catch slices and shanks
- Anti-sag top rod keeps the projection surface flat
- Square base is more stable than two-pole designs
- Works with most projectors and launch monitors
- Room for drivers
- irons
- wedges and chips
Cons
- Ball capture after impact is not fully reliable on short irons
- Frame width may need trimming for a tight space
- Some units arrive with a bent assembly pipe
Containment is the reason to pick this cage, and in a garage with a car, a bicycle or a workbench within range, containment is not a minor feature. Side netting, overhead coverage and a 10 by 8 by 6 foot enclosure give you somewhere for a mishit to go that is not your car door.
The reinforced top support rod with multiple tension points is the detail we like most. A sagging top edge is the classic reason projected pictures look bad in a garage, and a rod that pulls the surface flat is worth more than the extra netting on most budget cages.
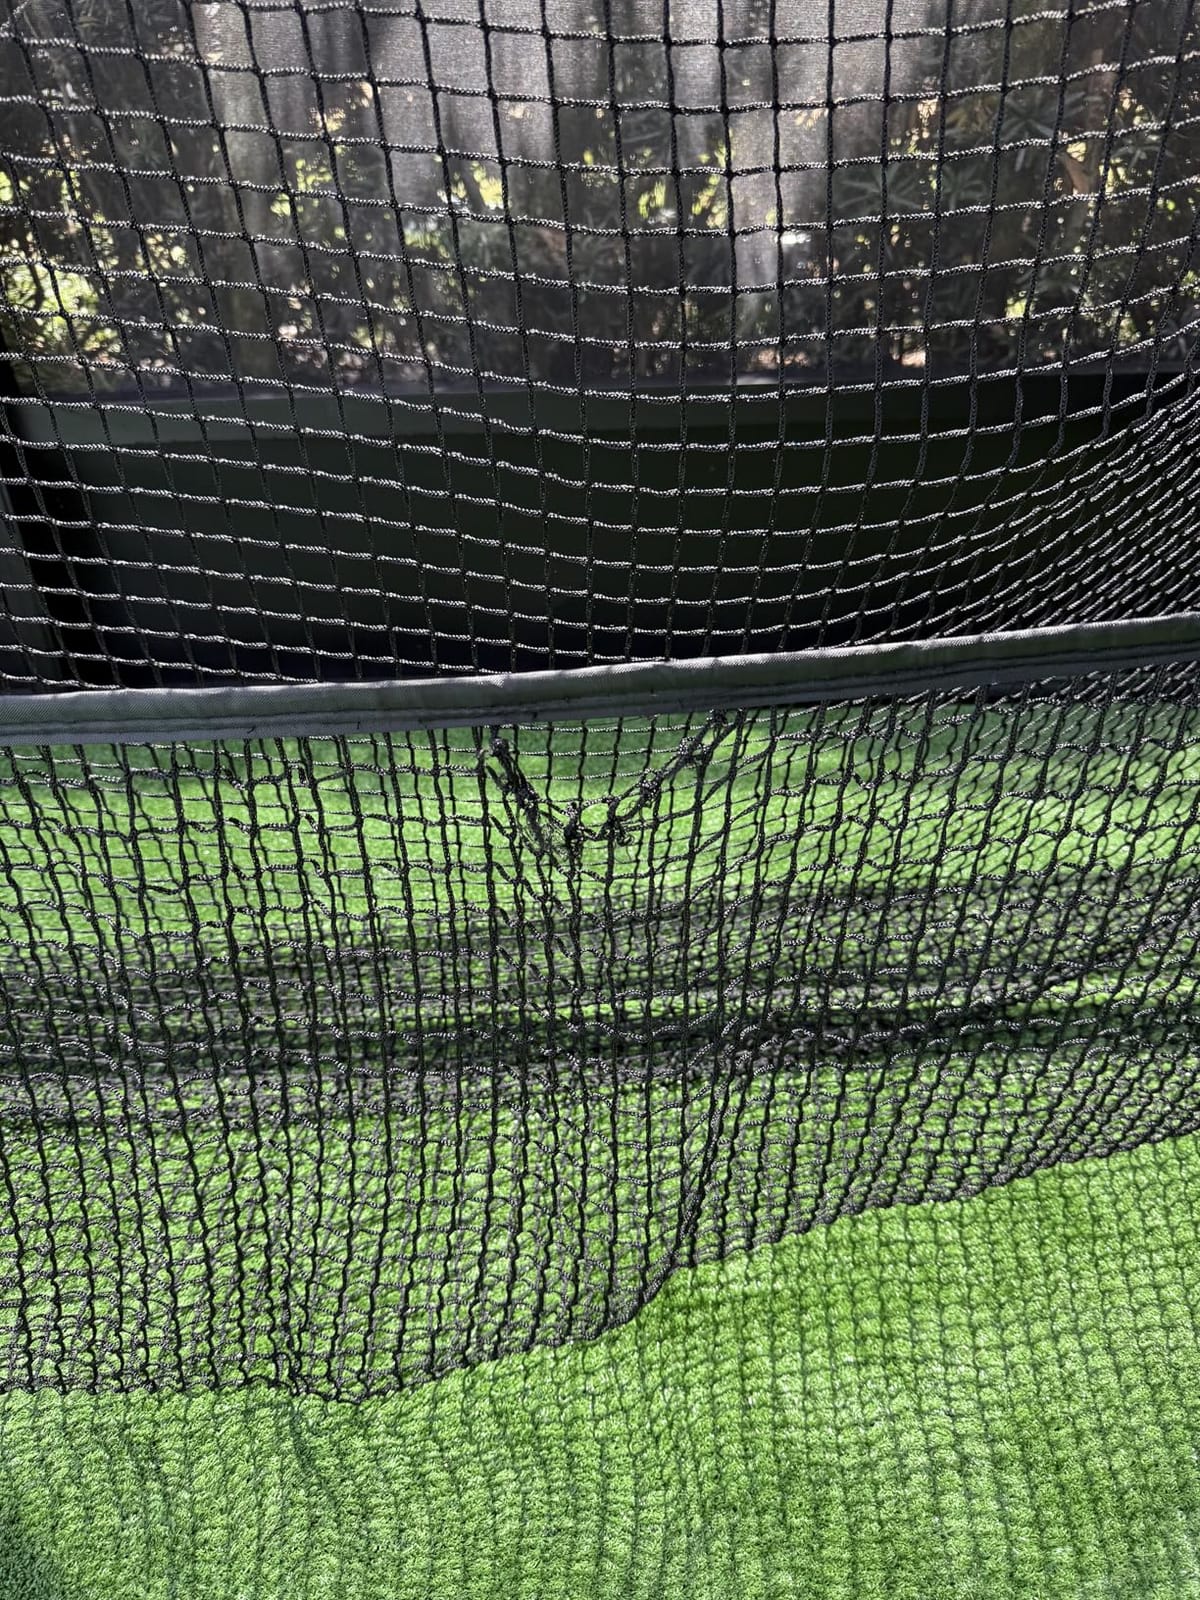
The 4.6 rating comes from 129 reviews, which is a small base, but the distribution is unusually clean. Owners describe replacing cheaper two-pole nets and being glad they did, with the square base doing most of the talking for stability.
It works with most projectors and launch monitors, though the projector, launch monitor, software and hitting mat are all sold separately. Treat this as the room, and budget the rest of the build around it.
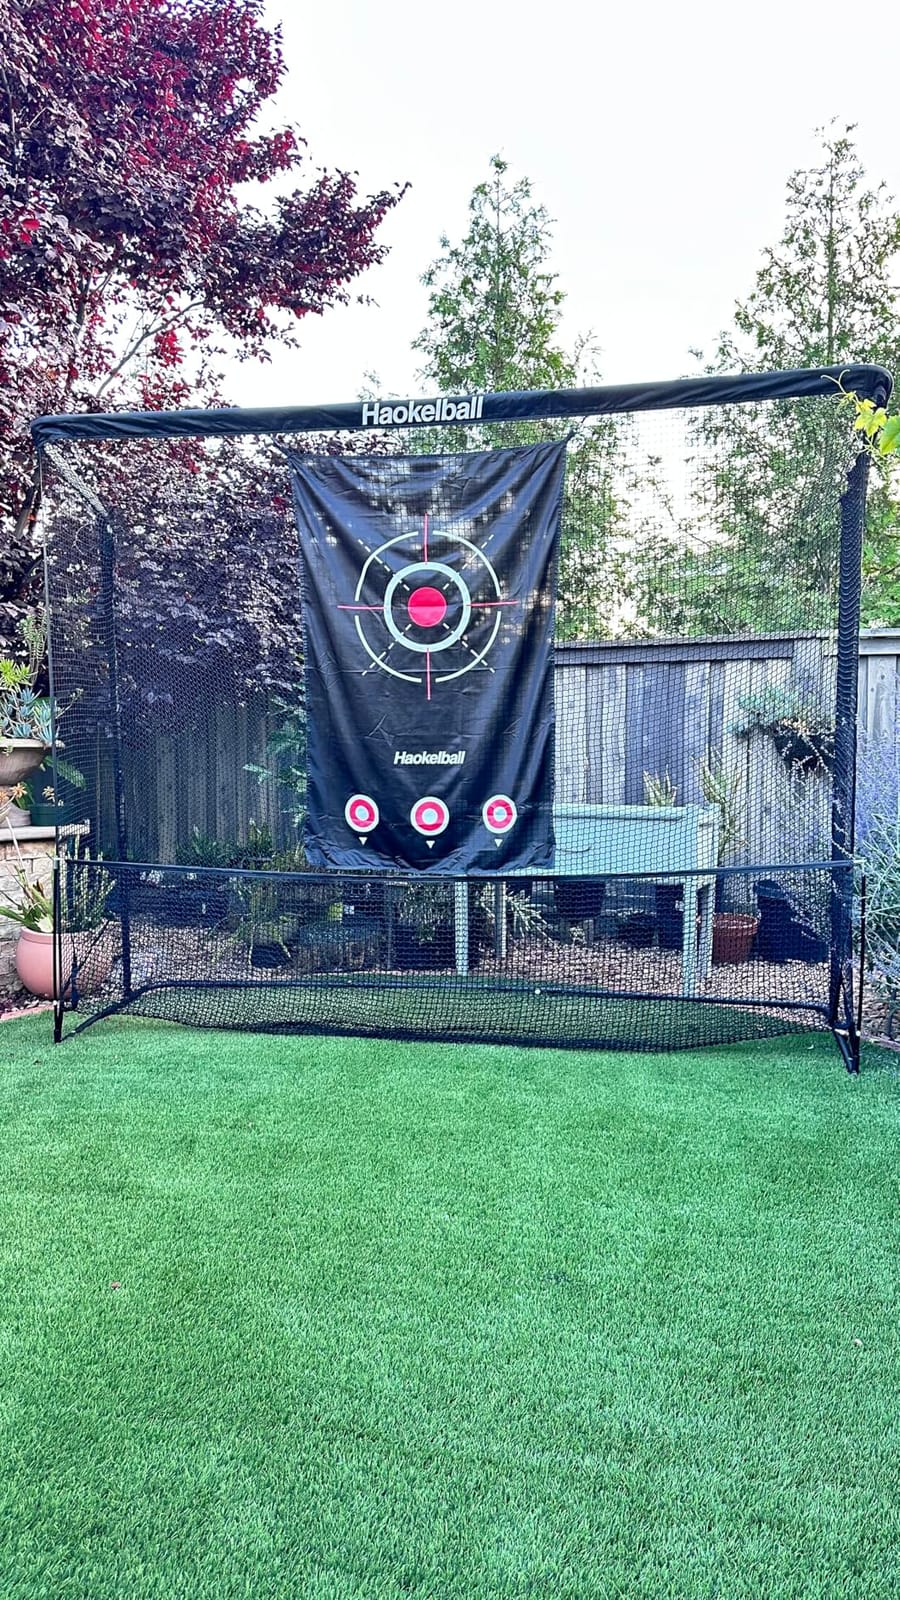
Why it is safer in a working garage?
Overhead coverage is the difference between a net and a cage. Wedges and high shots that clear a plain net end up on the garage door, the ceiling, or the side wall, and in a bay you also use for storage that is a recurring annoyance.
The square base also resists the twisting that makes a two-pole frame walk across concrete during a session, and the top rod keeps the projected picture flat.
What to plan around?
Ball capture is not perfect on short iron shots, which are the shots that stay low and fast. If you work on chipping and short irons, add a putting mat and a turf strip in front of the impact area.
Measure your bay before ordering. Owners in rooms under 10 feet report having to trim the frame width, and a bent assembly pipe is a known issue worth checking for the moment the box opens.
6. GoSports Golf Simulator Enclosure Kit – Best for Projector Brightness
GoSports 10 x 8 ft Golf Simulator Enclosure Net – Complete Set with Frame and HD Impact Screen Kit
10 x 8 ft with 12 x 9 and 14 x 8 options
79 pounds
Alloy steel and polyester
Multi-layer impact screen
Pros
- Multi-layer impact screen survives thousands of impacts
- True blackout dyed panels block outside light for a brighter picture
- Numbered poles allow about an hour of solo assembly
- Foam padding reduces rebound
- Three size options for larger bays
Cons
- Frame padding is thin so balls can still fire back
- No hanging baffles so wedge shots wear the top eyelets
- Assembly is a two-person job and the fabric needs retightening
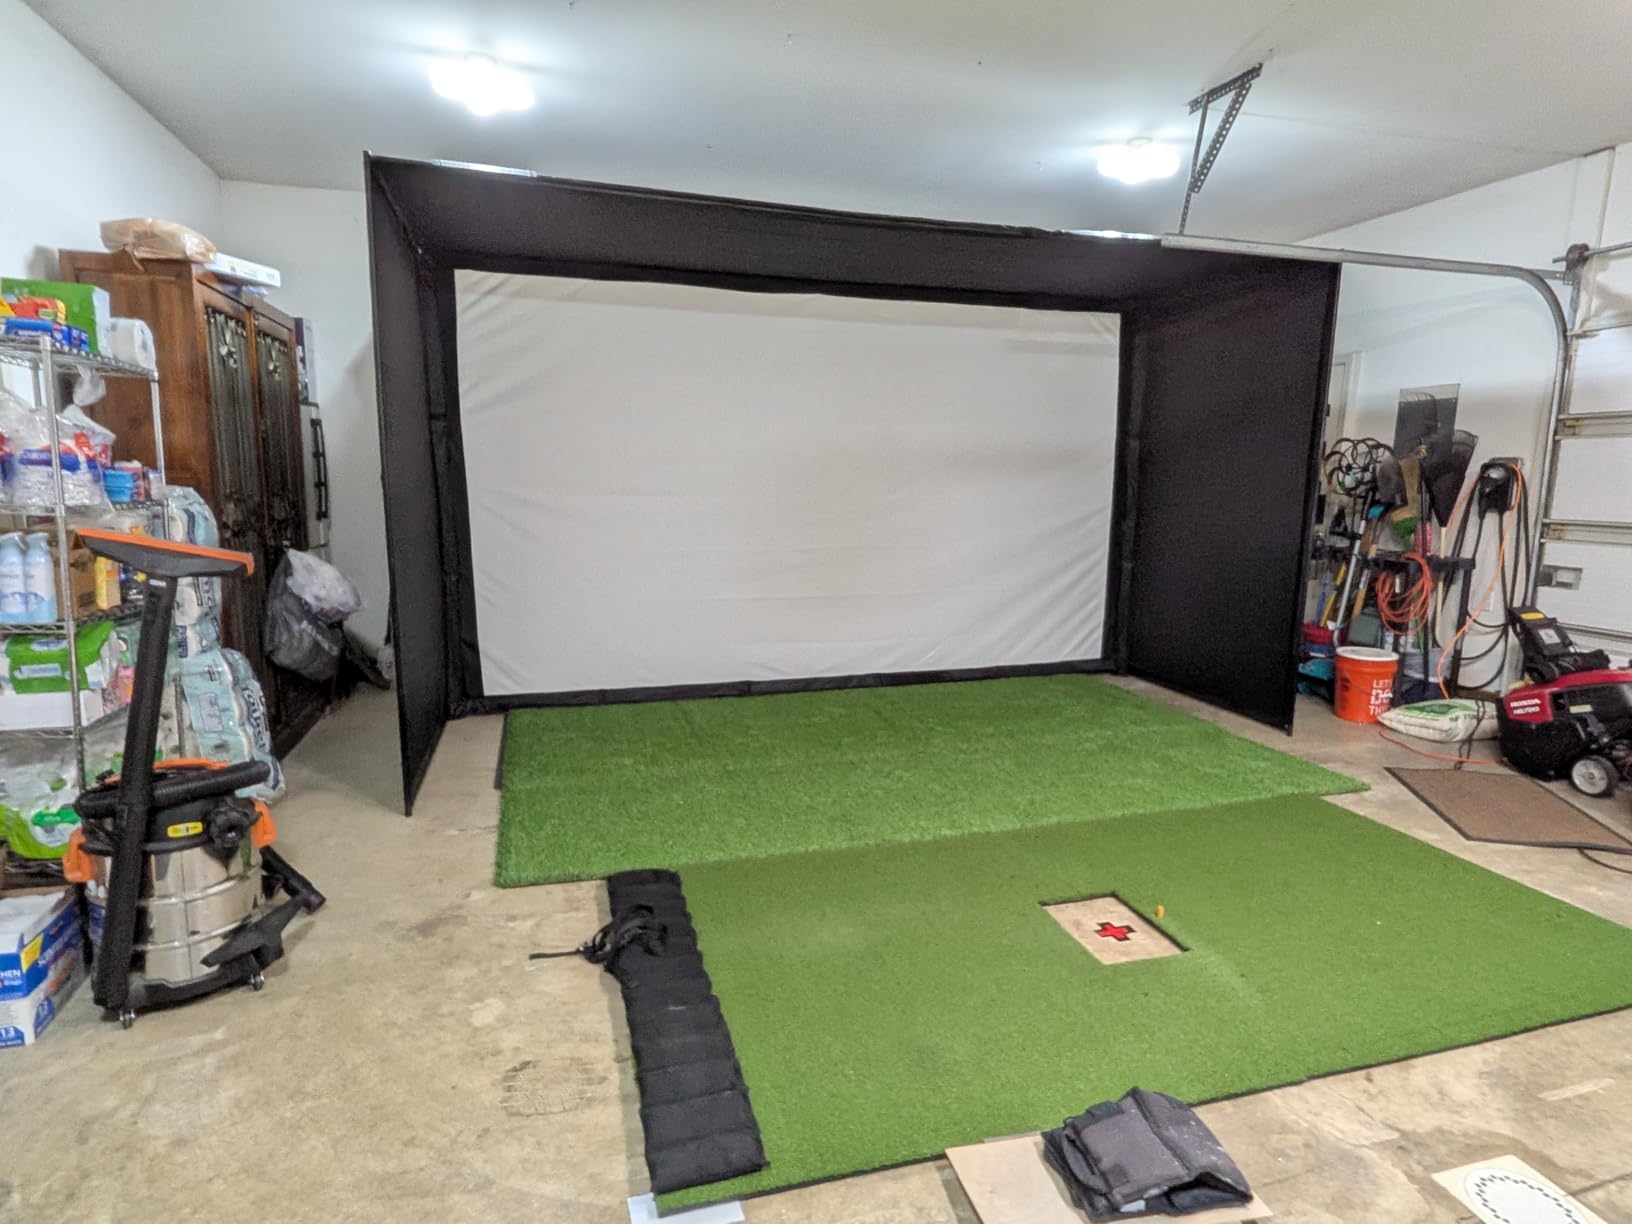
Most garage projection problems are contrast problems, and this enclosure is built for them. The panels go through a dyeing process the brand calls true blackout, which blocks outside light so a mid-range projector can hold a readable image in a bay with daylight around the door edges.
The multi-layer impact screen is the other half of the deal. Owners hitting into it daily report it still looks new after thousands of impacts, which is exactly the durability claim you need if the screen is doing double duty as a hitting surface and a projection surface.
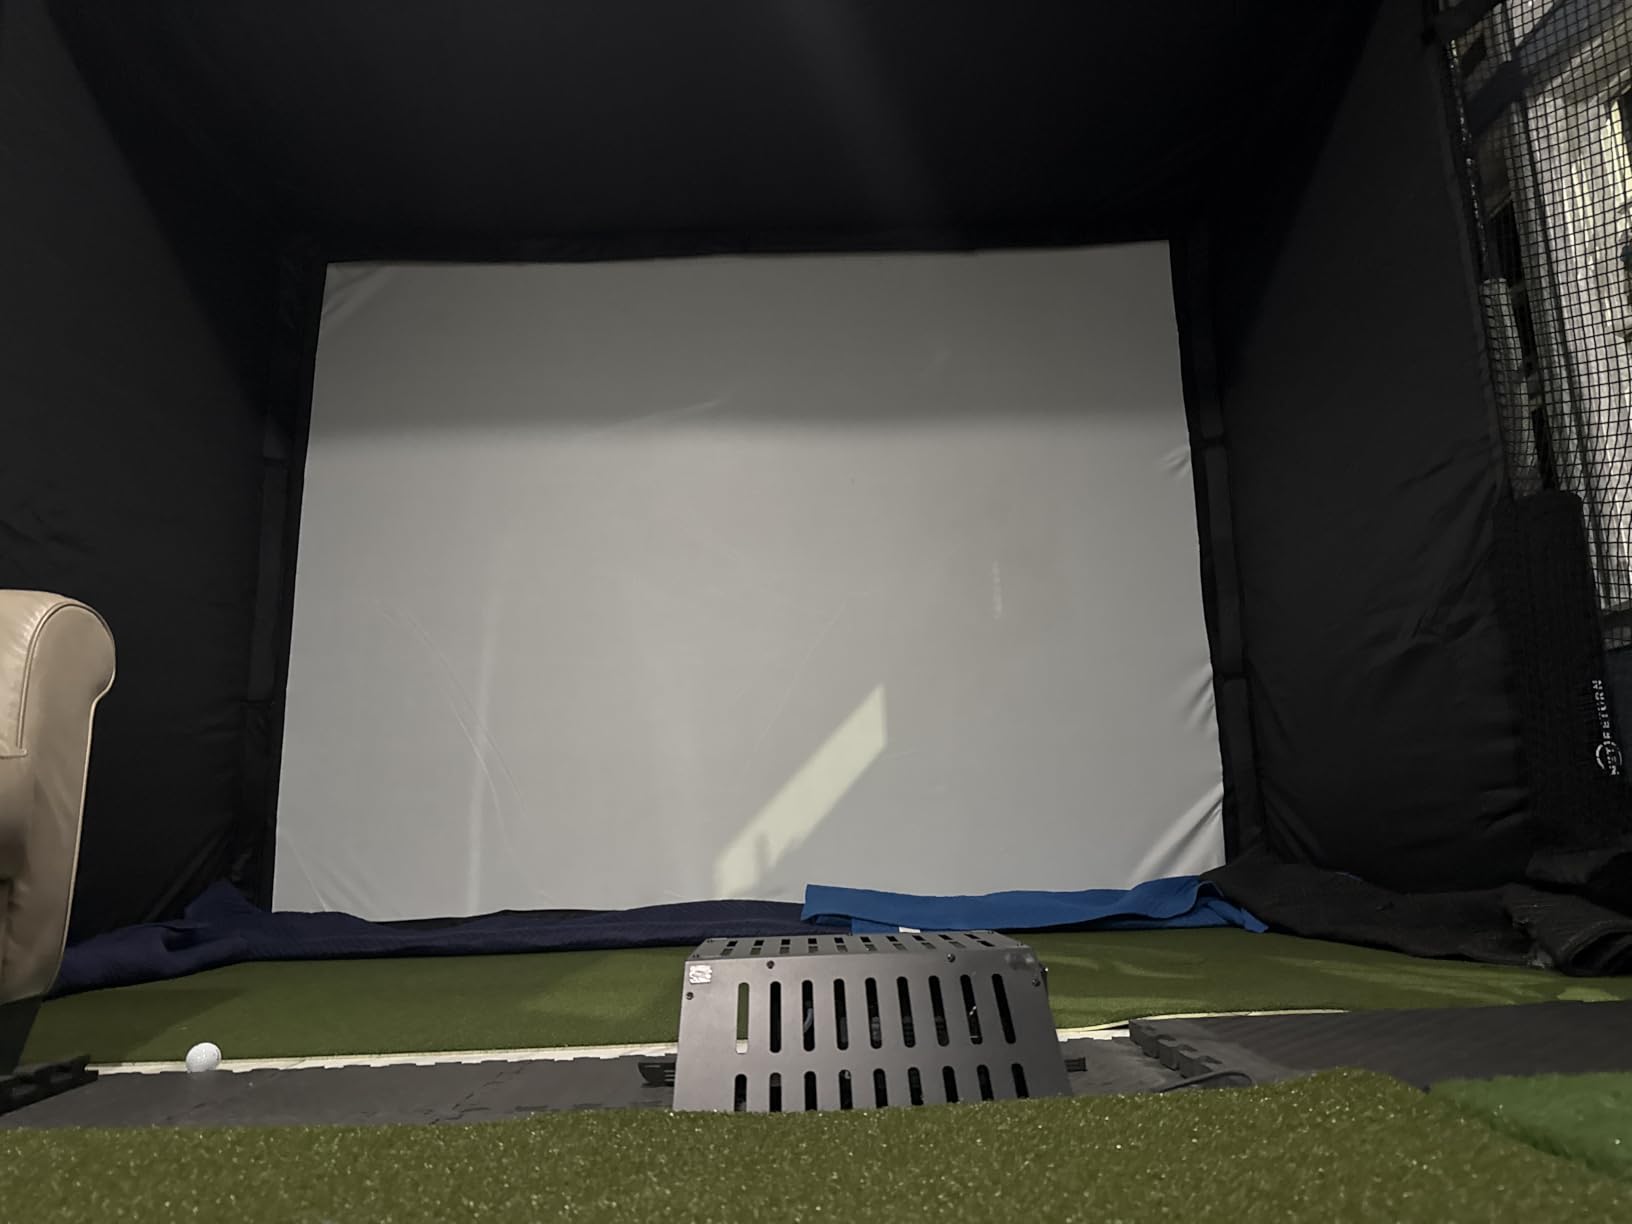
At 79 pounds it is a two-person build, and the numbered poles are a genuine help, taking roughly an hour with one person once you know the order. Three sizes are offered, and the 14 by 8 foot version is the one to consider if you have a deeper bay and want a wider image.
The 4.4 rating across 186 reviews comes mostly from people who bought it as a dedicated room rather than a weekend kit. That distinction matters for expectations, because the fabric does need retightening after a while and nobody describes the assembly as a single-person job.
Why the blackout panels matter most?
Garage lighting is uneven and hard to control. A dyed enclosure turns a washed-out image into a dark room with a bright screen in it, and that also makes a cheaper projector viable.
What to plan around?
Two things get repeated. The included padding around the frame is thin enough that balls can still return toward the hitter, and there are no hanging baffles, so wedge shots hit the top eyelets until they wear. Owners solve both with their own foam or a strip of putting turf.
Shank nets are not included at this level, so if the bay is close to a side wall, add them in your build plan.
7. ANYTHING SPORTS Complete Enclosure Package – Best All-In-One Kit
Complete Golf Simulator Enclosure Package – 4K-Ready Impact Screen with Blackout Cage, Projector Mount, Frame Poles, Side Shank Nets | Indoor & Garage Practice | Easy Setup | 12-Month Warranty
11 x 8 ft 4 in x 5 ft metal cage
39 kg
4K-ready impact screen
12 month warranty
Pros
- Poles
- impact screen
- hardware
- shank nets and projector mount in one box
- Rubber 4K-ready screen sized just under the frame to limit light bleed
- An 8 ft 4 in footprint fits a 9 foot wide bay
- 12 month no-questions-asked warranty
- About an hour to an hour and a half for two people
Cons
- Instructions are confusing and reference the wrong pole parts
- Included pads are decorative more than protective
- Blackout fabric sags after a few months
- Top rear crossbar is unpadded and returns wedge shots
The pitch of this kit is that you open one box and you have a room. Poles, joints, impact screen, hardware, side shank nets and a projector mount are all included, and the projector mount is the part that usually costs extra or takes an afternoon of ceiling work.
Sizing is where it beats most of the field. Three footprints are available, including an 8 foot 4 inch wide version that fits a 9 foot wide bay. For a garage narrower than 10 feet, that option is the difference between a build that works and a build you abandon.
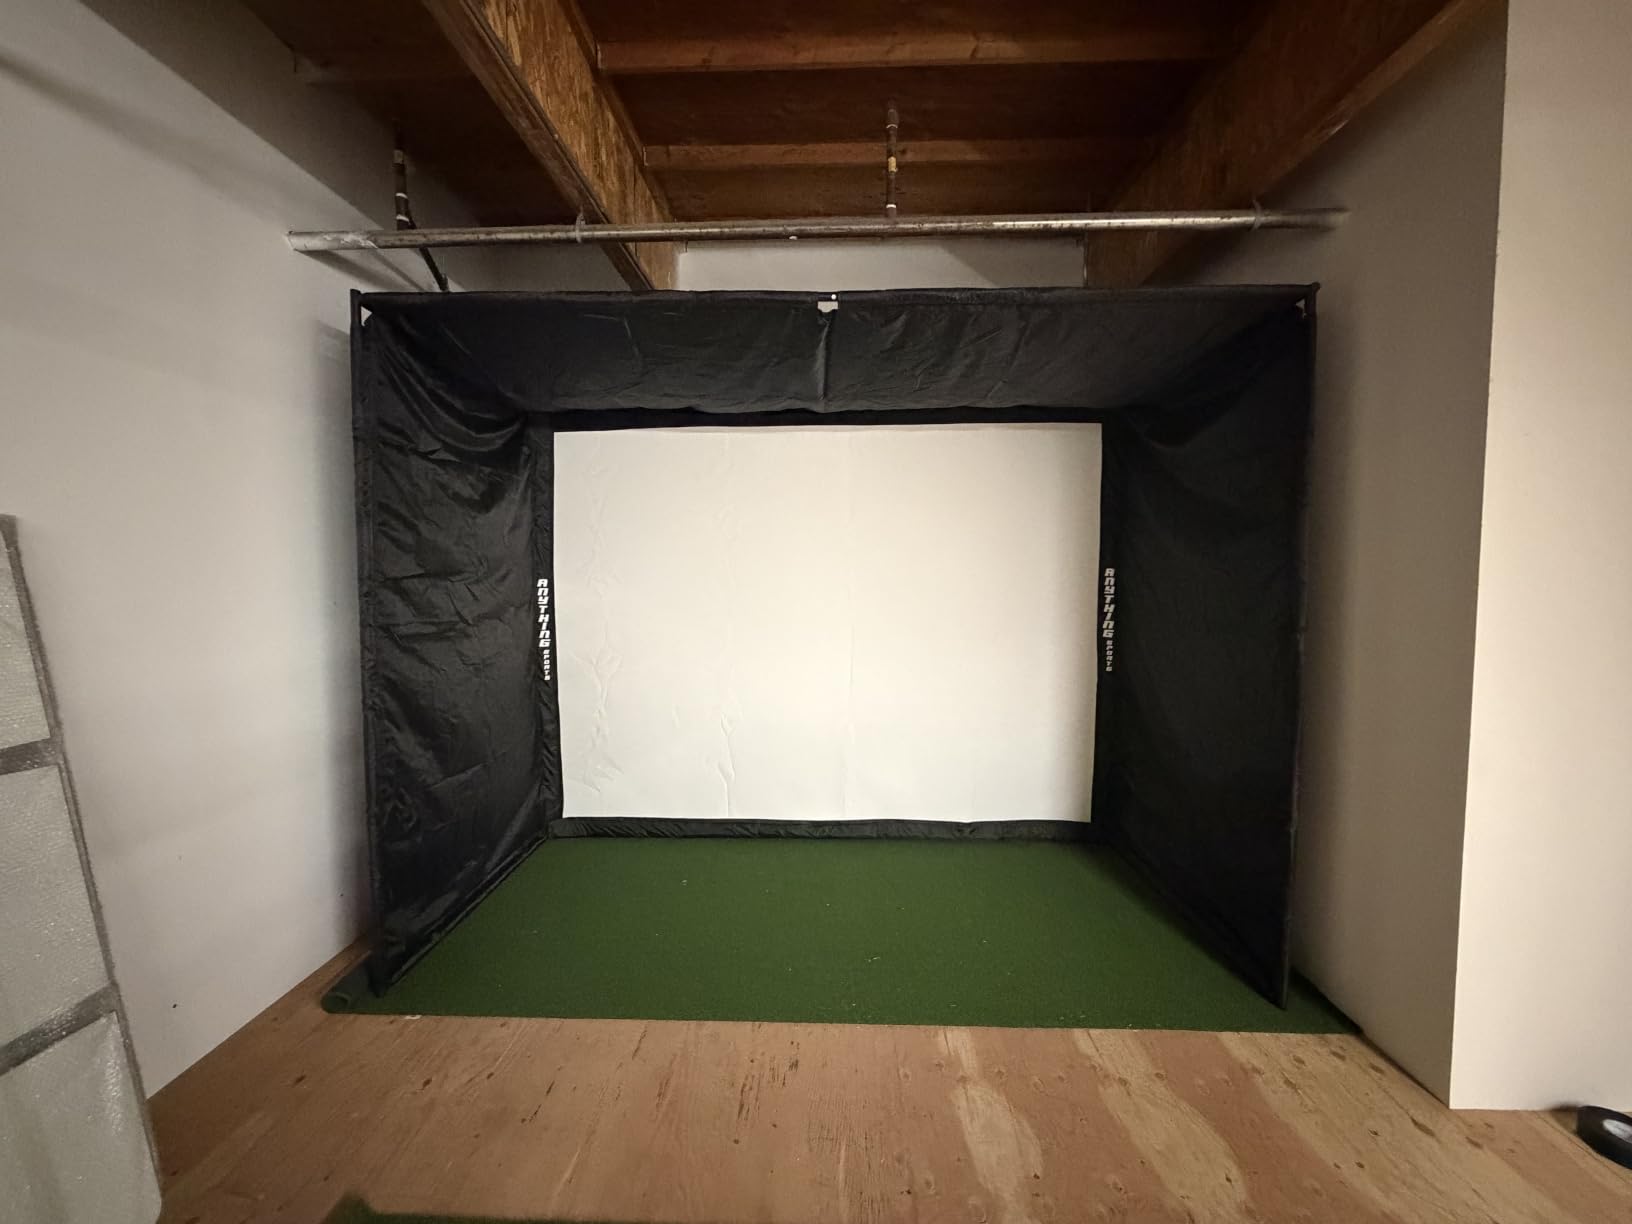
The screen is rubber rather than fabric and is cut one inch smaller than the frame, which is a smart way to reduce light bleeding around the edges. Owners running it for a year and a half report it still looks new, and the 4.5 rating from 183 reviews reflects that durability.
At 39 kg it is a two-person lift, and the warranty is a 12 month no-questions-asked with phone and email support. That is a shorter warranty than some enclosures offer, so note the date on purchase.
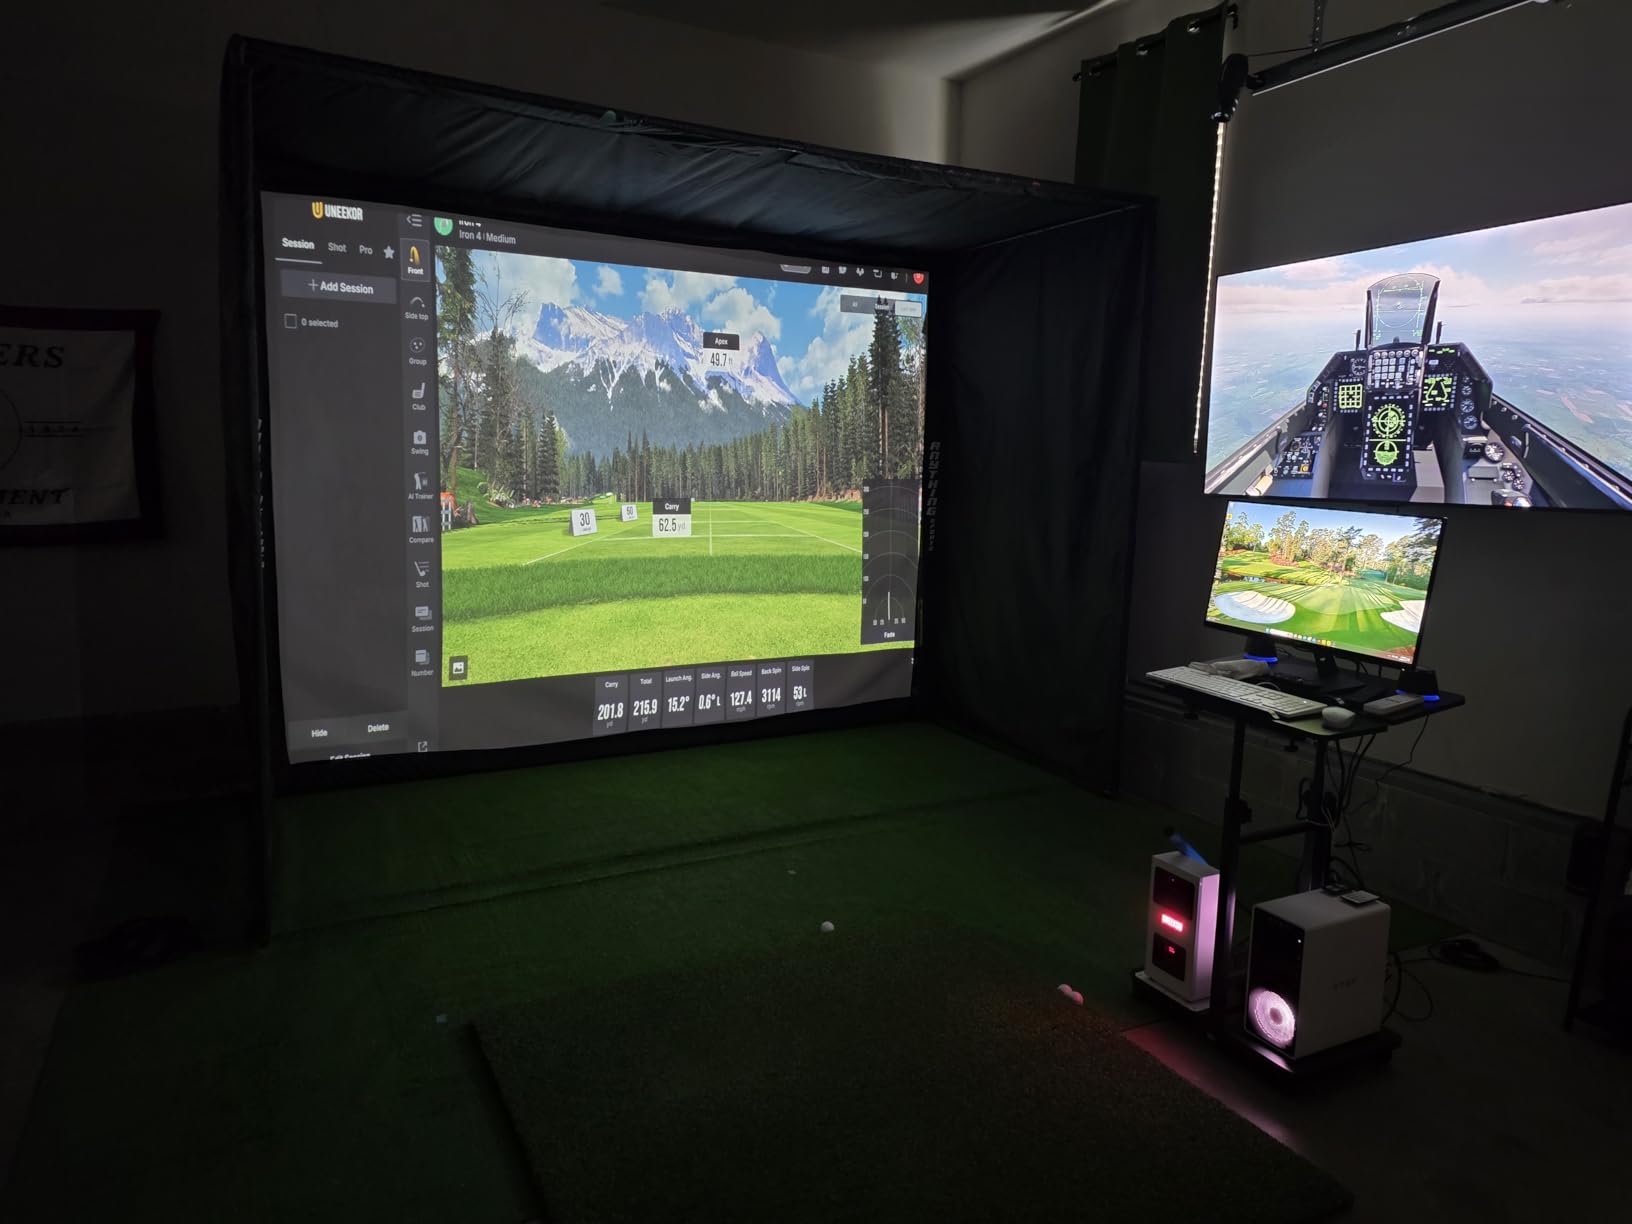
Why the included projector mount earns its place?
Short-throw units still need a rigid bracket fixed into a joist, and a cheap ceiling-mount arm is a known source of image shake. Having the mount in the box removes a decision and a trip to a hardware store.
What to plan around?
Documentation is the dominant complaint. The instructions reference pole parts that do not always match what is in the box, so budget time to work it out rather than assuming a clean assembly. The top rear crossbar is also unpadded and several owners covered it with their own foam after a wedge came back at them.
The blackout fabric sags after a few months, and the bungee cords that come with it can over-tighten and wrinkle the screen. Take them off if you see wrinkling.
8. HOMEVOL 2 in 1 Net and Impact Screen System – Best for Practice Without a Projector
2 in 1 Golf Simulator Net System, 10 x 8ft Golf Practice Net Hitting Net with 4K-Ready Impact Screen, Target Cloth, Foam-Padded Steel Frame Cage, Hitting Mat and Balls for Indoor and Outdoor Practice
10 x 8 ft cage
Alloy steel, fiberglass and polyester
2 year warranty
Mat and two balls included
Pros
- Impact screen and printed target cloth in one system
- Foam-padded frame reduces bounce-back and impact noise
- Top protection net and side shank nets catch high wedge shots
- Hitting mat and two practice balls included
- Sag-resistant screen surface
- Two year warranty
Cons
- Screen and target cloth are separate so the setup needs reconfiguring
- Small review base with limited long-term feedback
- Simulator mode still needs a projector and launch monitor
This is the system to buy if half your sessions are target work and half are simulator play. The 2 in 1 design pairs a 4K-ready impact screen with a printed target cloth carrying multiple target holes at different heights, so chipping, driving direction and family scoring games all work with no projector at all.
The foam padding around the key frame areas is the detail that matters most in a garage. It cuts the metallic clang off impacts, it reduces bounce-back toward the hitter, and it makes hitting a shared wall less of a concern. For an attached or terraced house, that is a real quality of life gain.
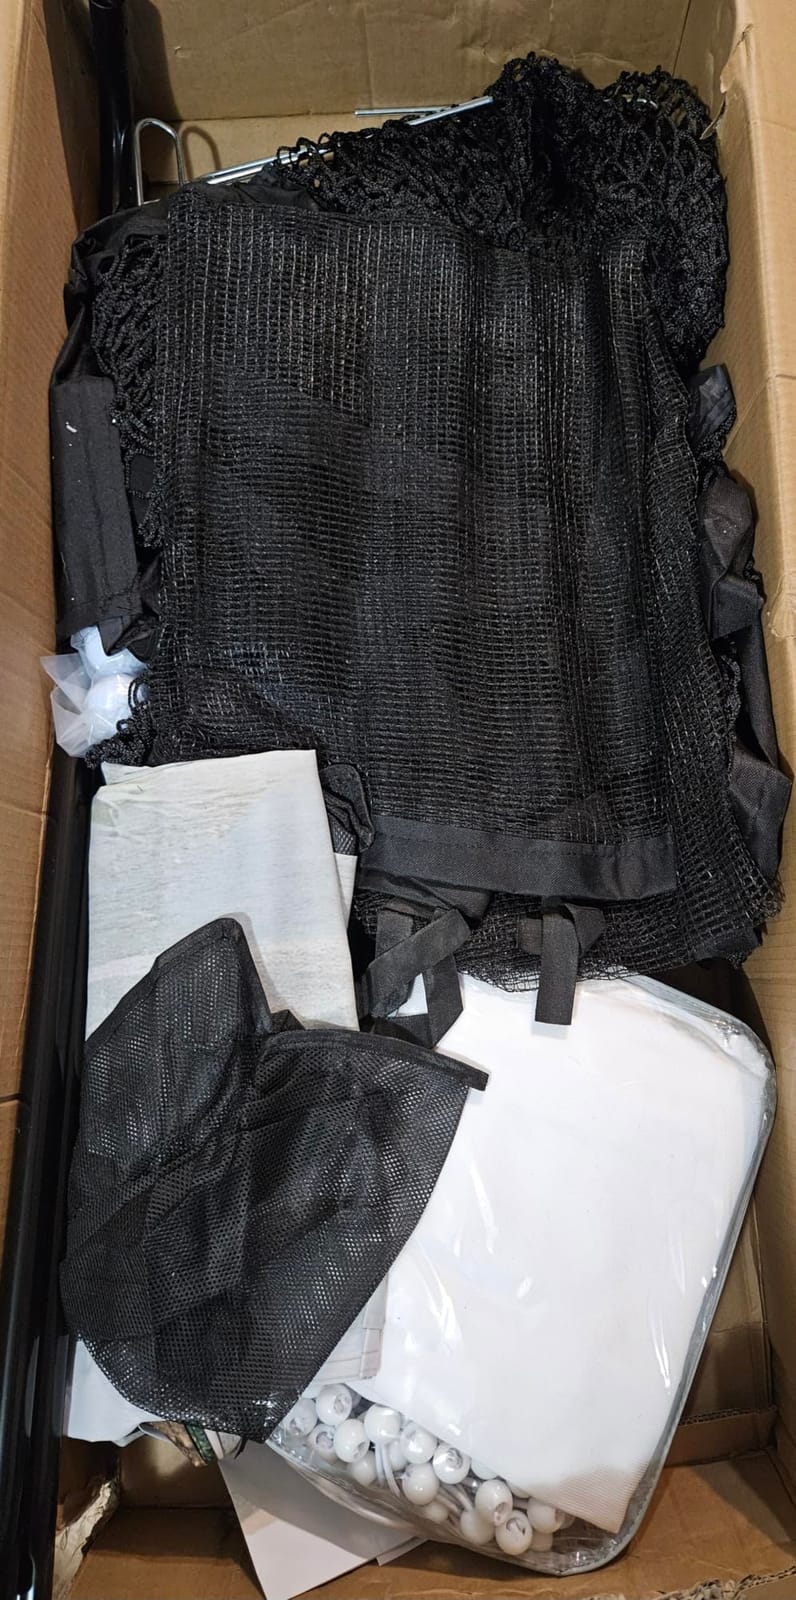
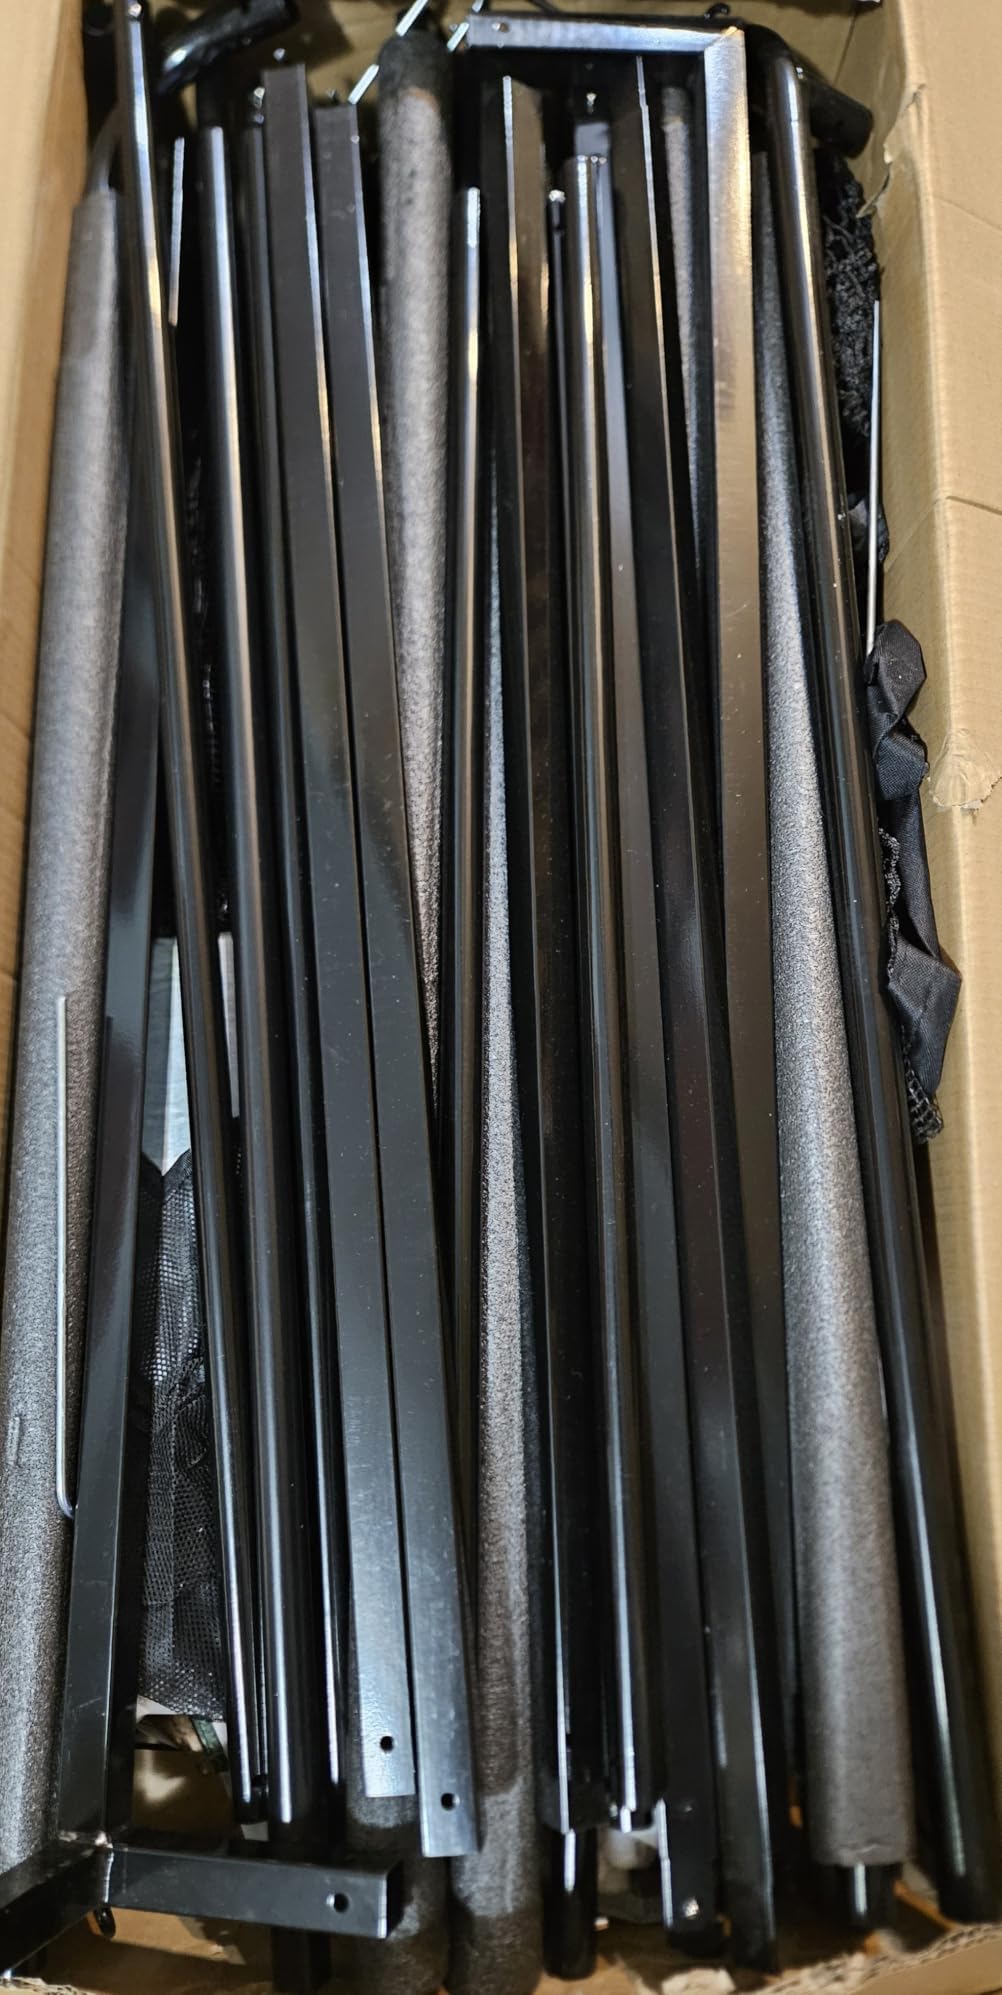
The box also includes a foam-padded steel frame and cage, side nets, a hitting mat, two practice balls, six ground stakes, a carry bag and a user manual. For someone building a first setup, the mat and balls being included saves a second order and a second week of waiting.
The 4.6 rating from 63 reviews is strong, though we would treat the small base as caution rather than proof. Durability feedback over a longer period is thin, and that matters more here than with a premium enclosure because a fabric screen is the part that wears.
Why the target cloth matters?
Most sim builds are projected and therefore dependent on a machine. The target cloth keeps the setup useful on the days you want to work on distance control and direction for ten minutes with no boot time, no signal and no phone. That is a more common session than most roundups admit.
The cloth is printed rather than a display, so there is no distance read-out and no shot data behind it. That keeps the appeal with families and casual practice, and it is why we would pair this cage with a radar monitor later rather than expecting it to replace one.
What to plan around?
The two pieces are separate, so switching between target and simulator modes means reconfiguring the cage. It is a few minutes each way, which is acceptable if you do both but annoying if you want a fast session.
And to be clear about the packaging: the projector and launch monitor are not included, so simulator mode still needs both.
9. Durbles Enclosure Kit – Best for Quiet Hours
Golf Simulator Enclosure Kit with Premium HD Impact Screen, Full Safety Padding & Blackout Curtain, Home Golf Sim Setup Compatible with Launch Monitors, Indoor Cage Net Golfing Accessories (10 x 8 ft)
10 x 8 ft with an 8.4 x 8.4 ft option
33.88 kg
Triple-layer impact screen
Alloy steel and polyester
Pros
- Triple-layer screen is thick and noticeably quieter than single-layer
- Pre-wrapped foam sleeves on the poles cut noise
- Top blackout curtain darkens the room for a cleaner image
- Full-coverage padding reduces ricochets
- Tool-free build of roughly 1.5 to 3 hours
Cons
- Instructions assume ceilings over 9.9 feet
- Frame needs exactly 10 feet of width with no wiggle room
- Some pole sleeves were missing and some metal is thin
- Screen still bounces back unless bungee cords are removed
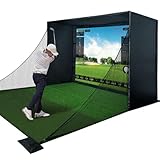
Noise is the reason to look at this one. A triple-layer commercial-style impact screen is a meaningfully thicker surface than a single-layer fabric, and owners report that the difference is audible in the first few balls. If your bay shares a wall with a bedroom, that is worth more than a slightly larger image.
The padding is thorough and covers the poles as well as the frame, with inside corner screen padding included. The top blackout curtain darkens the room so a mid-range projector reads cleanly without you hanging extra fabric yourself.
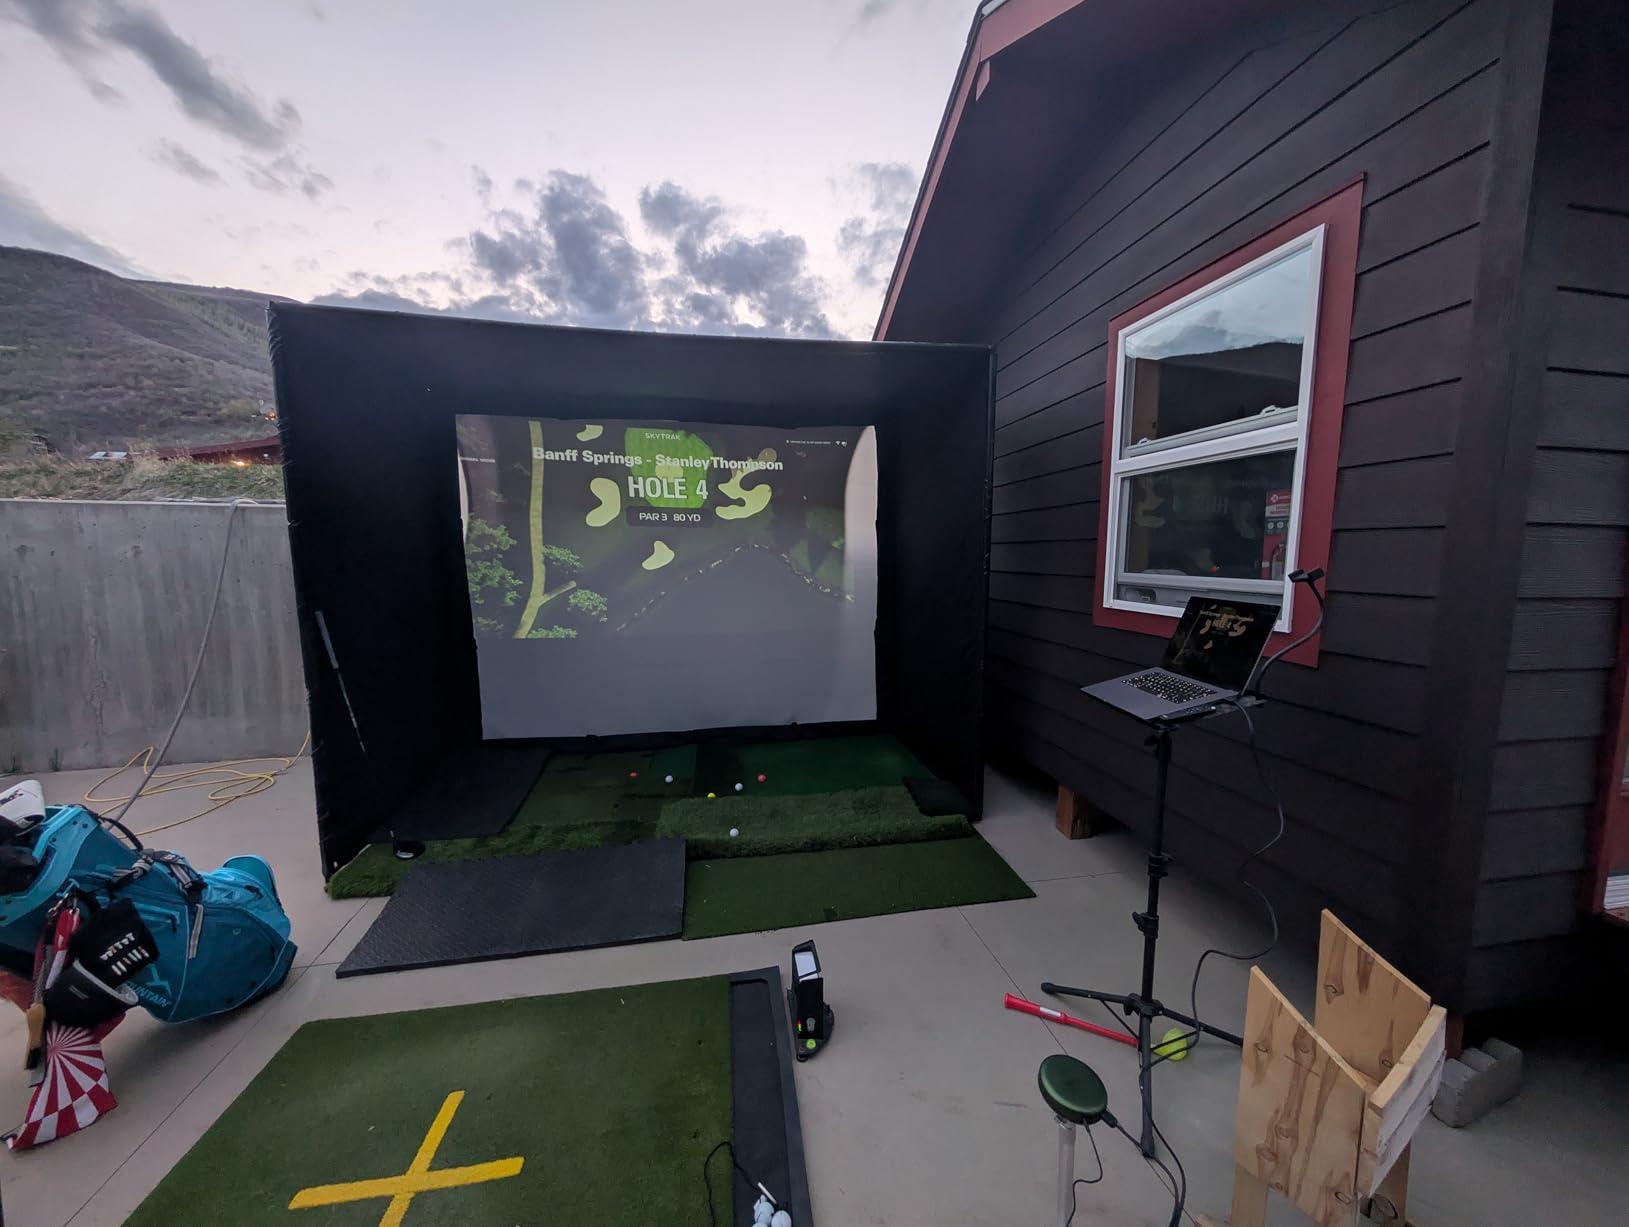
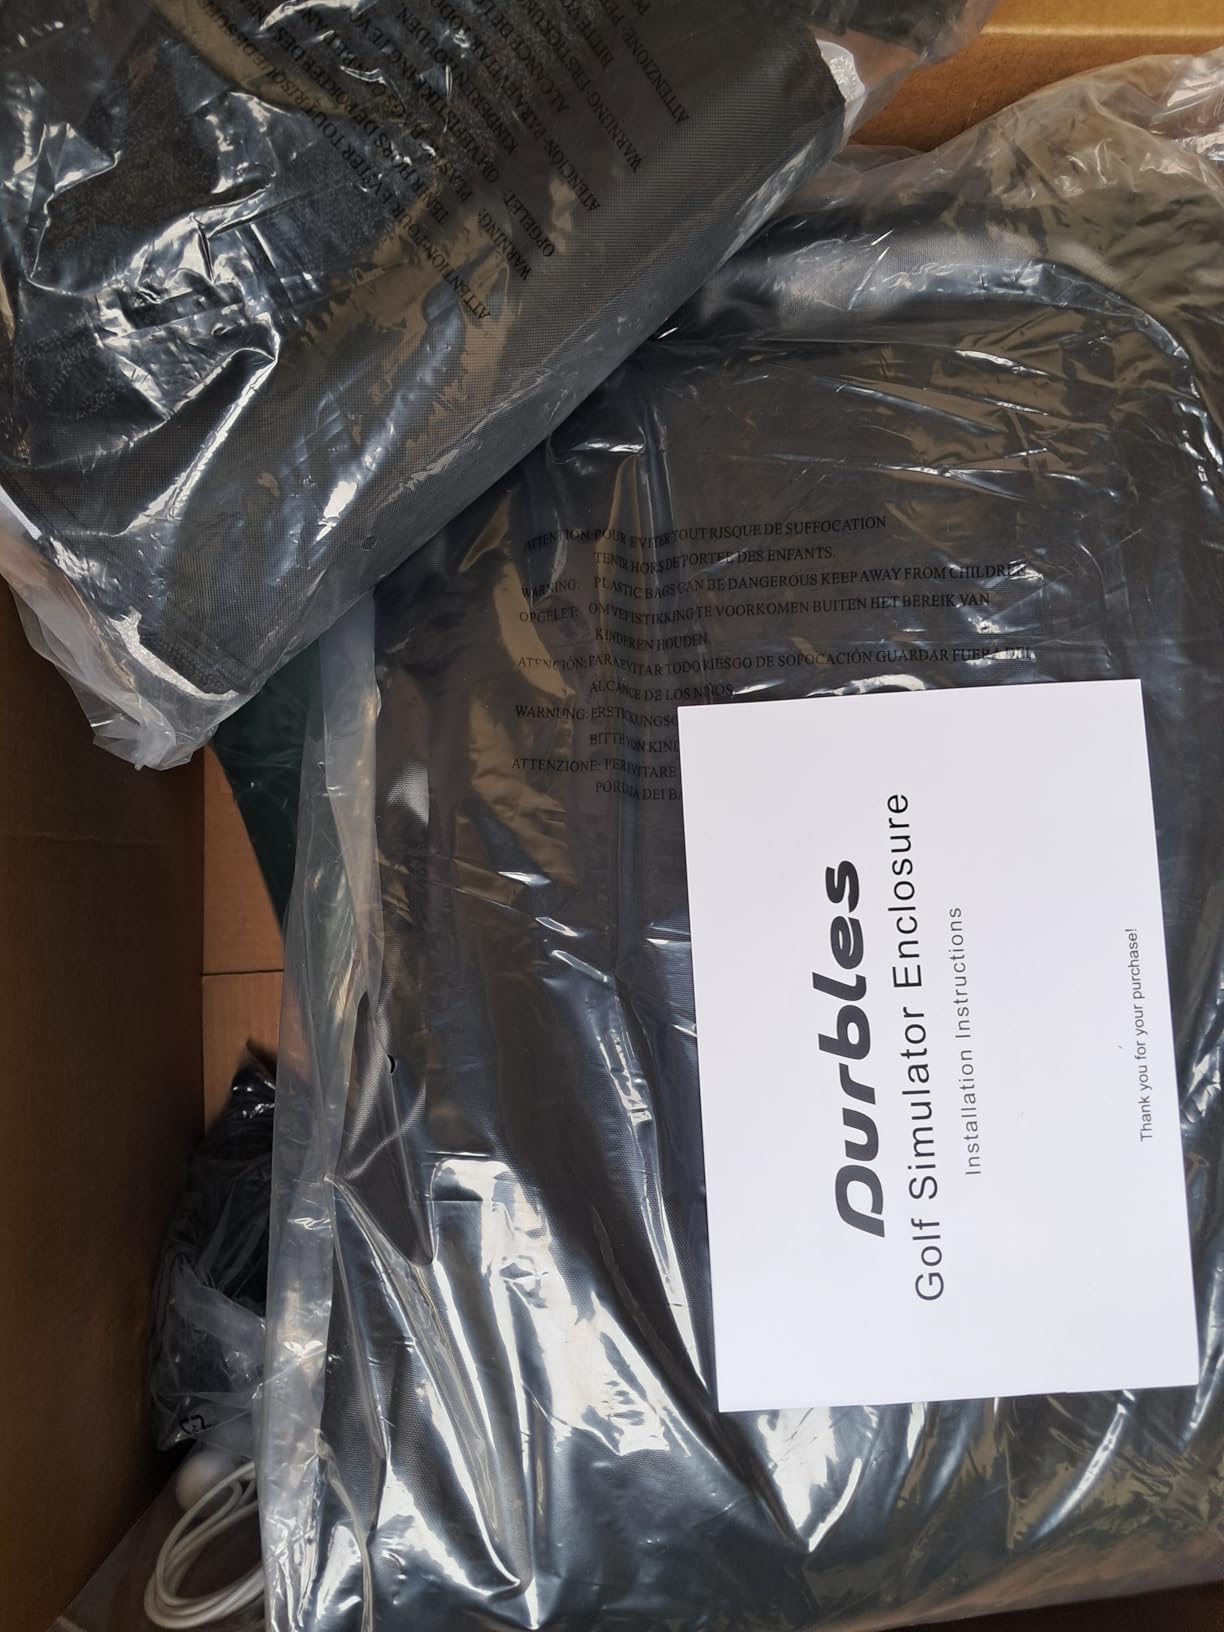
It is also lighter than most full enclosures here, and the build is tool-free, taking between an hour and a half and three hours. A 4.5 rating from 45 reviews is a good signal, but the sample is small and owner reported a bent crossbar after a few months.
There is also an 8.4 by 8.4 foot version, which is the more realistic option for a narrow bay and worth checking against your measurements before you commit.
Why quieter matters in a garage?
A garage is often directly under living space, and hard surfaces reflect everything. In our bay the difference between a single-layer and a triple-layer screen was obvious without measuring anything, and it is a bigger practical improvement than a slightly higher resolution picture.
Add the foam pole sleeves and the padded frame and you have the quietest setup we tested, which matters if anyone else in the house is working a night shift.
What to plan around?
Measure twice, literally. The instructions assume ceilings over 9.9 feet, which rules out many standard bays, and the frame needs exactly 10 feet of width with no tolerance, so tighter rooms require cuts. Also inspect the box for missing pole sleeves and thin metal before you build.
Remove the bungee cords if you see bounce-back, as several owners did.
10. Garmin Approach R50 – Best for a Dedicated Bay
Garmin Approach® R50, Premium Golf Launch Monitor & Simulator
3-camera system
10 inch built-in touchscreen
9 pounds
4 hour battery
Pros
- Three-camera system gives ball speed
- launch angle and face-to-path
- Built-in 10 inch color touchscreen removes the phone from the loop
- Improved spin rate and spin axis indoors
- Built-in barometer corrects carry for local pressure and elevation
- HDMI output to a monitor or projector
Cons
- The most expensive option in this roundup
- Virtual rounds and putting need a Garmin Golf membership
- Face-to-path needs the included club sticker
- 9 pounds and mains power for a permanent install
The R50 is the one we would install and forget. Three cameras measure the ball and the club, and unlike every portable unit here, the data lands on a built-in 10 inch color touchscreen instead of a phone propped against a wall. In a finished bay that changes the room.
Metrics include ball speed, launch angle, face-to-path and improved spin rate and spin axis, and training mode tracks per-club stats with a shot dispersion chart. The built-in barometer is a detail we did not expect to care about and now do, because it corrects carry distance for local atmospheric pressure.
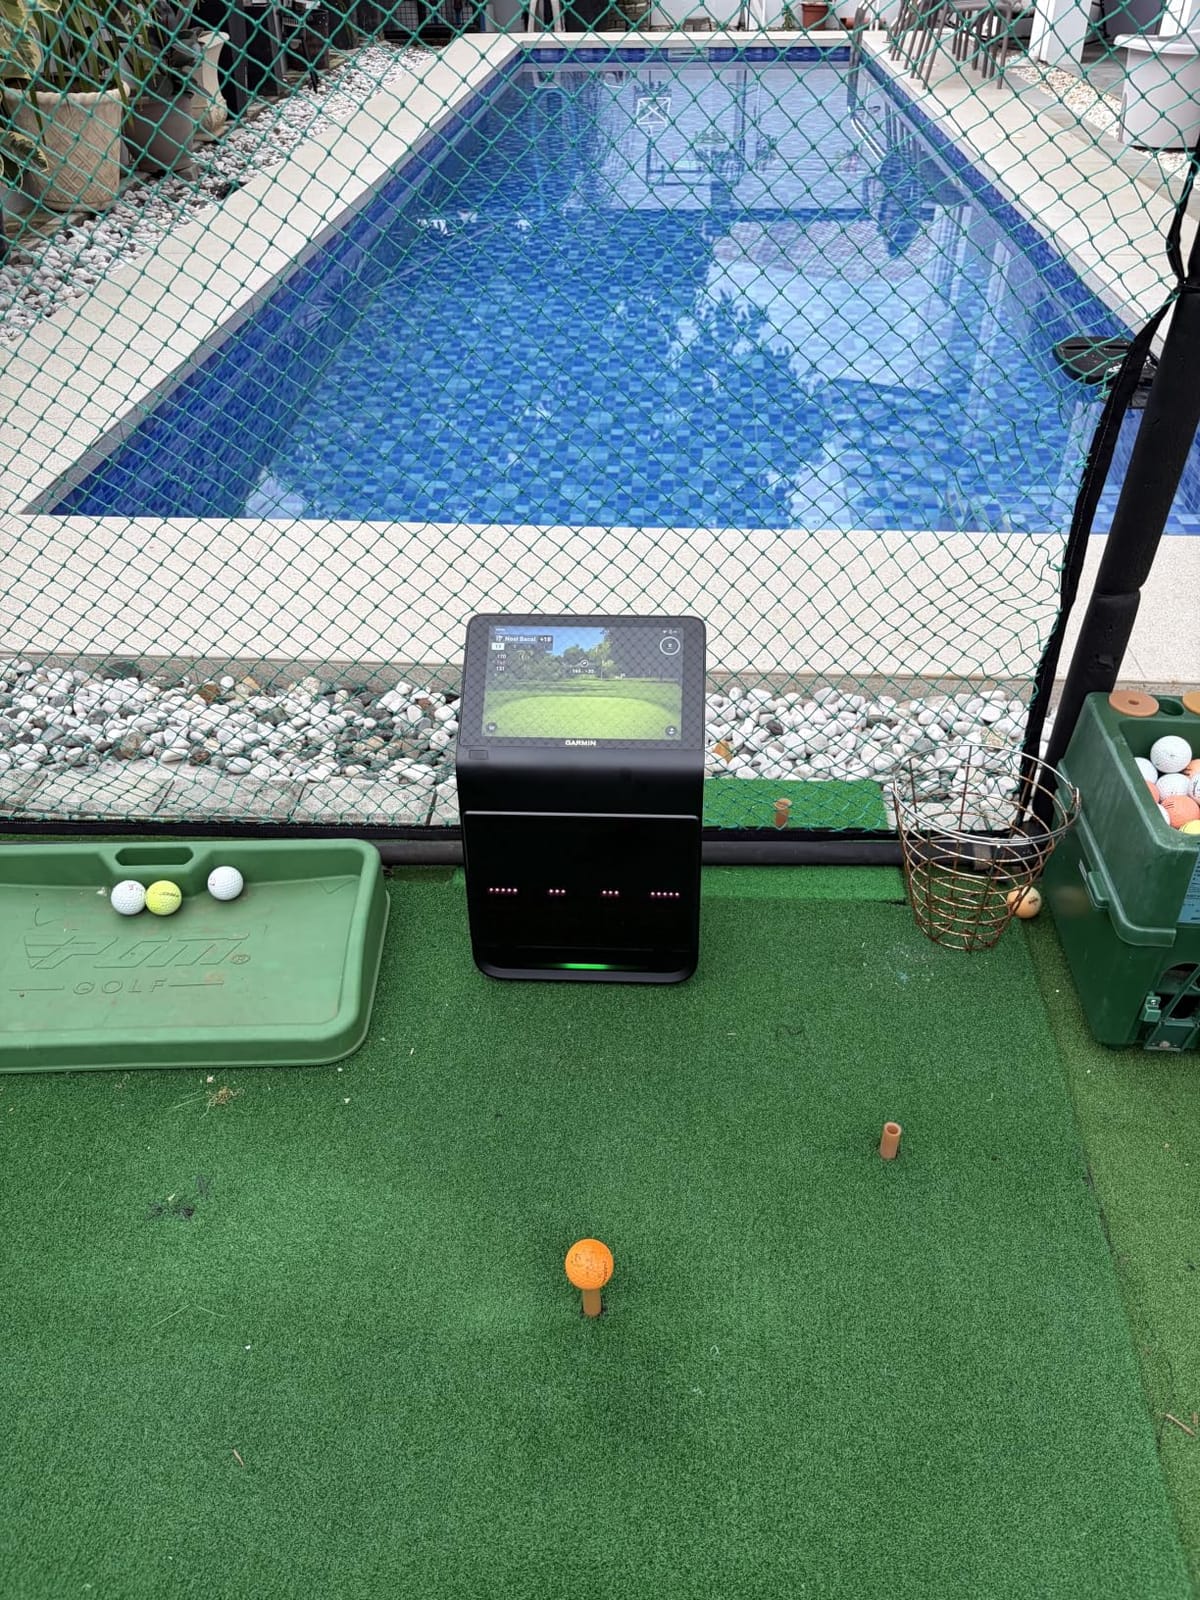
HDMI output means you can push the image to a projector or a large monitor, and the course library runs past 43,000 with a membership. The carrying case and 4 hour battery keep it portable, though at 9 pounds and with mains power as the sensible option, we treat it as installed equipment.
The 4.4 rating from 63 reviews is a small sample, and owners point to the self-contained touchscreen and the accuracy as the reasons it earns its place. Face-to-path needs the included sticker applied to the club face, which is a small extra step per club.
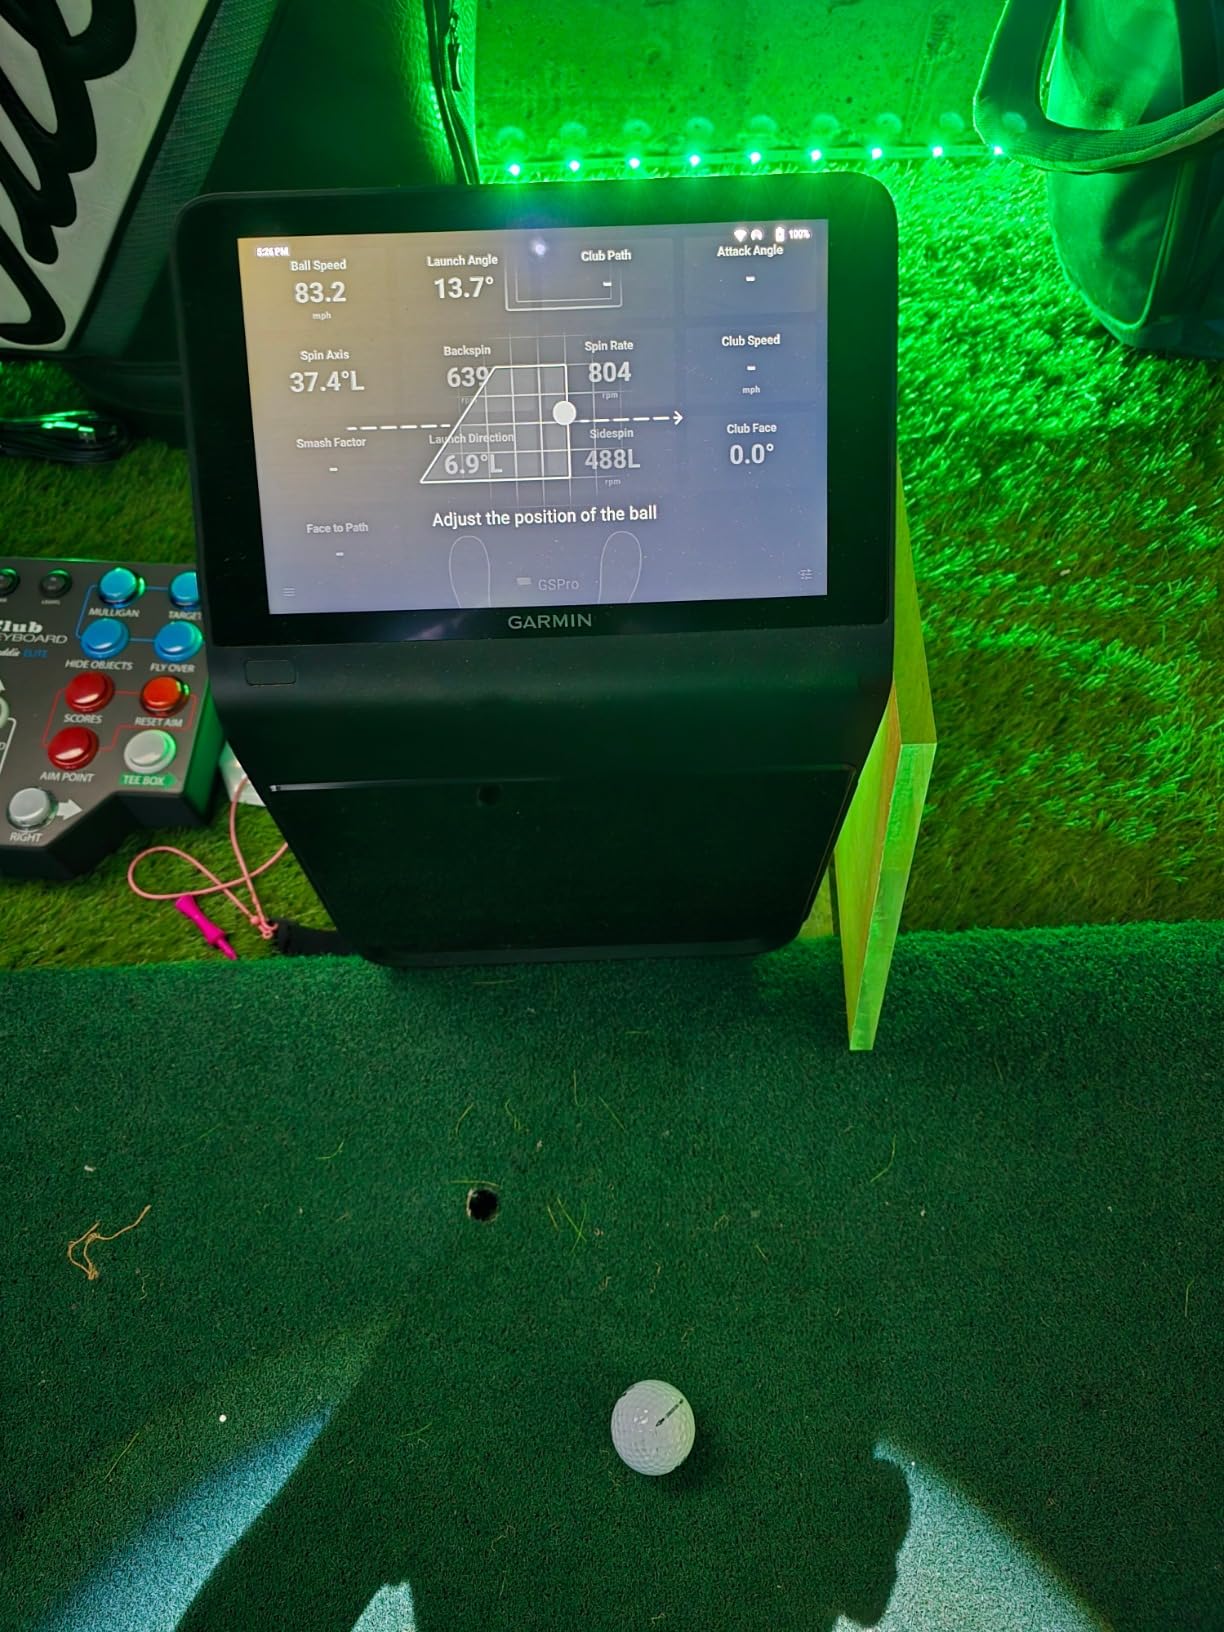
Why a dedicated bay changes the answer?
Once the bay stops being a parking space, the compromises stop mattering. A permanently mounted screen, a fixed projector and a touchscreen with no phone in the loop is a fundamentally different experience from a portable unit you set up in five minutes.
It also means the data can be read from the hitting position without a phone or laptop in the loop, which matters if you want to review a shot without walking over to the unit.
What to plan around?
Face-to-path tracking needs the club sticker, and putting and virtual rounds need an active Garmin Golf membership. Budget a dedicated circuit and a stable location for the unit, because 9 pounds of hardware that never moves is the correct setup for it.
This is a purchase for someone who has already decided the bay is a golf room.
11. Uneekor EYE MINI CORE – Best for Real-Time Feedback
Uneekor EYE MINI CORE Golf Launch Monitor & Simulator, 15 Ball Data Points, Near-Zero Latency, Works with GSPro, TGC19 & E6
High-speed cameras and infrared sensors
6.5 x 3.38 x 13.9 inches
8.4 pounds
2 year warranty
Pros
- Near-zero latency gives a genuinely real-time feel
- Dimple Optix reads any ball with no stickers
- All-metal construction proved durable over time
- Almost no missed shots reported by owners
- Works with GSPro
- E6 Connect and TGC19
- Two year warranty
Cons
- Hardwired Ethernet so it cannot move casually between rooms
- Needs a capable gaming PC for full simulation
- A roughly 200 dollar annual subscription for third-party software
- Club speed and face-to-path are not included at this level
The EYE MINI CORE is the most accurate-feeling unit we tested indoors, and the reason is latency. High-speed cameras and infrared sensors give near-zero delay, so the number on screen updates while the ball is still moving rather than a beat later. Reviewers upgrading from cheaper monitors single this out as the decisive change.
Dimple Optix is the other quiet hero. It reads dimpled balls of any brand directly, so there are no stickered balls to keep track of, and the all-metal construction and wide hitting area add to the sense of a machine built to stay put.
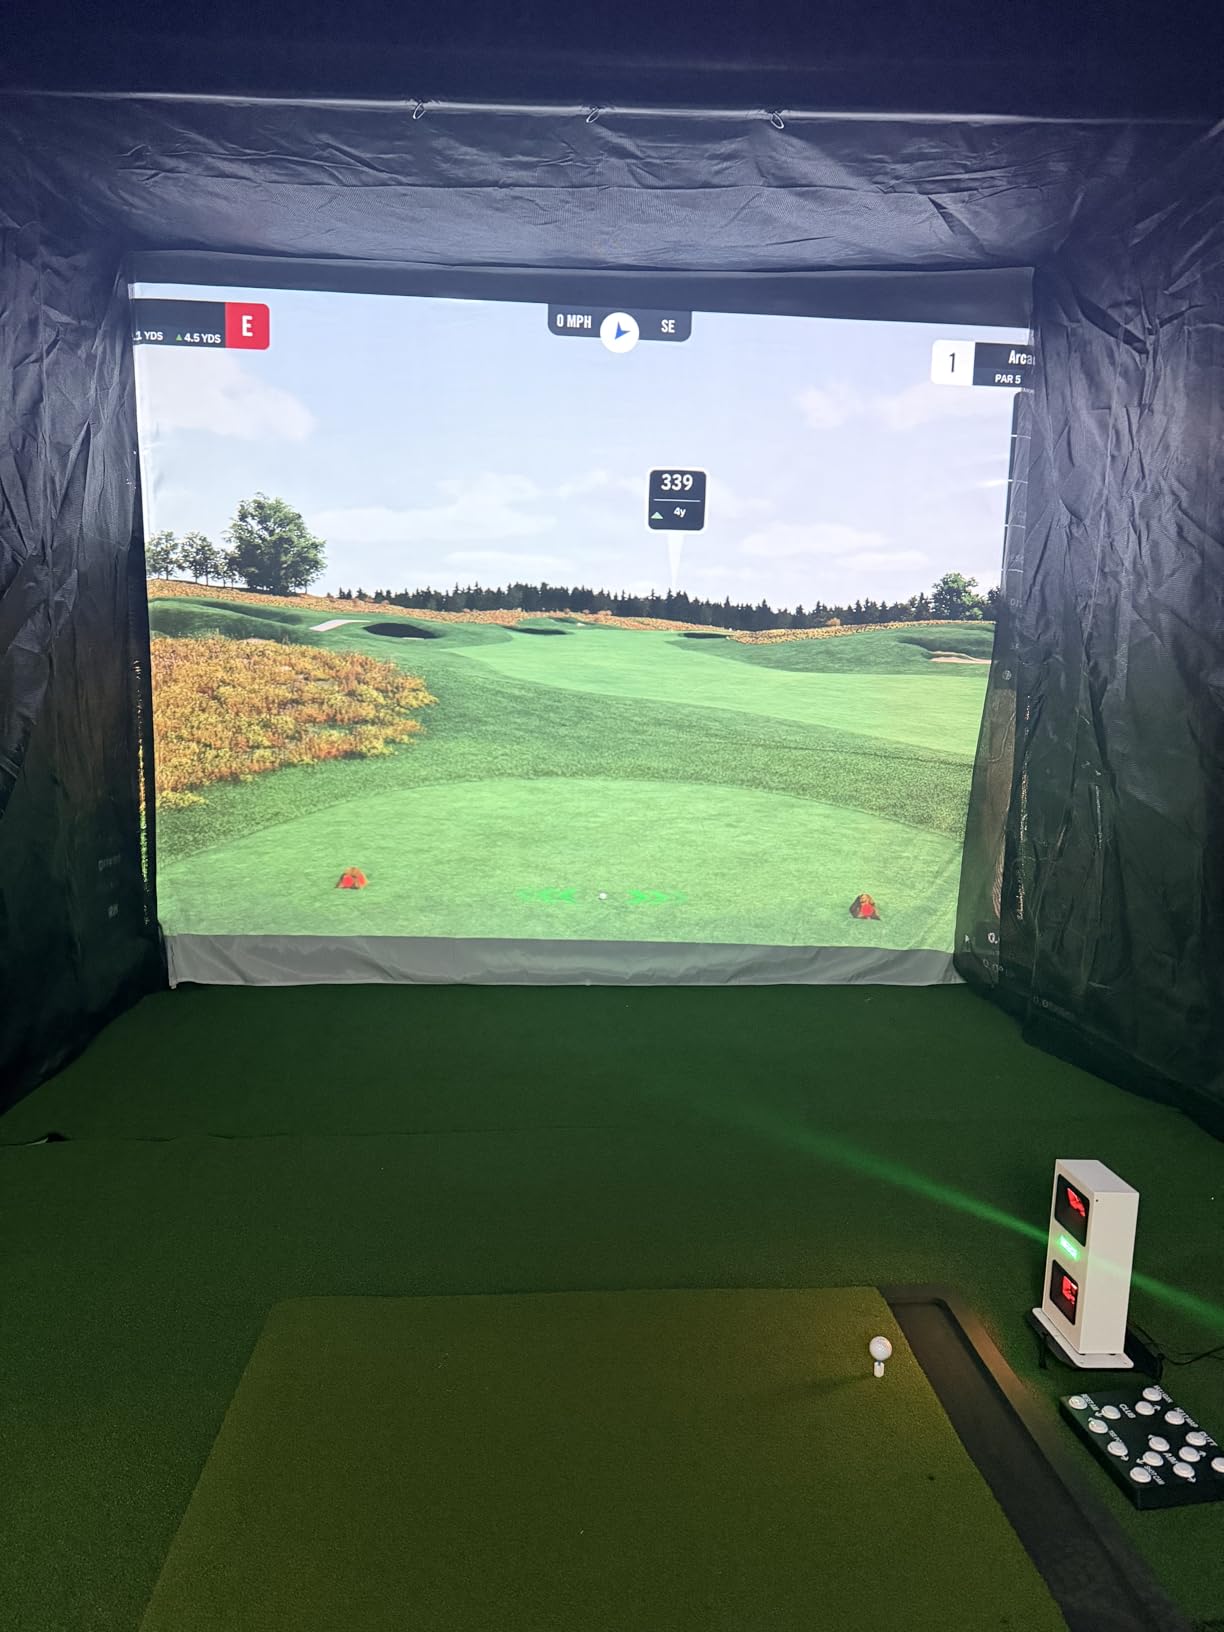
Owners report almost no missed shots compared with budget monitors, and 15 ball data points come with the included VIEW software. It works with GSPro, E6 Connect and TGC19 for course play, and the two year warranty is longer than the one year most units in this roundup carry.
The 4.3 rating from 37 reviews is a small base, but the consistency of the comments is notable. The trade-off everyone describes is the same one: this is an installed system, not a portable gadget.
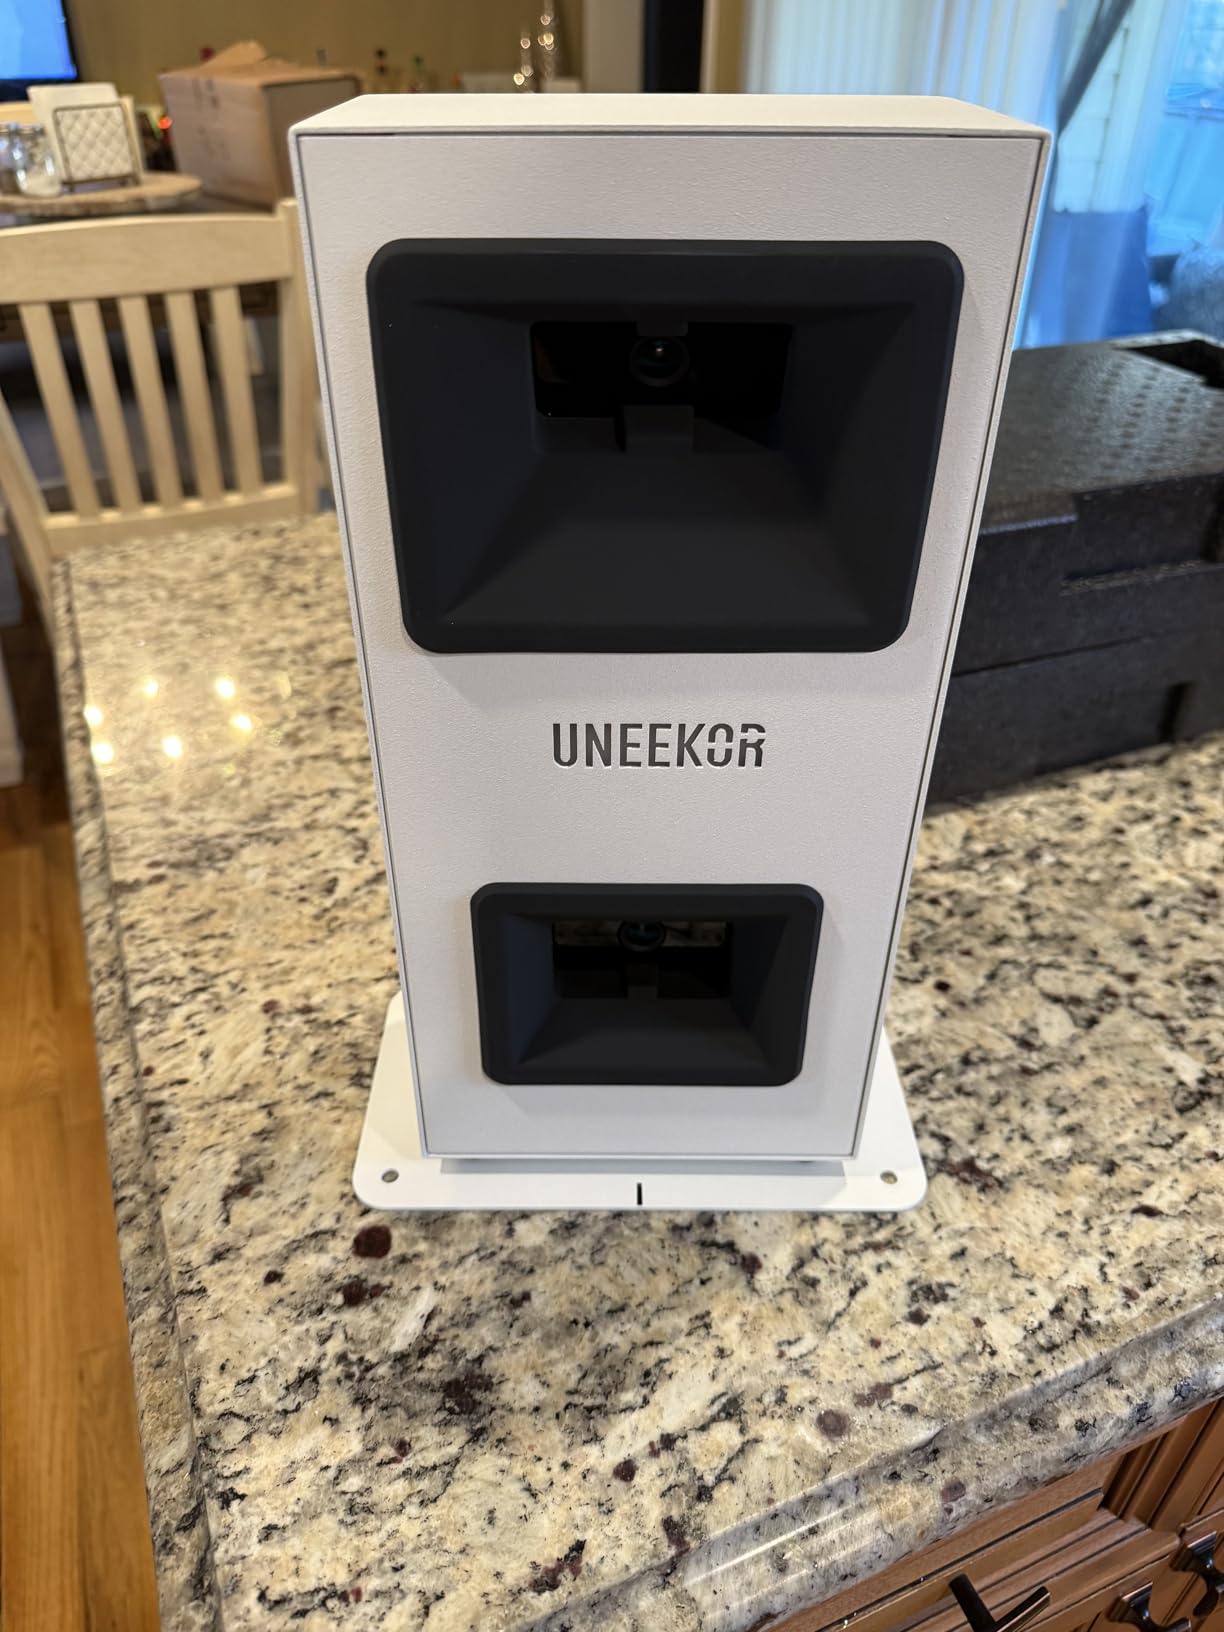
Why real-time matters for training?
Latency changes what feedback is worth. A number that arrives two seconds after the shot is a report, and a number that arrives instantly is a cue. For work on delivery position and strike face, the difference in how you learn is substantial.
The wide hitting area also matters indoors, because a tight garage bay and a narrow detection window are a frustrating combination for anyone not yet consistent.
What to plan around?
It is hardwired over Ethernet, so plan the cable run from the screen back to where the unit sits, and do not expect to grab it and move it to the range on a whim. A capable PC is also part of the build, with a 32 GB RAM and RTX4070 class machine recommended for full simulation graphics.
Third-party software adds an annual subscription, and club-level data such as club speed and face-to-path is a separate upgrade rather than standard.
12. FlightScope Mevo Gen2 – Best With No Annual Fees
FlightScope Mevo Gen2 Portable Golf Launch Monitor and Simulator with 18 Swing Data Parameters, Front Facing Camera, 8 E6 Simulation Courses with GPS Overview and Shot Tracer | Indoor and Outdoor
1.1 pounds
5.5 x 1 x 6.88 inch
6 hour battery
1 year limited warranty
Pros
- Fusion Tracking combines 3D Doppler radar with high-speed image processing
- 18 data parameters for full swing
- chipping and putting
- E6 Connect bundle with 8 courses included for life
- Front-facing camera plus multi-cam for up to three devices
- Shot Tracer renders the 3D ball flight path
- 1.1 pounds with 6 hours of battery
Cons
- Initial iPad pairing and firmware setup can be difficult
- Only one device connects at a time
- Distance readings need elevation and firmware correction
- Some units track a lower share of shots reliably
The Mevo Gen2 is the value pick for anyone who objects to subscriptions. Eight E6 Connect courses are included for life, alongside the FS Golf and FS Skills apps, Shot Tracer and action video with data overlays. There is no annual license, which over a five-year ownership window is a meaningful difference from the recurring fees attached to the other options here.
Patented Fusion Tracking pairs 3D Doppler radar with synchronized high-speed image processing, and 18 parameters cover full swing, chipping and putting. That chipping and putting coverage matters in a garage, where most days you want short game work rather than another 120 yard drive.
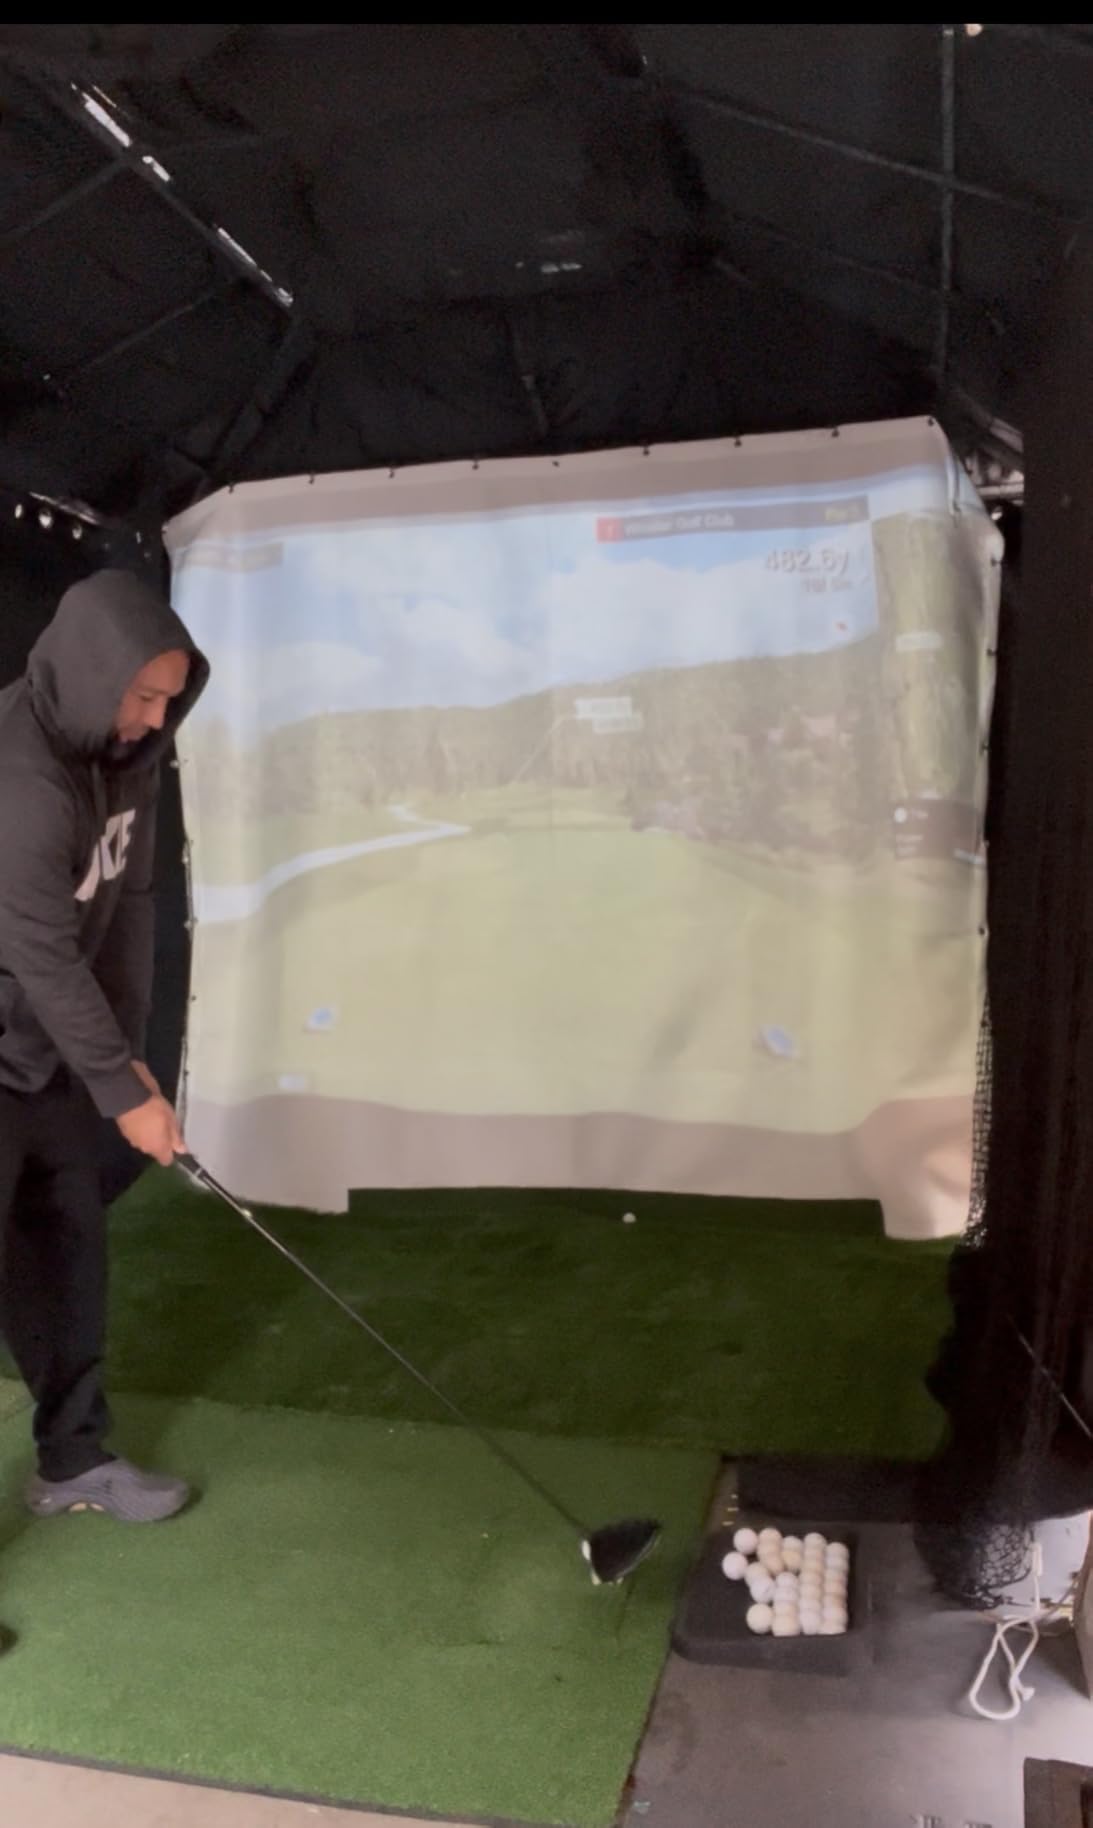
At 1.1 pounds with up to 6 hours of battery, it is among the most portable devices in the roundup and moves between the bay and the range with no charging anxiety. The front-facing camera records every swing with overlays, and Shot Tracer renders the full 3D flight path inside the video.
The 4 rating from 31 reviews reflects a real split. Owners who complete setup rate the data quality highly, and several note that later firmware updates fixed both the pairing problems and the distance calibration. The negatives cluster around connection stability and shot capture in the first sessions.
Why no subscription matters?
Subscription costs are the quiet reason a good launch monitor gets abandoned. Knowing the software is yours for good changes how you use the machine, especially for course play rather than only range work.
Multi-cam support for up to three devices is also useful for a household where more than one person swings, though only one device connects at a time.
What to plan around?
Allow time for setup. iPad pairing and firmware configuration are the most common early frustration, and support is worth contacting rather than guessing. Correct elevation and firmware settings before you trust any distance reading.
The 1 year limited warranty is the shortest in this roundup, and a few owners report inconsistent shot tracking. Our advice is the same as for any radar unit in a tight bay: give it the deepest part of the garage and keep 8 feet clear behind the ball.
Radar, Cameras, or Swing Sensors: What to Buy for a Garage?
Three sensor families appear in this roundup, and the choice determines how much of your bay you give up. Swing sensors need nothing. Radar needs depth. Cameras need mounting height and a clean line of sight. Get this decision right and the rest of the build is straightforward.
Swing sensors: zero floor space
A motion sensor clipped to a club, as on the PHIGOLF, needs no downrange space and no screen. It is the only option in this roundup that works equally well in a 10 foot bay and a 20 foot one, because it never looks at where the ball goes.
Radar: depth is the price of accuracy
Garmin R10, Rapsodo MLM2PRO and FlightScope Mevo Gen2 all read the ball as it flies. They are accurate and they are portable, and they are the wrong choice for a bay you cannot keep empty for 8 feet behind the ball.
Cameras: pay in ceiling height instead
Garmin R50 and Uneekor EYE MINI CORE measure at or just after impact. They need somewhere to mount and a view of the hitting area, not empty floor downrange, and they are the reason several high-end systems work in spaces a radar unit could not.
The handedness question nobody asks
Any unit that tracks the club has to be set for the hand you normally swing, and that is a real friction point in a shared household. Overhead and fixed camera arrangements sidestep it. Before buying, check whether the unit has an obvious setting change and who in your house will need it.
Impact Screen vs Golf Net in a Garage
The choice is between a surface that stops the ball and a surface you throw it back. A net is cheaper, quieter to install and easy to move. An impact screen doubles as a projector surface, which is the only way a projected image can exist in a small bay.
Go with a net when space is the constraint
A net with side and top coverage, such as the GoSports Range Cage or the Haokelball cage, gives you the most hitting area per square foot and the least commitment. It is the right call for a rental, a single-car bay or a build you might move.
Go with an impact screen when you want a picture
If you want course play, a projected image has nowhere to land but an impact screen. Budget for the screen to wear, and remember the lower third of a fabric screen takes the most punishment from wedge and short iron shots.
Think about noise before you think about price
A multi-layer or triple-layer screen is materially quieter than a single-layer one, and in a garage with living space above it that difference is felt by people who never see the screen. It is the quiet upgrade we would fund first.
Ceiling Mounting, Retractable Screens, and Still Parking the Car
Nothing attaches to a moving garage door. If you want the screen to clear the bay, you mount to the ceiling joists or the wall header above the door, or you use a retractable screen that rolls up before the door travels.
What ceiling mounting actually solves?
The most-asked question on garage simulator forums is how to keep hardware out of the swing. A ceiling-mounted projector and a camera-style monitor high on the wall solve the projectile problem, which is why owner builds tend to move toward them once mishits start.
You need joist access for a rigid mount, not a drywall anchor. A vibrating projector mount is the most common avoidable image problem in a garage build, and short-throw units still need a solid bracket rather than a suction cup.
Retractable screens and the parking question
A retractable screen is the honest answer to can you still park the car. It rolls up clear of the door tracks, so the bay returns to normal in a couple of minutes. The cost is that you have to do it every time, and the screen surface quality is usually a step below a fixed impact screen.
Fixed enclosures work if the bay is dedicated. Portable net cages work if the bay is not. Nothing in between is as tidy as a retractable screen, and that is the trade most single-car bay owners should make consciously.
Electrical and cable runs, briefly
Plan outlets before you buy hardware. Owners routinely discover that the nearest outlet is too far back from the screen, which means a new circuit and a longer cable run than they budgeted. Ethernet for camera systems, HDMI to the projector, power for the unit and a network drop if you run PC-based software are the four lines to think about.
If your bay needs more than a plug and a run of cable, that is the point to bring in an electrician rather than improvise. We covered the same principle in our hardwired EV charger roundup, where circuit capacity and panel space are the deciding constraints.
How to Choose the Right Golf Simulator for Your Garage?
Decide the room before the machine. Once you know whether the bay still holds a car, whether a full driver swing clears the joists and how much depth you can keep empty, the product choice narrows to two or three options and the comparison becomes easy.
Five steps before you spend anything
Measure ceiling height at three points along the bay, at the lowest point including the door opener rail
Measure depth from the garage door to the back wall with the bay empty
Decide whether the car still parks inside, because that decides fixed versus portable
List your outlets and plan the cable run back from where the screen will hang
Decide what you want the data for, which decides sensor type and budget
Garage prep that people skip and regret
Climate is the one that decides whether you use the room in February. An uninsulated garage in a cold climate makes hitting unpleasant long before it makes it unsafe, and a mini split unit is the most commonly recommended fix among owners. Insulation on the ceiling and walls helps with both comfort and how long equipment lasts in a hot garage.
The floor is the second. Concrete is hard, and a thin mat is how people end up with sore wrists and elbows. A proper turf strip or a dense mat with a shock-absorbing layer under the ball position is the cheapest upgrade in this whole article.
Third, dust. A screened bay and a mat that traps grit will protect an impact screen and a projector lens far better than any amount of careful hitting.
Software and the real running cost
Course libraries are where recurring costs hide. Garmin, Rapsodo and Uneekor all charge for their full simulation libraries beyond an included trial, while the Mevo Gen2 and the PHIGOLF bundle their access in. Add software to your build total before you commit, not after.
A practical split that works for most households is a portable radar unit for winter range work and a fixed enclosure plus a stronger monitor for the projected course play. That is exactly how the two-car bay owners in the forums describe their setups, and it is why they end up with two systems rather than one compromise.
Where the money is best spent?
If your budget is tight, the best order is enclosure and mat first, then a mid-tier launch monitor, then the projector. People who buy the expensive monitor first and then use a phone for months are the least happy group in every owner thread we read.
The exception is a narrow bay. If you cannot free up 8 feet behind the ball, spend on a camera-based system instead, because it will actually work in the space you have.
While you are planning the bay, it is worth thinking about what else has to live in it. A lot of our readers run a small freezer or a chest cooler alongside the sim, and we covered garage-rated freezers in our upright freezer roundup.
Frequently Asked Questions
How big of a garage do I need for a golf simulator?
Plan on at least 10 feet wide by 10 feet deep with 8.5 feet of ceiling clearance for a net setup. A projected impact screen setup wants 12 feet wide by 15 feet deep and a 9 foot or higher ceiling, because radar launch monitors need roughly 8 feet of clear space behind the ball. Measure at the lowest point of the ceiling, including joists and the garage door opener rail.
Can you put a golf simulator in a garage?
Yes, and a garage is the most common home location. It needs full driver swing clearance of roughly 8.5 to 9.5 feet, enough depth for either the ball flight or a camera unit, and a flat level floor. The things to watch are the garage door tracks and opener, ceiling joists at low points, and whether the bay still has to hold your car.
Which golf simulator can be attached to a garage door?
None should be attached to a moving garage door, because the door travels through the swing area and the impact surface. Instead, mount the projector or camera to the ceiling joists or the wall header above the door, or choose a retractable screen that rolls up clear of the tracks before the door opens.
How much does it cost to put a golf simulator in your garage?
A net and swing sensor setup is the lowest tier. Adding a launch monitor and a projector moves you into the mid range. Premium camera systems plus a screen and projector sit well above that, and a full custom studio installation with retractable screen and professional fitting is the top tier. Software subscriptions add an annual cost to most but not all brands.
Can you still park your car in the garage with a simulator?
It depends entirely on the enclosure. A portable net cage such as the GoSports Range Cage breaks down into a carry bag in minutes, and a retractable screen rolls up clear of the door. A fixed blackout enclosure is a permanent commitment and normally means the car moves outside. Decide this before you buy, because it dictates what you can install.
Do golf simulators damage a concrete garage floor?
The floor itself is rarely the problem, because impact happens onto a mat and screen rather than onto concrete. What does matter is joints and ankles, since hard concrete under a thin mat is a common source of strain. A turf strip or dense mat with a shock-absorbing layer under the ball position is the cheapest protective upgrade available.
Can a golf simulator work in an unheated garage?
Technically yes, since the equipment will operate, but comfort decides how often you use it. Owners who built in cold climates report adding insulation and a mini split unit as the two changes that made winter sessions actually happen. Summer heat is a separate concern for electronics and for screen fabric, so climate control matters in both directions.
Our Verdict for 2026
There is no single best golf simulator for garages, because the garage is doing the deciding, not the hardware. If your bay is a single-car space you still want to use for the car, the PHIGOLF PG2 Flex or a GoSports Range Cage with a Garmin Approach R10 is the honest answer, because both clear the bay in minutes and neither needs a builder.
If you have a two-car bay and a ceiling over 9 feet, build it as a room. Our pick is the Garmin R50 inside a blackout enclosure, or the Uneekor EYE MINI CORE if near-zero latency matters more to your training than a built-in screen. Both trade portability for accuracy, which is the correct trade in a dedicated space.
Two things decide more than any spec sheet. How much depth you can keep empty, and whether the car stays inside. Answer those two, and the rest of the build writes itself. Check current listings for every pick using the buttons above, and measure your bay before anything ships.