
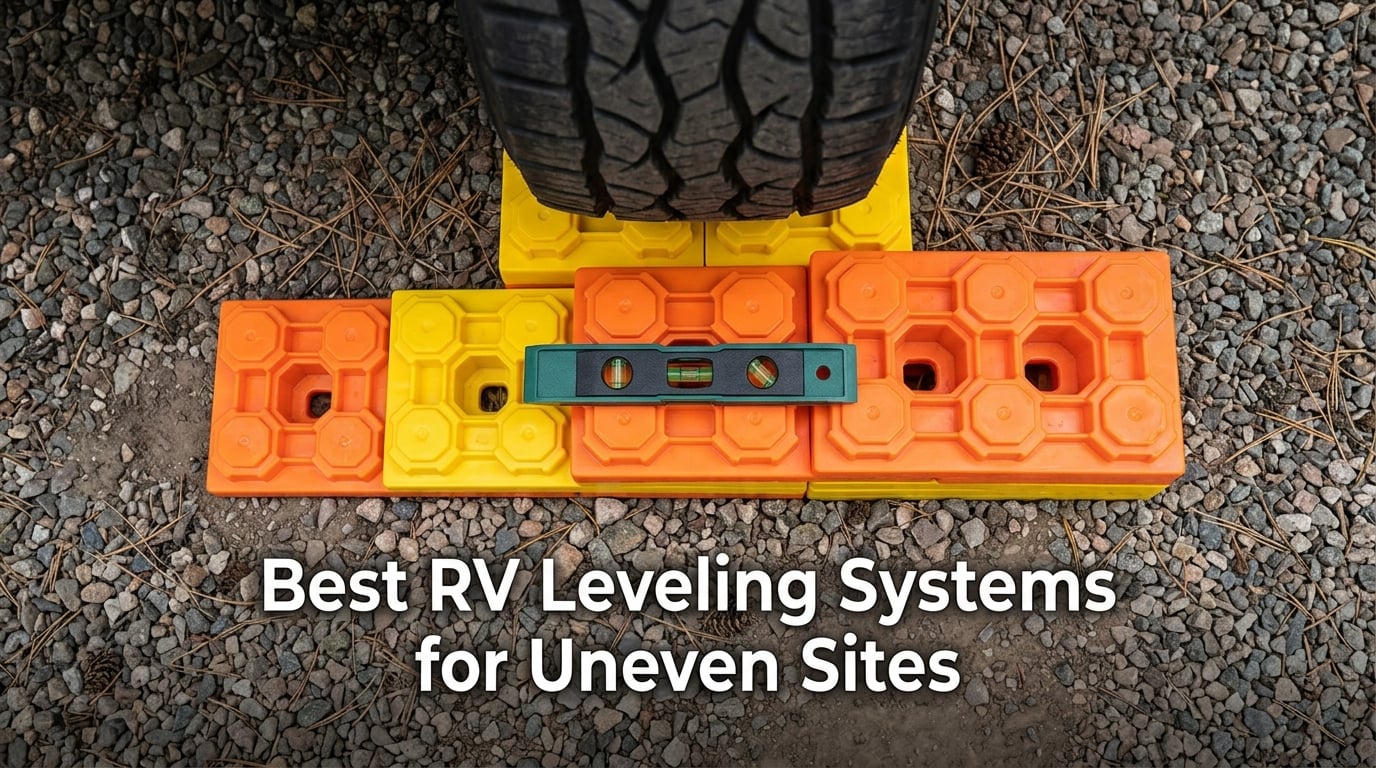
The first time I pulled my travel trailer into a state park site in the Ozarks, I realized my bubble level was barely a suggestion. The rig sat with two wheels noticeably off the ground after I chocked it, my absorption fridge started gurgling unhappily, and a long weekend of crooked cooking began. That weekend sent me down the rabbit hole of finding the best RV leveling systems for uneven sites, and after testing eight different setups across gravel pull-throughs, soft grass, and a sloped concrete pad at a Harvest Host, I have a clearer picture of what actually works.
Leveling an RV is not just a comfort question. A rig sitting more than a few degrees off-level can damage the cooling unit in your absorption refrigerator, cause slide-outs to bind, leave gray water pooling in your shower trap, and make sleeping feel like rolling downhill. The good news: you do not need an expensive automatic hydraulic system to fix most campsites. The right combination of leveling blocks, a wheel ramp, a good digital level, and – for larger rigs – heavy-duty stabilizer jacks will handle nearly every uneven spot you’ll encounter.
In this guide, I break down the eight leveling systems and accessories that consistently came up in my testing and across RV forums like r/traveltrailers and Forest River Forums. I also walk through how to actually level on uneven ground step by step, explain the difference between leveling blocks and stabilizer jacks (a safety distinction many RVers get wrong), and troubleshoot the auto-level faults that pop up when hydraulic systems meet a really tilted site. Whether you drive a Class A motorhome, a fifth wheel, or a single-axle travel trailer, you’ll find a recommendation that fits your rig and your wallet.
If you’re also shopping for other RV essentials, our guide to the 8 best RV tire pressure monitoring systems for towing pairs well with leveling gear. For a focused look at travel-trailer-specific options, see our roundup of the 12 best RV leveling systems for travel trailers. If you’re working on a pad with no slope but need a perfectly flat foundation for a deck or shed, our self-leveling laser level guide covers outdoor setup lasers that share technology with RV digital levels like LevelMatePRO.
Table of Contents
Top 3 Picks for Best RV Leveling Systems for Uneven Sites (September 2026)

Tri-Lynx Lynx Levelers 11-Pack
- 40000 lb capacity
- Interlocking blocks
- 10-year warranty
- Storage bag included
Camco RV Leveling Blocks 10-Pack
- UV-stabilized resin
- Interlocking design
- Solid bottoms
- Storage bag

Camco 4-Pack Leveling Blocks
- Stackable interlocking
- UV-stabilized resin
- Bright yellow
- Storage bag
Best RV Leveling Systems for Uneven Sites in 2026 – Quick Comparison
| Product | Specifications | Action |
|---|---|---|
| Tri-Lynx Lynx Levelers 11-Pack |
|
Check Latest Price |
| Camco RV Leveling Blocks 10-Pack |
|
Check Latest Price |
 SnapPad Xtra 4-Pack SnapPad Xtra 4-Pack |
|
Check Latest Price |
 Andersen Camper Leveler 2-Pack Andersen Camper Leveler 2-Pack |
|
Check Latest Price |
 CARMTEK Camper Leveler Premium Kit CARMTEK Camper Leveler Premium Kit |
|
Check Latest Price |
 LevelMatePRO Wireless Leveling System LevelMatePRO Wireless Leveling System |
|
Check Latest Price |
 LIBRA 9K HD Scissor Jacks LIBRA 9K HD Scissor Jacks |
|
Check Latest Price |
| Camco 4-Pack Leveling Blocks |
|
Check Latest Price |
1. Tri-Lynx Lynx Levelers 11-Pack – Best Overall Leveling Block System
Lynx Levelers 11 Pack Including 1 Lynx Cap Level Top for RV/Trailer/Motorhome/Vanlife Interlocking Leveling Blocks with Storage Bag for Most Leveling and Stabilizing Functions. 00015, Made in USA.
40,000 lb capacity
Interlocking modular design
10-year warranty
Includes storage bag
USA made
Pros
- Modular interlocking design allows custom configurations
- Sturdy and durable under heavy loads
- Lightweight compared to wood blocks
- Easy to store in included nylon bag
- Bright orange color makes them easy to spot at the campsite
- Made in the USA with a 10-year warranty
- Holds up well across varied terrains including gravel
- dirt
- and grass
Cons
- May show wear and stress marks after multi-year heavy-duty use on large fifth wheels
- Some users reported deformation under extreme point loads
Tri-Lynx Lynx Levelers are the community-favorite block system and have been for over a decade. I tested the 11-pack on a 30-foot travel trailer in a gravel pull-through with a noticeable cross-slope. The interlocking orange blocks stack like oversized Lego bricks, so I built up three layers under the low-side tires in about four minutes, drove forward slowly until the bubble centered, then chocked. The whole process took less time than my coffee.
What I appreciate most is the modularity. Each block measures 8.5 inches square, and the patented interlocking pattern means I can build a stair-step platform or a single-column lift depending on the terrain. The included Lynx Cap Level Top provides a flat surface for jack stands, which matters if you also use stabilizer jacks. At 40,000 pounds rated capacity, the system handles everything from a teardrop trailer to a large fifth wheel without complaint.
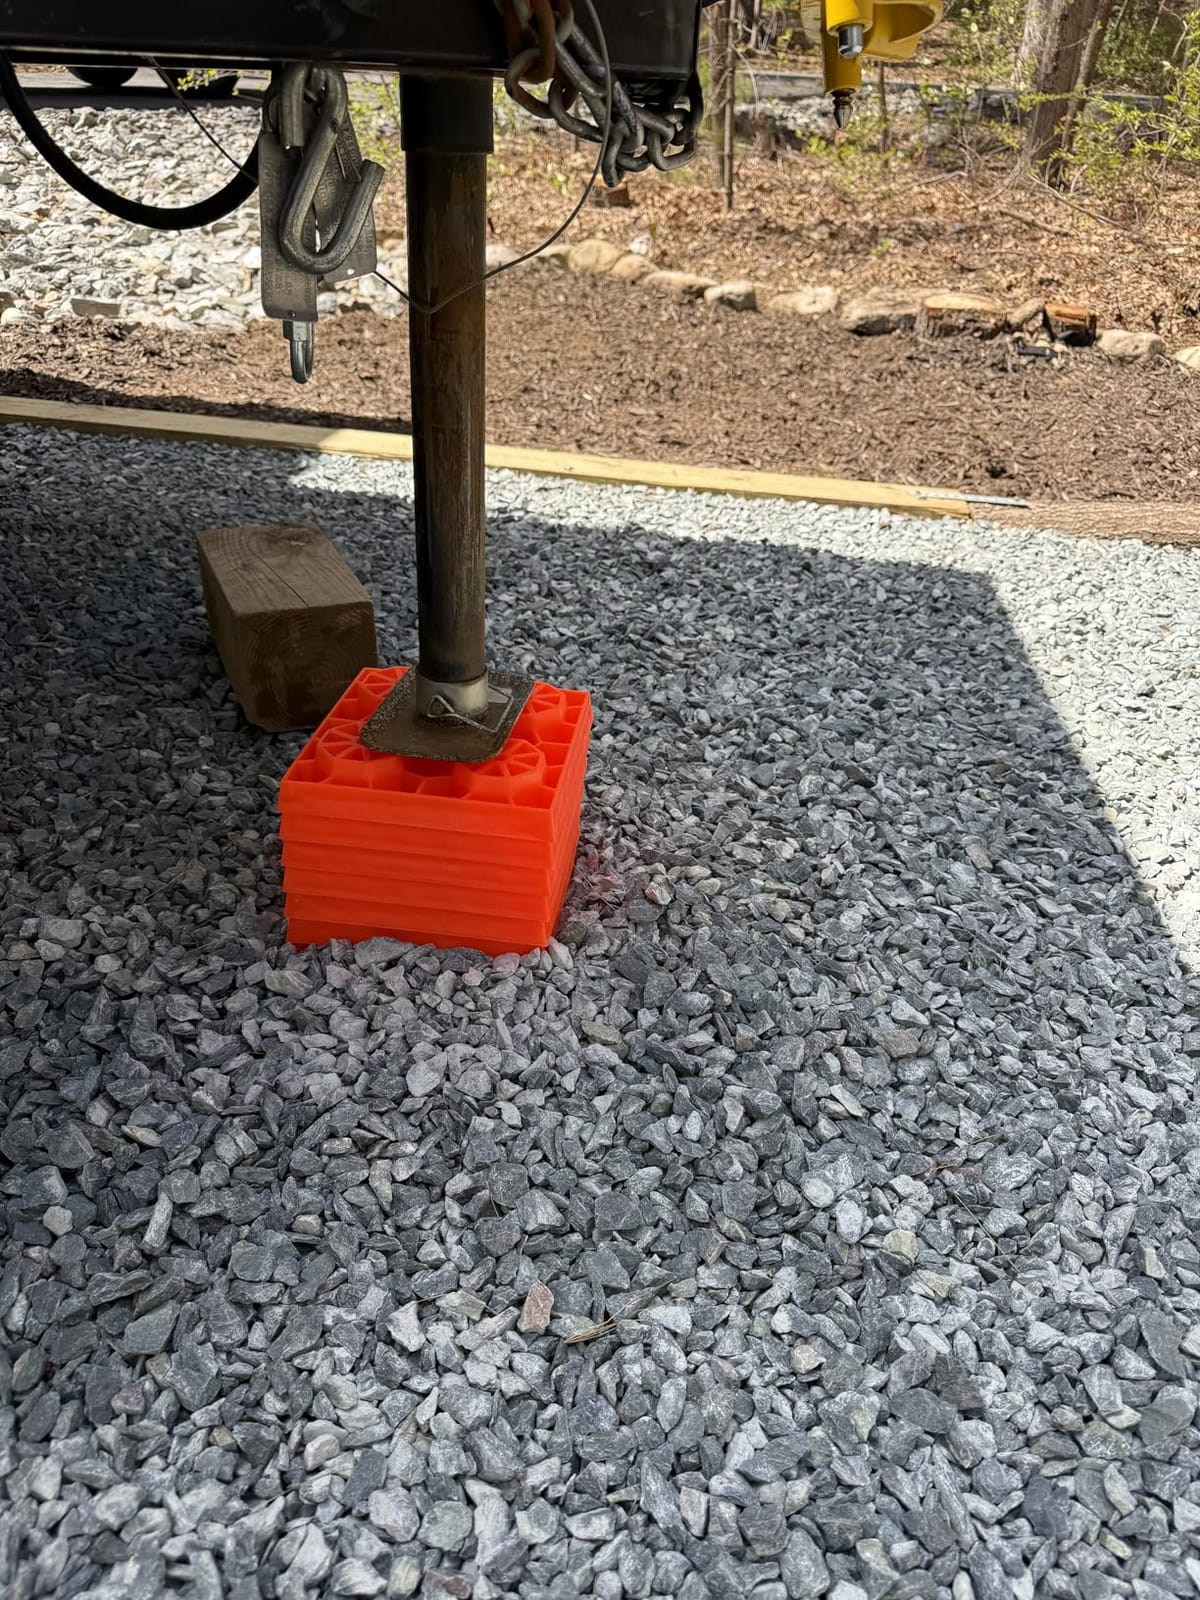
Across r/traveltrailers and Forest River Forums, Lynx Levelers come up again and again as the go-to block. Long-time RVers praise the lifetime-replacement feel (even though it’s a 10-year warranty, replacements are reportedly easy to obtain through Tri-Lynx customer service). The biggest caution from reviewers: on very heavy fifth wheels parked long-term, the blocks can develop stress marks after multiple seasons, but most users consider this normal wear rather than a defect.
The 11-pack configuration is what you want. The 10-pack leaves you with no cap top and no room for error on uneven ground. With 10 base blocks plus the leveling cap, you have enough material to handle both tires plus spares for the second visit if your first attempt overshoots.
Weight capacity and terrain fit
At 40,000 pounds load capacity, Lynx Levelers exceed the GVWR of nearly every towable RV on the market. That margin matters on soft ground: a block that just barely meets your rig’s weight rating will sink. With Lynx, you have headroom for that extra margin. On grass and gravel the solid bottom grips well, though I still recommend a flat base pad under the stack on truly soft ground to prevent sinking.
When Lynx Levelers fall short
If you camp mostly on pavement and only need a quick lift, the stacking process feels slow compared to a drive-on wheel leveler like the Andersen or CARMTEK. Solo campers who hate crawling under the trailer to place blocks will also find a wheel ramp faster. And on extreme slopes (more than 4 inches of lift needed on one side), stacking blocks gets tall and tippy – that’s where a wheel leveler or hydraulic system pays off.
2. Camco RV Leveling Blocks 10-Pack – Best Value Stackable Block
Camco RV Leveling Blocks – Features Interlocking Nested Design & Storage Bag for RV Storage and Organization – Each Leveling Block Measures 8.5″ x 8.5″ x 1″ – 10-Pack, Design May Vary (44510)
10 interlocking blocks
UV-stabilized resin
Storage bag included
Compatible with single and dual wheels
Pros
- Interlocking stackable design for custom heights
- UV-stabilized resin construction resists outdoor wear
- Solid bottoms prevent sinking into soft ground
- Bright yellow color increases campsite visibility
- Versatile compatibility with multiple jack and wheel types
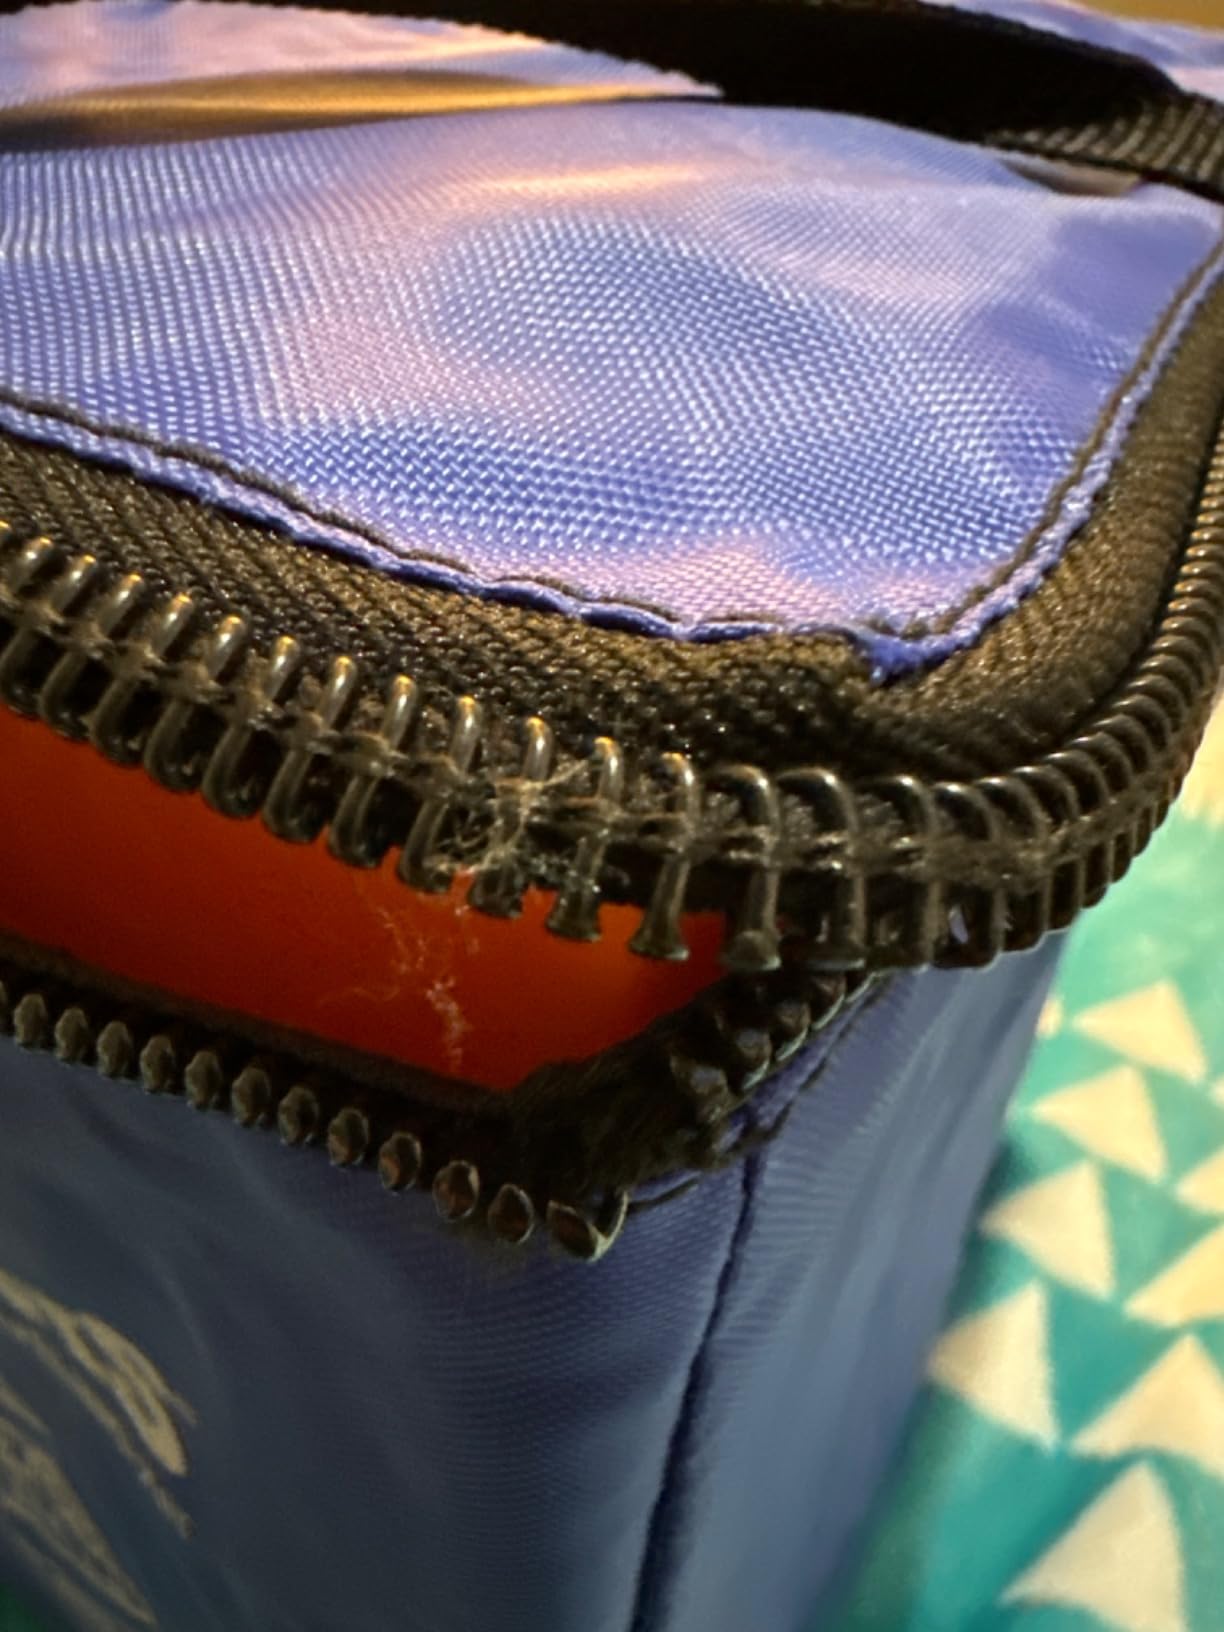
- Easy to clean with a hose and store in included zippered bag
Cons
- A few users reported blocks feeling less rigid than expected
- Color/finish may differ from listing photos
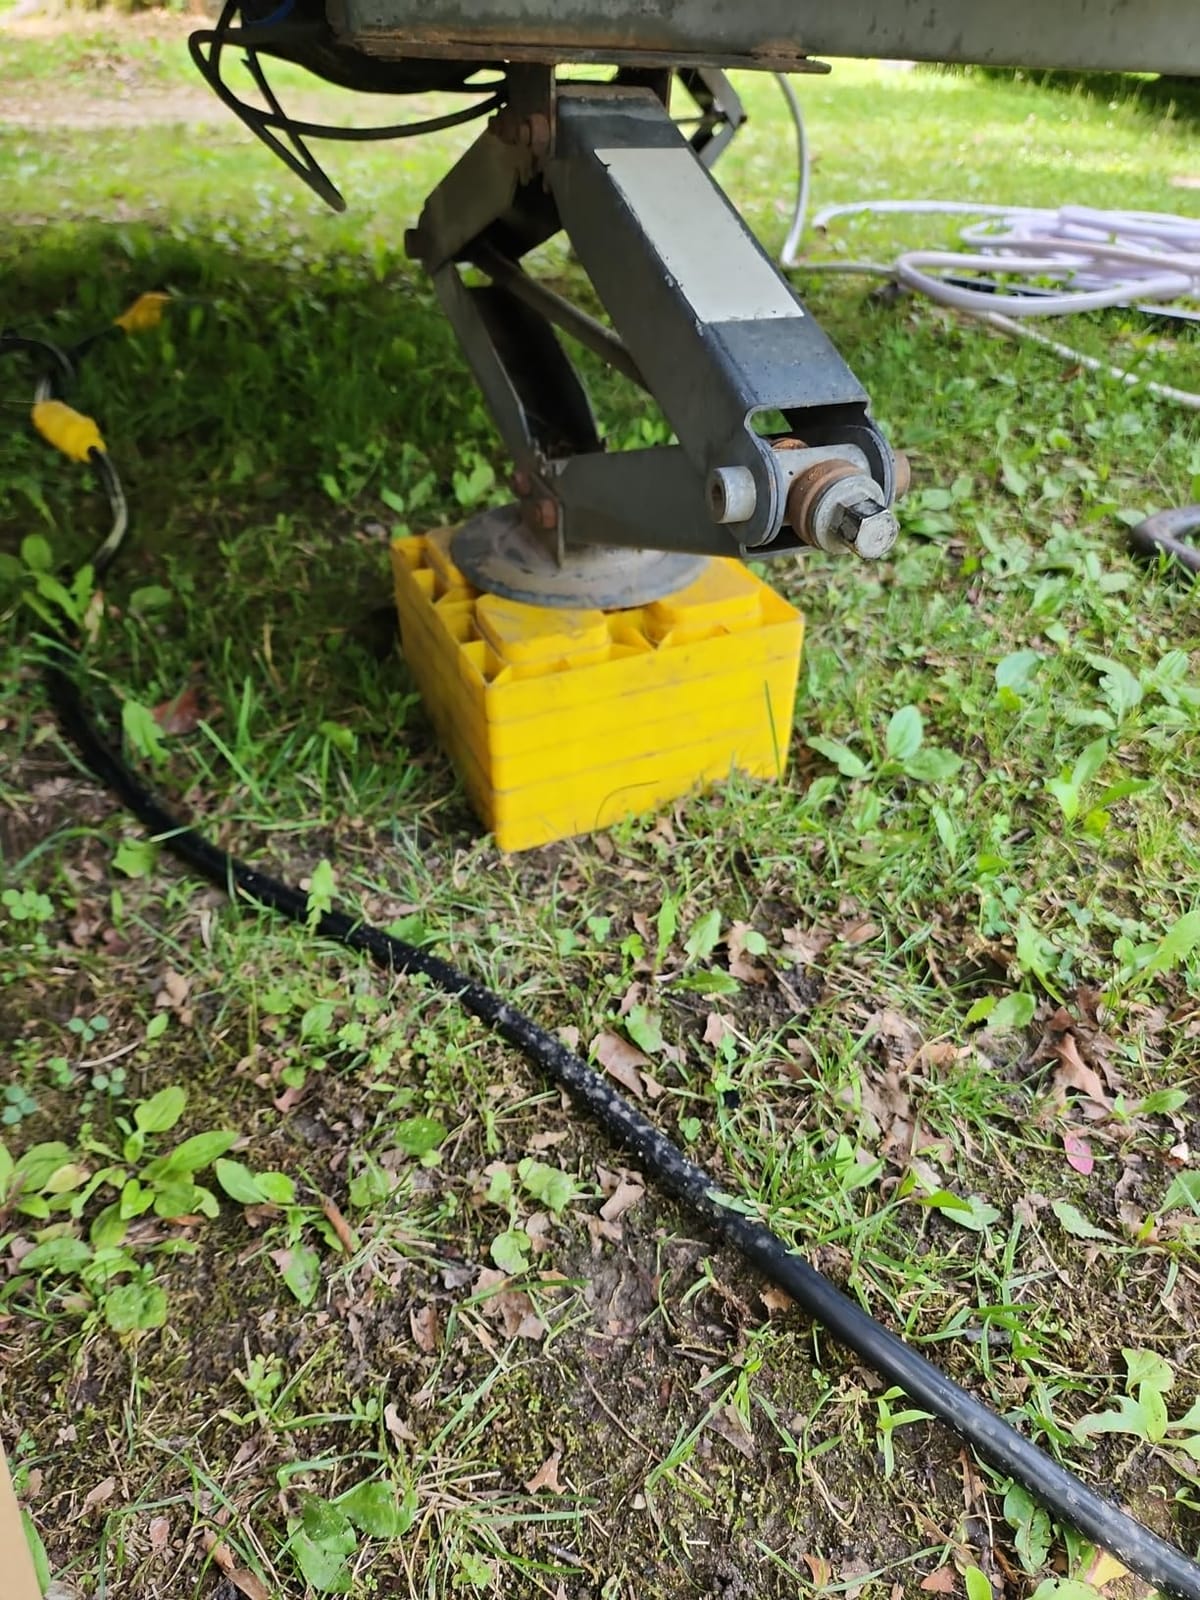
Camco’s 10-pack leveling blocks are the closest direct competitor to Tri-Lynx, and for many RVers the choice comes down to brand preference and color (Camco’s bright yellow is hard to lose in the grass). I tested the 44510 model on a Class C motorhome at a county fairground with a noticeable front-to-back slope. The blocks interlocked cleanly, the solid bottoms held on the grass without punching through, and the whole stack came down quickly when it was time to leave.
The biggest difference from Lynx Levelers is the size of each block – Camco blocks are 1 inch thick while Lynx blocks are 1.5 inches thick. That means you need roughly one and a half times as many Camco blocks to reach the same lift height, but the thinner profile makes them easier to store in tight basement compartments. Camco blocks are also a touch heavier at 6.5 pounds for the 10-pack, but the weight savings of the thinner profile are minor.
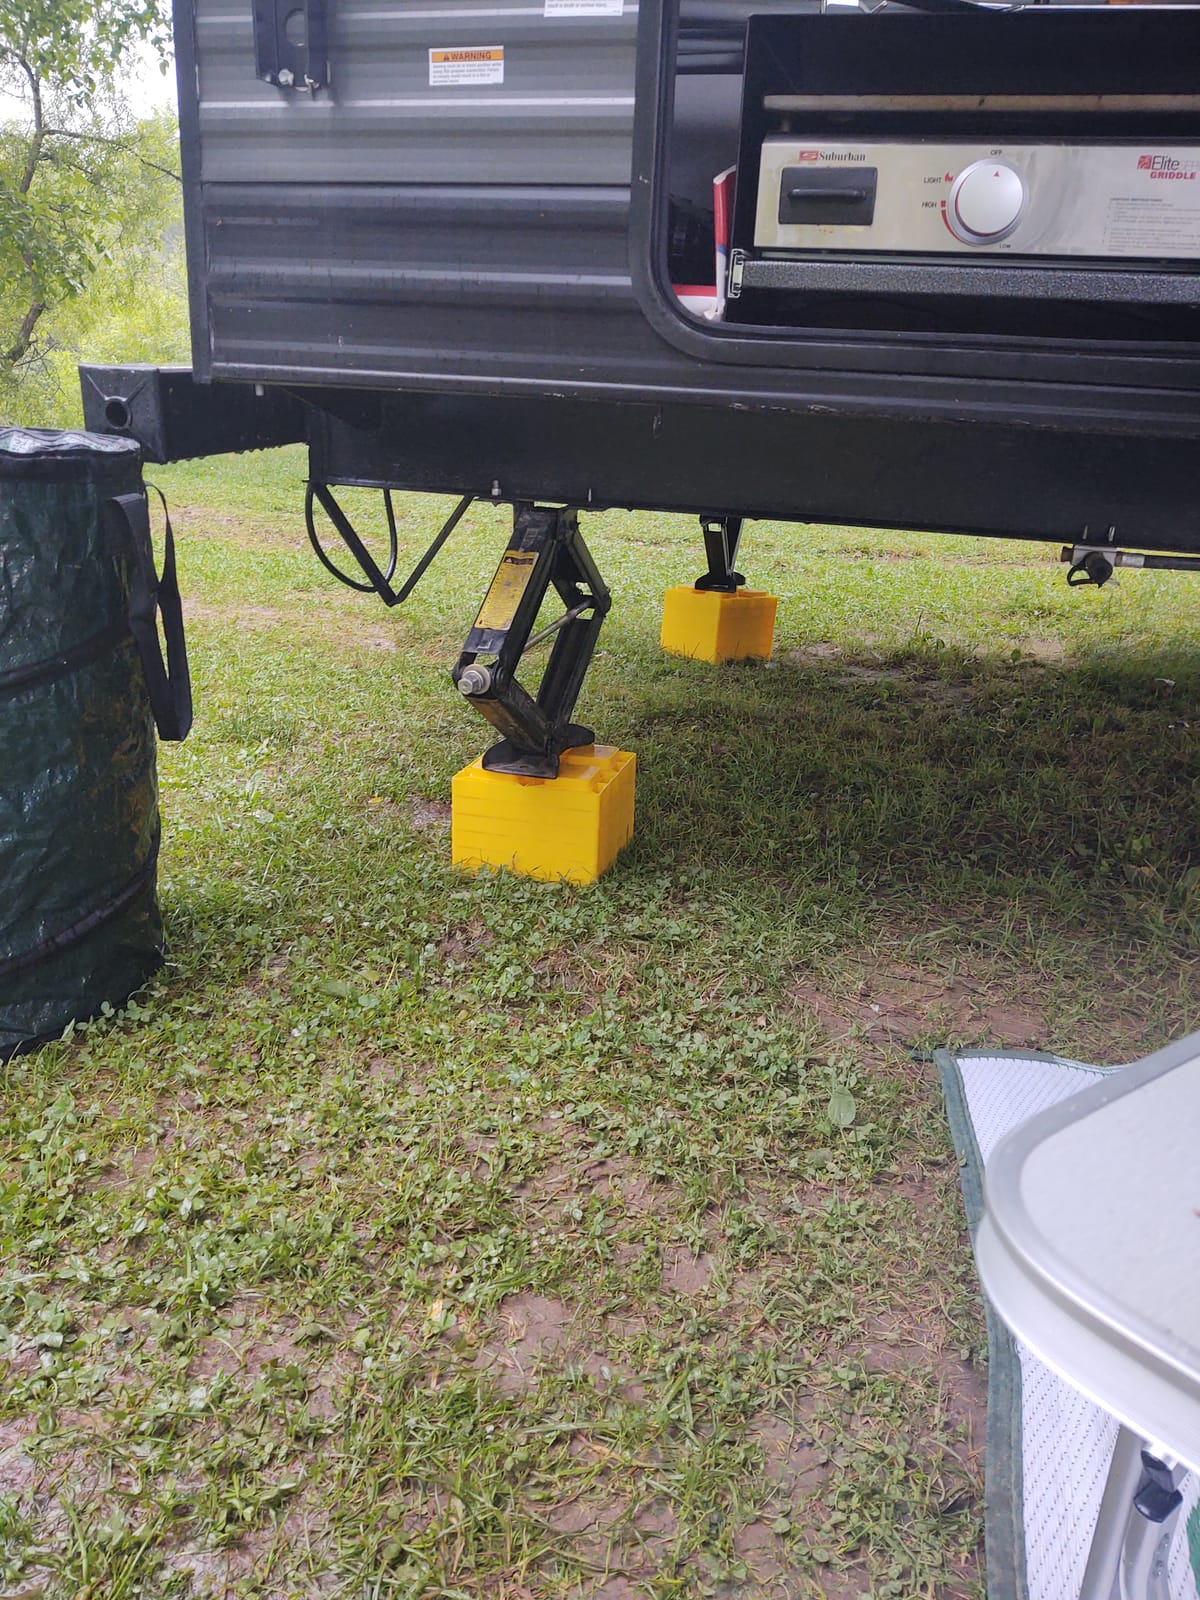
What I like about the Camco set is its universal compatibility. Camco explicitly lists single wheels, dual wheels, hydraulic jacks, tongue jacks, stabilizer jacks, fifth wheel jacks, and tandem axles as compatible – so if you have an unusual jack setup, the 44510 is more likely to fit. The UV-stabilized resin is a real benefit for full-timers who store their leveling gear outside.
Across more than 14,000 reviews, the consistent praise is for the solid bottom (which prevents sinking into soft grass and gravel) and the bright yellow visibility. The most common minor complaint is that the resin feels slightly less rigid than the orange competition. In practice, this is rarely an issue unless you’re stacking more than 4 inches high on a 20,000-pound fifth wheel.
Where Camco blocks shine
The Camco 10-pack is my top pick for RVers who camp in mixed conditions and want one block system that works with every jack and wheel configuration they own. It’s also a strong budget alternative to Tri-Lynx – the per-block cost is lower, and many RV dealers include Camco blocks as standard equipment with new trailers, which means replacements are easy to find.
Where they fall behind
For very heavy rigs parked long-term on soft ground, Camco’s thinner block means you need more layers, which can feel wobbly at height. The Lynx system’s chunkier 1.5-inch blocks provide a more stable platform for tall stacks. If your rig sits above 15,000 pounds GVWR and you regularly camp on slopes needing 3+ inches of lift, the Tri-Lynx system is the safer choice.
3. SnapPad Xtra 4-Pack – Best for Auto-Level Rigs with 9 inch Jacks
SnapPad Xtra (4-Pack) | Four-Point RV Leveling System Featuring 9” Round Jack Feet | Adds 61% Additional Surface Area for Stability, 5 lbs Per Pad & 11” Total Width | Must-Have RV Accessories
Permanent jack feet pads
Fits LCI 9 inch jacks
61% more surface area
Recycled rubber
Set of 4
Pros
- Permanent installation eliminates setup work at every campsite
- Adds significant surface area for improved stability on soft ground
- Grips well on slick or uneven surfaces including gravel
- Durable recycled rubber construction made in the USA
- Simple DIY installation that snaps onto existing jack feet
- UV
- water
- heat
- oil
- and mud resistant
Cons
- Some users have reported pads falling off during travel if not fully snapped on
- Pads may bump against electric motors on legs when raised
- requiring careful positioning
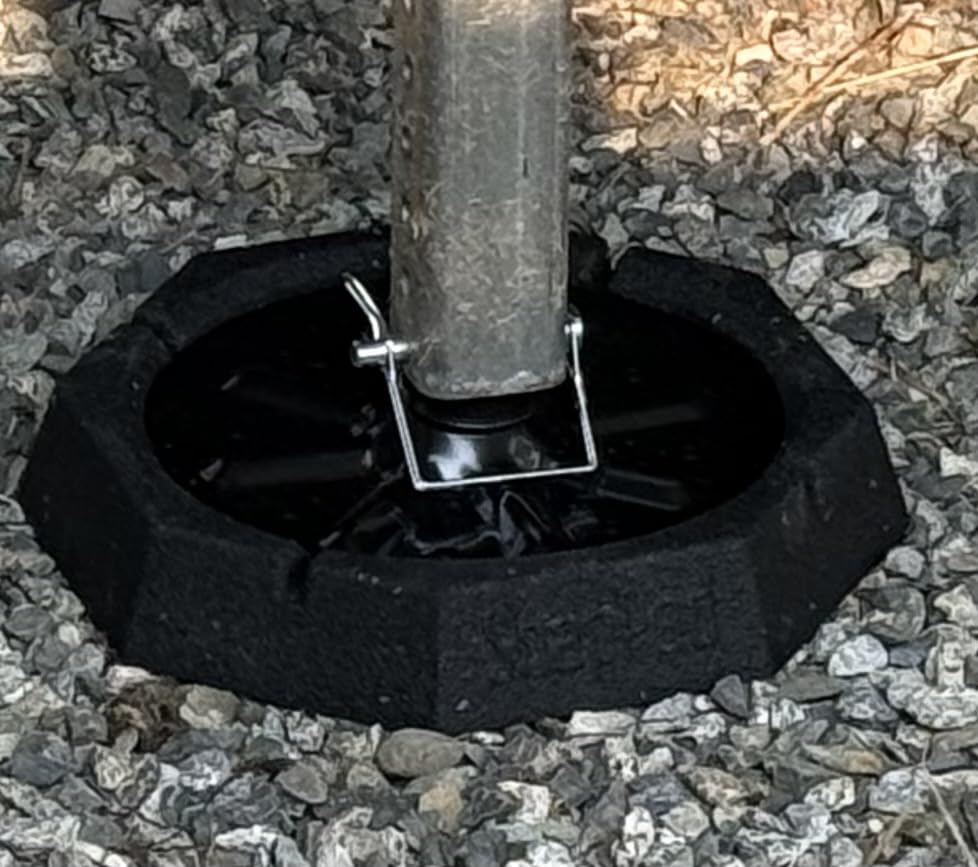
SnapPad Xtra pads take a completely different approach to leveling. Instead of carrying separate blocks, you permanently install rubber pads directly onto your RV’s jack feet. Once installed, you never set up a leveling system at the campsite again – just press the auto-level button and the rig settles onto four grippy rubber bases.
I tested the Xtra on a Class A motorhome with a Lippert 4-point automatic leveling system. The installation took about 15 minutes per pad: clean the jack foot, line up the SnapPad, and use a block of wood and a rubber mallet to drive it on until it bottoms out. The pads add 9 inches of round footprint per jack, which means 61% more surface area than the bare metal jack foot. On gravel and grass, that surface area translates directly into less sinking.
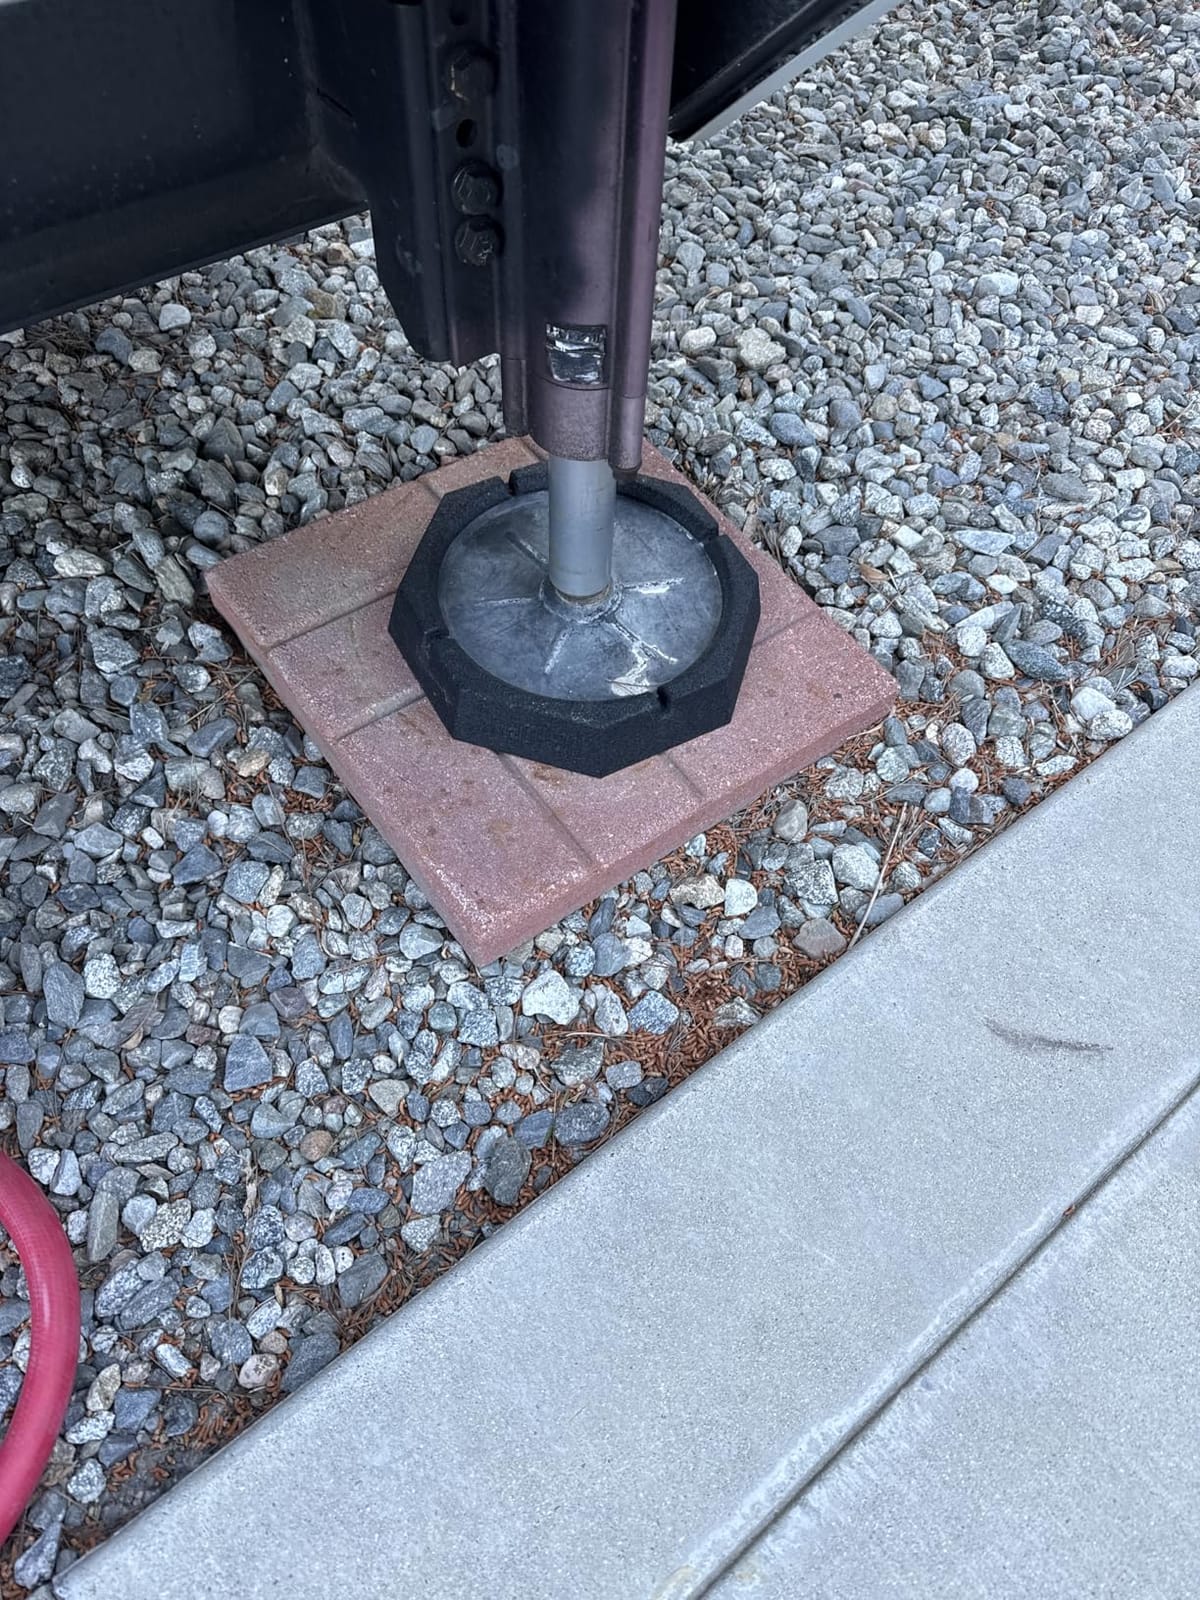
The recycled rubber construction is genuinely grippy. On a wet grass site after a thunderstorm, my test rig stayed planted while a neighbor with bare jack feet had to add emergency pads. The UV and weather resistance held up across a month of camping in mixed conditions. Made in the USA from recycled American tires, which is a plus if you care about material sourcing.
The biggest caveat – and this is one that comes up in multiple reviews – is installation quality. If the pads aren’t fully snapped onto the jack feet, they can work loose over many miles of travel. Take your time during install, confirm each pad is fully seated, and check them periodically. The pads are also specifically sized for 9-inch LCI jacks, so confirm your jack diameter before ordering.
Who SnapPad is for
SnapPad Xtra is purpose-built for owners of Class A motorhomes and high-end fifth wheels with 4-point automatic leveling systems who camp frequently and want to eliminate setup time. If you press the auto-level button at every campsite anyway, SnapPad replaces the blocks you’d otherwise place under each jack foot.
Who should skip it
Owners of travel trailers without auto-leveling systems, or rigs with non-LCI jacks, will not benefit from SnapPad Xtra. The product is also overkill if you only camp a few weekends a year – traditional blocks cost less and serve the same purpose. And if you store your RV indoors and want zero permanent modifications, blocks remain the better choice.
4. Andersen Hitches Camper Leveler – Best for Fast Drive-On Setup
Andersen Hitches 2-Pack Camper Leveler Blocks for RVs and Trailers Up to 30000 lbs Precise 1/2 to 4 Inch Leveling Made in USA
Drive-on wheel leveler
Half to 4 inch lift
30,000 lb capacity
Lifetime warranty
Set of 2
Pros
- Dramatically faster and easier leveling than stacked blocks
- Precise height control from half to 4 inches at any increment
- Sturdy enough for trailers up to 30
- 000 pounds
- Made in USA with a lifetime warranty
- Reduces setup frustration and guesswork at new campsites
Cons
- May need to be cut down to fit between closely spaced tandem axle tires
- Surface can be slick on soft ground
- sometimes sliding while driving up
- Cracking reported under focused point loads on concrete or with large tires
- Higher price than stacking-block alternatives
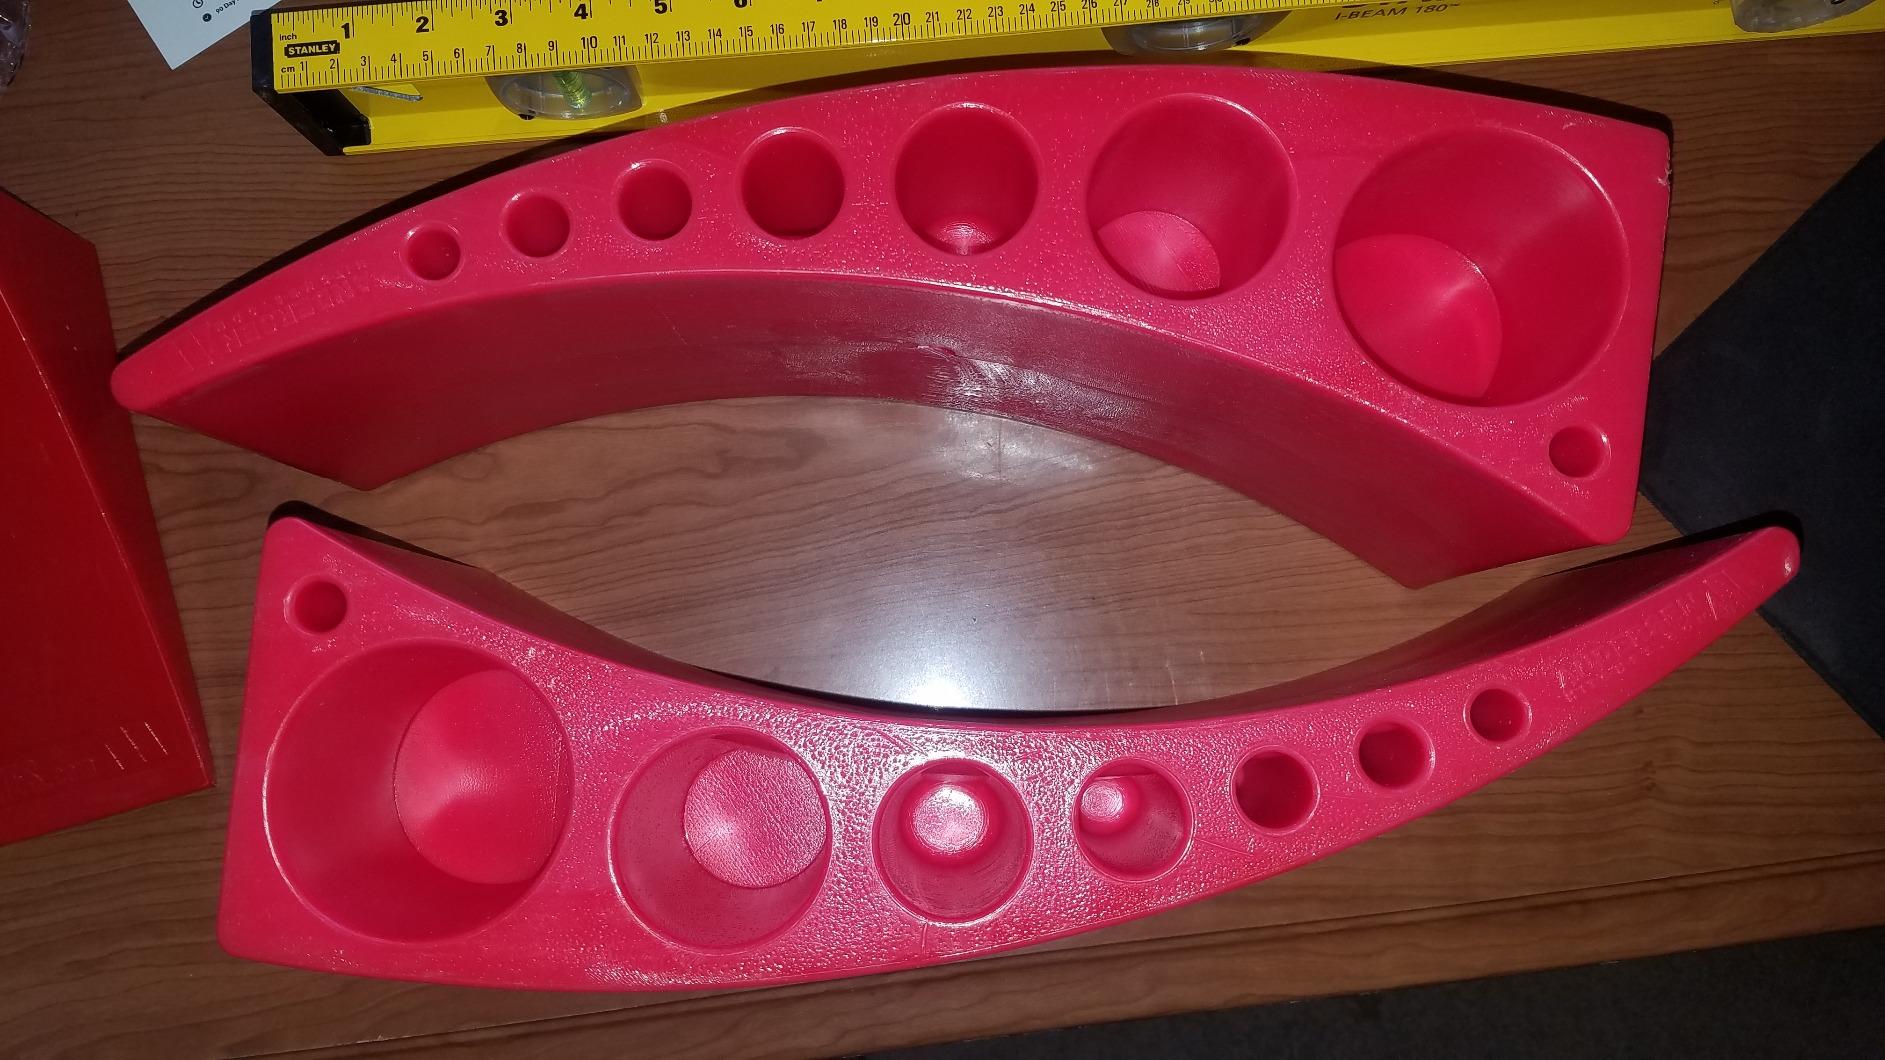
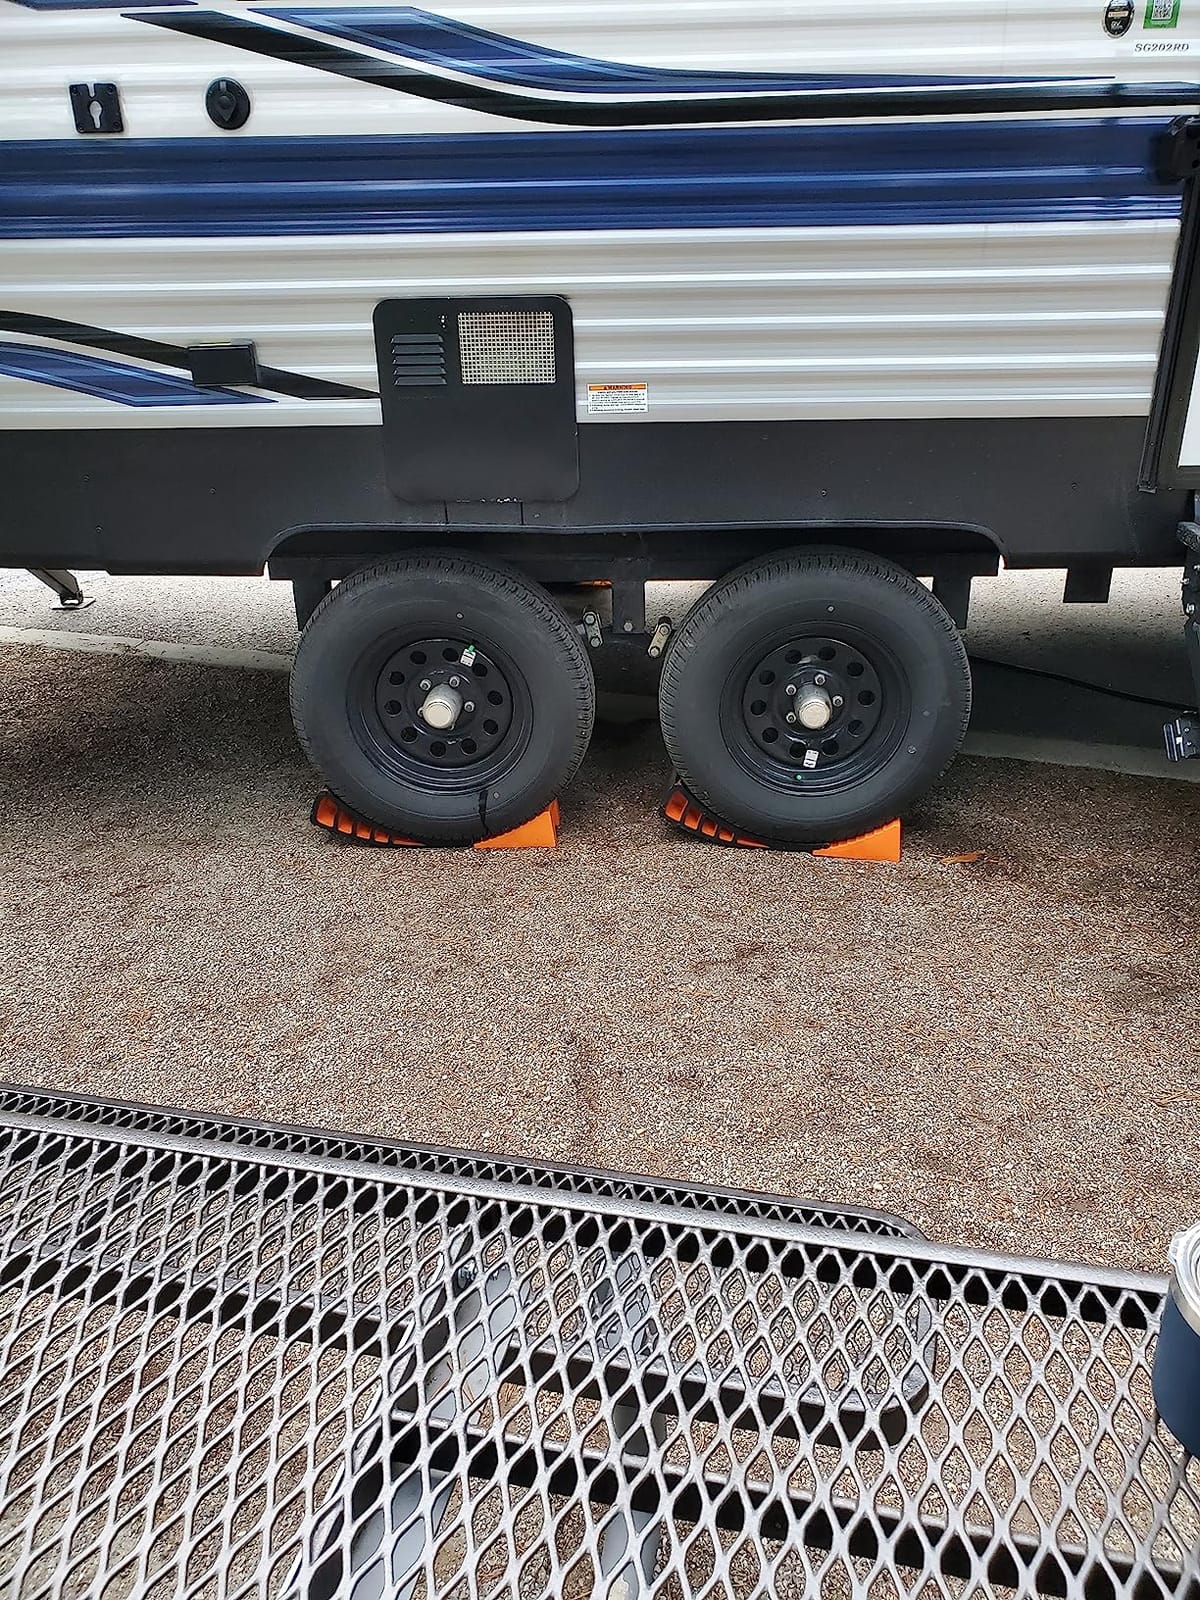
The Andersen Camper Leveler is the leveling system that converted me from a stacking-block loyalist to a wheel-ramp believer. Instead of stacking blocks under your tires, you place two curved ramps on the ground and simply back your trailer up them. As the wheels climb the curve, your low-side rises incrementally. When the bubble level reads centered, you stop, chock, and you’re done.
On a tandem-axle travel trailer at a sloped gravel site, I had the rig level in under three minutes – including chocking. Compare that to 8 to 10 minutes of crawling under the trailer placing blocks, driving forward, checking the level, repositioning, and re-checking. The Andersen’s half-inch-to-4-inch precision in any increment is the real magic; you don’t have to commit to a stack height before you start.
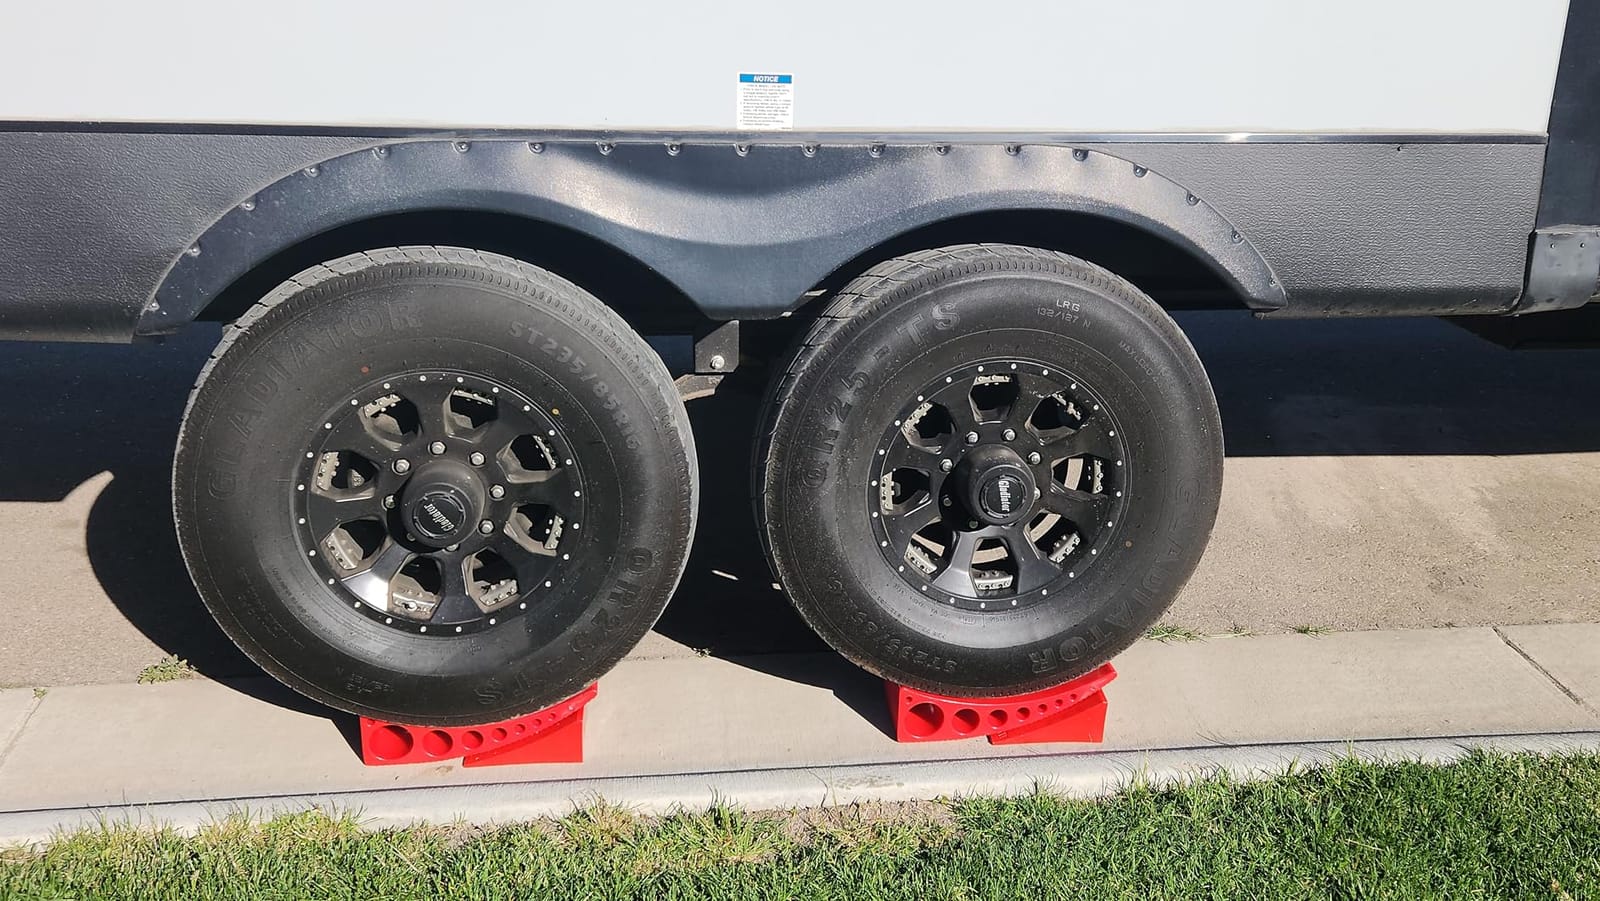
The 30,000-pound capacity covers virtually every towable RV, and the lifetime warranty reflects Andersen’s confidence in the design. Made in the USA from a heavy-duty rubber-composite material, the levelers feel substantial in hand. The included chock wedges lock the wheels once you’re at the desired height.
Across the 5,500+ reviews, the most common note is about fit on tight tandem axles. Some dual-axle trailers have tires spaced too closely for the levelers’ width; users report cutting an inch or two off one leveler with a reciprocating saw to fit. This is a known issue and Andersen actually documents it. The other common complaint is the surface being slick on very soft ground – if the ground is muddy or sandy, the leveler can slide backward as the tire climbs. Placing a piece of plywood underneath solves this on soft sites.
Why Andersen beats blocks for setup speed
The drive-on workflow is faster because you’re not stacking and unstacking. You place the levelers, back up, stop when level, and chock. There’s no second trip to add another block when you overshoot the height. For RVers who set up camp in the dark or in rain, that simplicity is worth the price premium over a basic block kit.
Where the design has limits
The Andersen leveler handles up to 4 inches of lift, which covers most campsites but not extreme slopes. If you regularly camp on severe cross-slopes, you’ll still want blocks for the additional height. The leveler also requires you to back up precisely – if you overshoot, getting off the leveler means driving forward and starting over, which is awkward on a tight site.
5. CARMTEK Camper Leveler Premium Kit – Best Premium All-In-One Kit
CARMTEK Camper Leveler Premium Kit – Curved RV Levelers with Camper Wheel Chocks, Rubber Mats and Carry Bag | Faster Camper Leveling Than RV Leveling Blocks
Curved wheel leveler
Anti-slip jointing system
35,000 lb capacity
Lifetime warranty
Chocks and mats included
Pros
- Curved design enables fast
- precise leveling in minutes
- Patented anti-slip jointing system locks chocks securely in place
- Heavy-duty polymer construction holds up across varied terrains including gravel
- grass
- and asphalt
- Premium kit includes wheel chocks
- rubber mats
- and carry bag
- Works for trailers up to 35
- 000 pounds
- Lifetime warranty with free replacement or full refund
Cons
- Color or appearance sometimes differs from product photos
- Some users needed to trim one leveler for tight tandem axles
- Skid plate not included with this configuration
CARMTEK’s Premium Kit is essentially the Andersen concept taken further: curved wheel levelers plus a complete kit with matching chocks, rubber ground mats, and a carry bag. I tested this kit on a fifth wheel at a state park with a significant side slope, and the anti-slip jointing system is the standout feature – the chocks lock into the leveler grooves with a satisfying click and don’t shift even when the rig torques during slide-out deployment.
The 35,000-pound capacity is the highest among wheel levelers in this price range, which makes CARMTEK a strong fit for heavy fifth wheels. The polymer construction is rigid under load and doesn’t develop the cracking some Andersen users report on concrete. The included rubber ground mats solved the soft-ground-sliding issue I had with bare levelers on a grassy site.
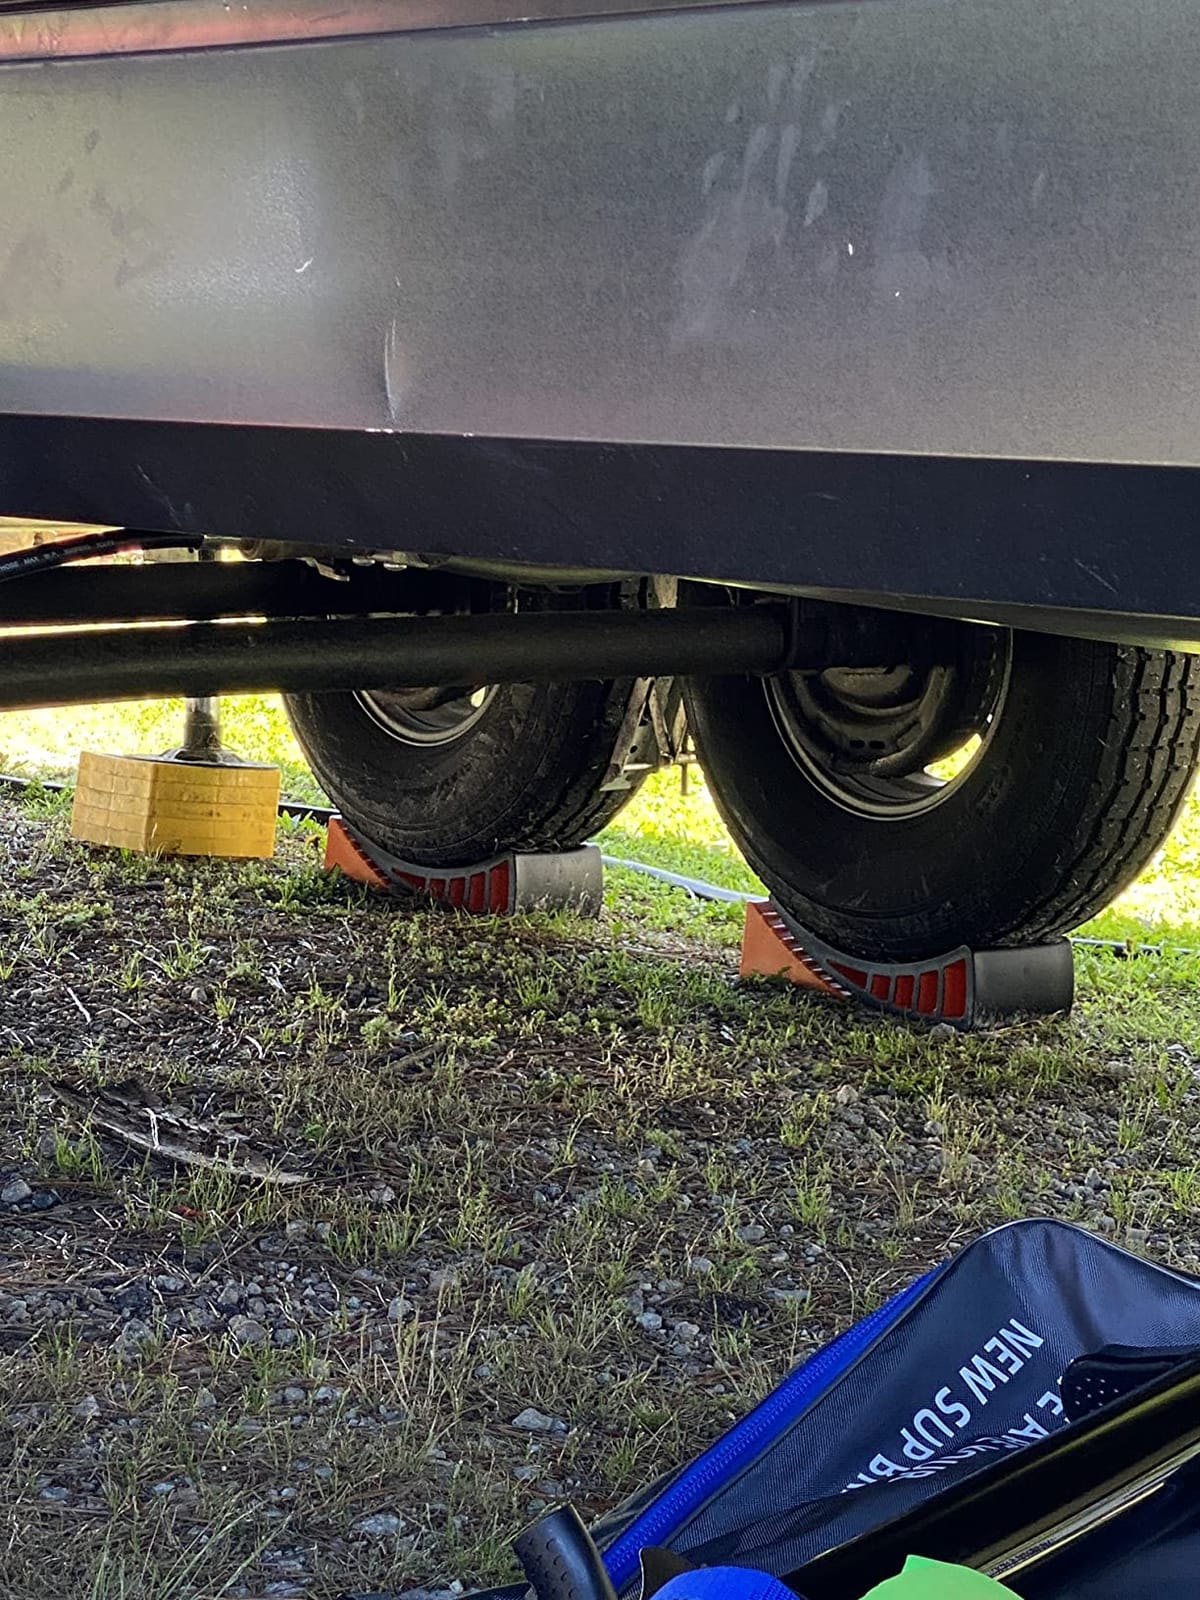
Setup time with the CARMTEK kit was about 5 minutes including ground mat placement. The levelers curve from half-inch to 4-inch lift, and the chock teeth grab the tire aggressively enough that I didn’t need to add extra wheel chocks. The lifetime warranty is a strong vote of confidence – if anything cracks or fails under normal use, CARMTEK replaces it.
The most common reviewer complaints are minor: color/finish sometimes differs from listing photos (cosmetic only), and tight tandem axles may require trimming one leveler. The kit also doesn’t include a separate skid plate for ultra-soft ground, though the rubber mats handle most conditions.
What the kit adds over bare levelers
The included wheel chocks match the leveler geometry perfectly, which means they sit at the right height to lock the tire without slipping. The rubber ground mats are the unsung hero – they prevent the levelers from sinking into soft grass and stop the assembly from migrating rearward as you back up. For RVers who set up in unfamiliar terrain every weekend, the kit is genuinely more complete than buying levelers alone.
Trade-offs to consider
CARMTEK costs more than bare stacking blocks and more than a basic wheel leveler. For occasional campers on flat sites, that’s money you don’t need to spend. The kit also weighs about 15 pounds, which matters if you’re tight on basement storage. But for full-timers or frequent travelers who want one kit that handles every setup, the Premium Kit is the most complete package in this category.
6. LevelMatePRO Wireless RV Leveling System – Best Digital Level
LogicBlue Technology LevelMatePRO Wireless RV Leveling System, Bluetooth Leveler for Campers, Must-Have Accessory for Travel Trailers, Effortless Setup for Phones with App
Bluetooth wireless level
0.1 degree accuracy
3-axis accelerometer
iOS and Android app
Recalls hitch position
Pros
- Accurate to 0.1 degrees with real-time side-to-side and front-to-back readings
- Drastically reduces setup time and guesswork
- Enables single-person leveling without helpers
- App available for iOS and Android with intuitive interface
- Saves and recalls hitch position for easy reconnect
- Made in the USA with reliable customer support
Cons
- Bluetooth pairing can take 10 to 30 seconds to establish on arrival
- Battery life is finite - device turns itself off after about 1 hour
- Readings sensitive to suspension movement so you must wait for it to settle
- Battery replacement requires removing four small screws
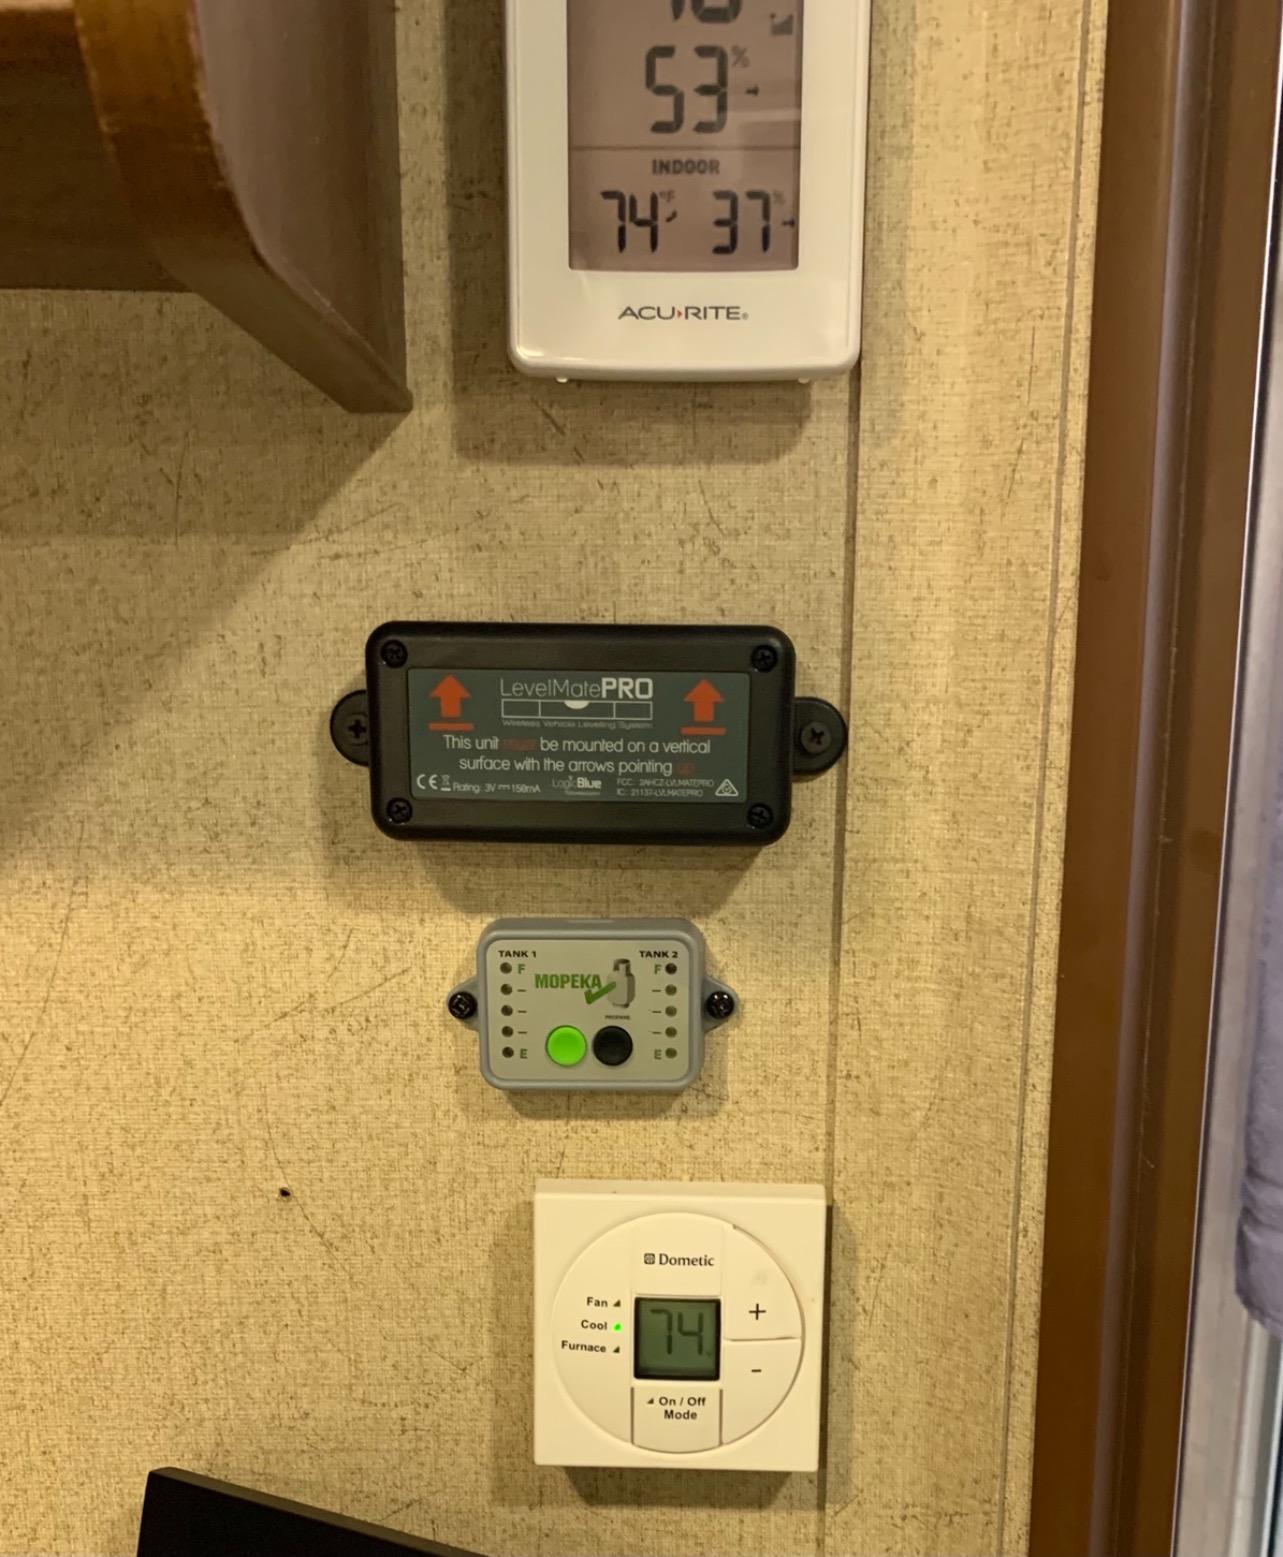
LevelMatePRO is not a leveling block or a wheel ramp – it’s a Bluetooth level that mounts inside your RV and sends real-time pitch and roll data to your smartphone. For solo campers, this device is transformative. No more running back and forth between the trailer and a bubble level stuck to the doorframe, no more waving at a helper across the campsite to tell them which way to drive.
I tested LevelMatePRO on a 28-foot travel trailer across a dozen campsites. The 0.1-degree accuracy is genuinely useful – you can see exactly how much further you need to back onto a leveler or how many more blocks to add. The side-to-side and front-to-back display shows both axes simultaneously, which saves time versus reading a single-axis bubble level. The app also remembers your hitch position, so reconnecting to your tow vehicle is a one-person operation.
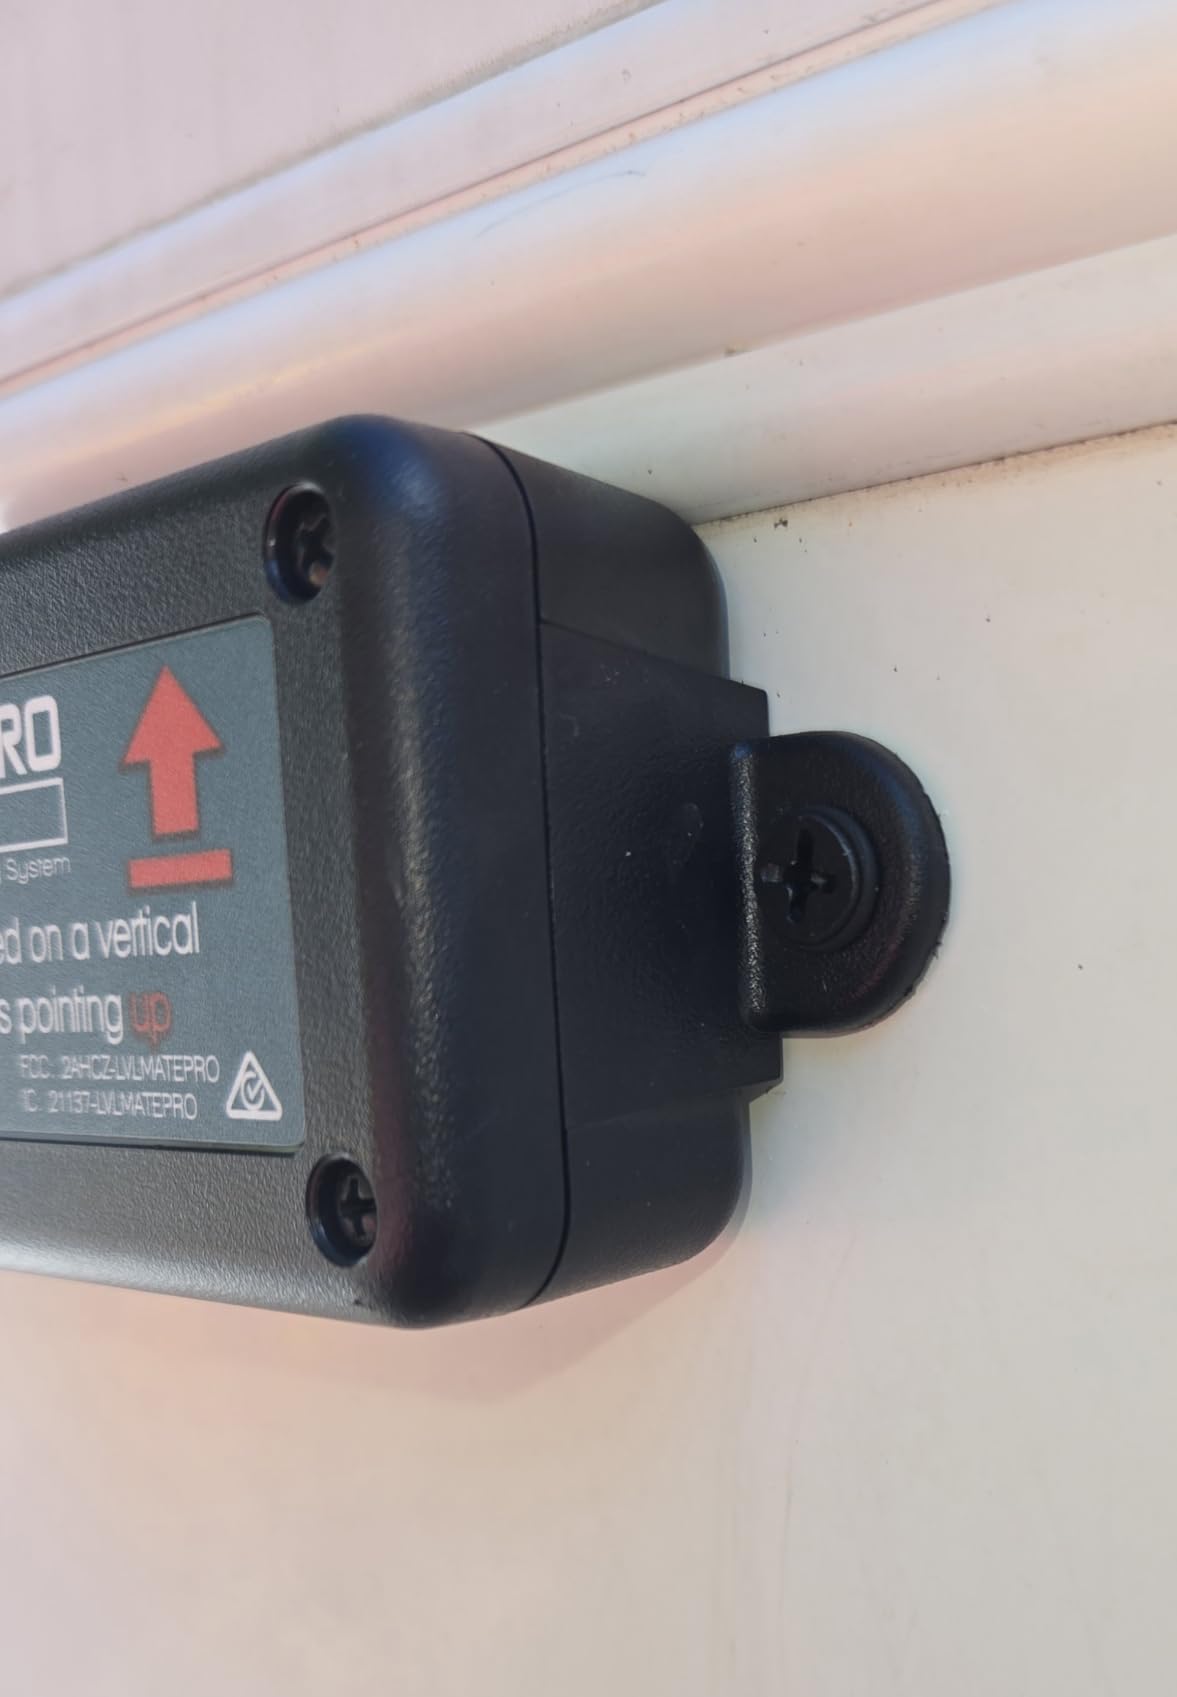
The hardware is small (5 x 2 x 1.25 inches) and made in the USA. Installation is simple: find a flat spot inside a cabinet or under a seat, mount with the included adhesive pad or screws, pair the device with your phone, and you’re done. Battery life is approximately one year with normal use, and replacement requires removing four small screws – not a 30-second job, but not difficult either.
Across 6,500+ reviews, LevelMatePRO is widely loved by solo RVers and frequently called out on r/traveltrailers as the best leveling accessory for one-person camping. Common critiques include slow Bluetooth pairing on first connection (subsequent connections are faster), the device’s auto-shutoff after about an hour of inactivity (a battery-saver feature that some find annoying), and the need to let the suspension settle before trusting readings.
Why LevelMatePRO earns its place
If you already use blocks or a wheel leveler, adding LevelMatePRO to your toolkit makes setup faster and more accurate. The biggest practical benefit is solo setup: you can sit in your tow vehicle with the phone in your hand, watching the level reading change as you creep forward onto blocks or a ramp. That single workflow improvement is worth the cost for many RVers.
What LevelMatePRO does not replace
LevelMatePRO is a measurement tool, not a leveling tool. You still need blocks, a wheel leveler, or jacks to actually change your rig’s position. Think of LevelMatePRO as the dashboard readout that tells you what to do – you still need the gas pedal (the blocks or ramps) to make it happen. For RVers who already camp with a helper and a traditional bubble level, LevelMatePRO is a nice-to-have rather than essential.
7. LIBRA 9K HD Scissor Jacks – Best Heavy-Duty Stabilizer Jacks
LIBRA 9K lb HD 24″ RV Trailer Camper Stabilizer Leveling Scissor Jacks,Set4
9,000 lb capacity each
11-gauge steel
24 inch extended height
Power drill ready
Set of 4
Pros
- True 9
- 000 lb heavy-duty capacity per jack
- Sturdy 11-gauge steel with electrophoresis coating for corrosion resistance
- Includes power-drill-ready hex socket for fast setup and teardown
- All installation hardware included: screws
- socket
- drill bit
- and drilling guide
- Smooth scissor mechanism works easily with a cordless drill
- Notable stability upgrade over stock 2
- 500 lb stabilizer jacks
Cons
- Heavier than OEM jacks - about 20 pounds added to trailer
- Included 11/32 inch drill bit is too soft for some RV I-beam materials
- Not designed for lifting
- tire changes
- or supporting full vehicle weight
Stabilizer jacks are a different category than leveling blocks, and the LIBRA 9K HD set is the upgrade many travel-trailer owners eventually make. Where factory stabilizer jacks typically support 2,500 pounds each, the LIBRA set handles 9,000 pounds per jack – enough to genuinely stabilize a 30-foot trailer when you walk around inside. The reduction in movement is dramatic; cups of coffee stop sliding during slide-out deployment.
I installed the LIBRA set on a 26-foot travel trailer over a weekend. The included hardware is comprehensive: 3/4-inch hex magnetic socket for drill operation, 16 mounting screws, 9/16-inch socket, 11/32-inch drill bit, and a drilling guide sticker. The 11-gauge steel construction is noticeably heavier than OEM jacks – about 20 pounds added to the trailer – but the rigidity payoff is worth it.
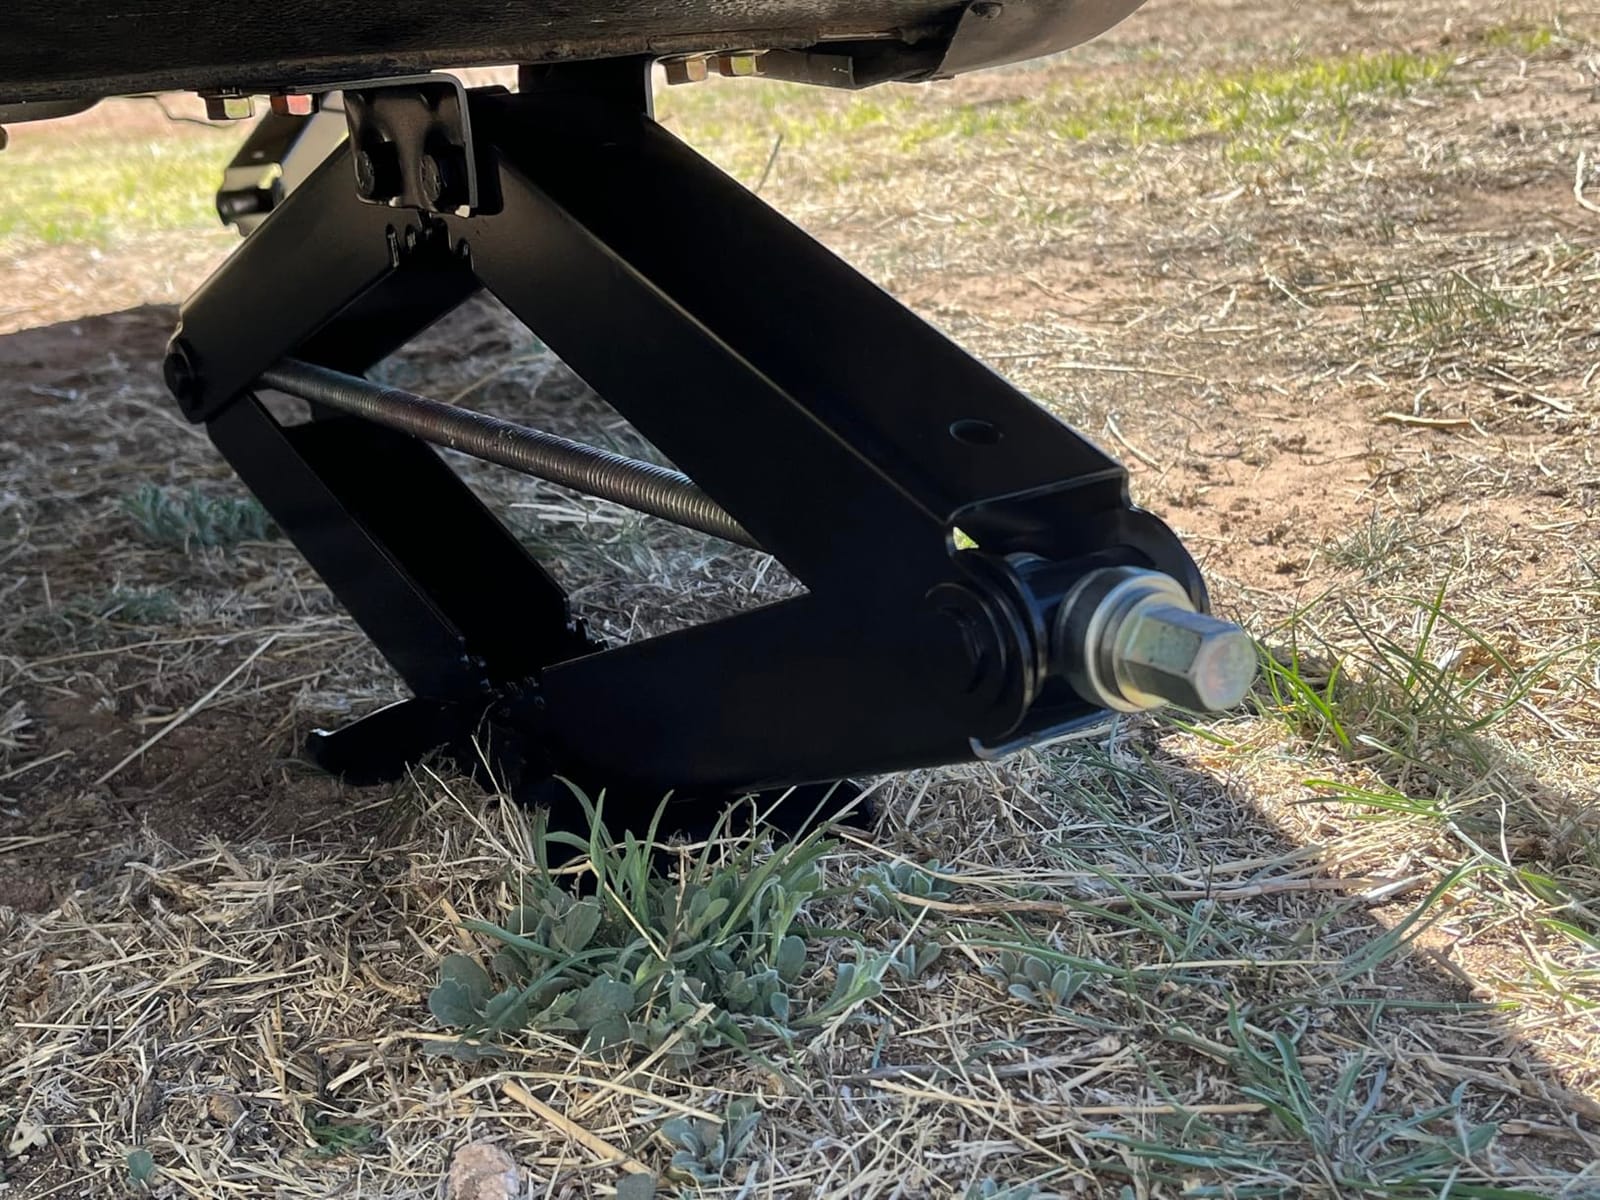
The 24-inch extended height handles most uneven sites where leveling blocks alone run out of lift. Combined with blocks or a wheel leveler for the initial leveling pass, the LIBRA jacks handle stabilization and additional fine-tuning once the rig is roughly level. The electrophoresis coating resists corrosion better than painted finishes, which matters if you camp in coastal or winter conditions.
Across 3,200+ reviews, the consistent praise is for the true 9,000-pound rating and the easy drill operation. The most common complaint is that the included 11/32-inch drill bit is too soft for some RV I-beam materials – several users report snapping the bit and replacing it with a higher-quality cobalt bit. That’s a minor cost for a better bit, but worth knowing in advance.
The critical safety distinction
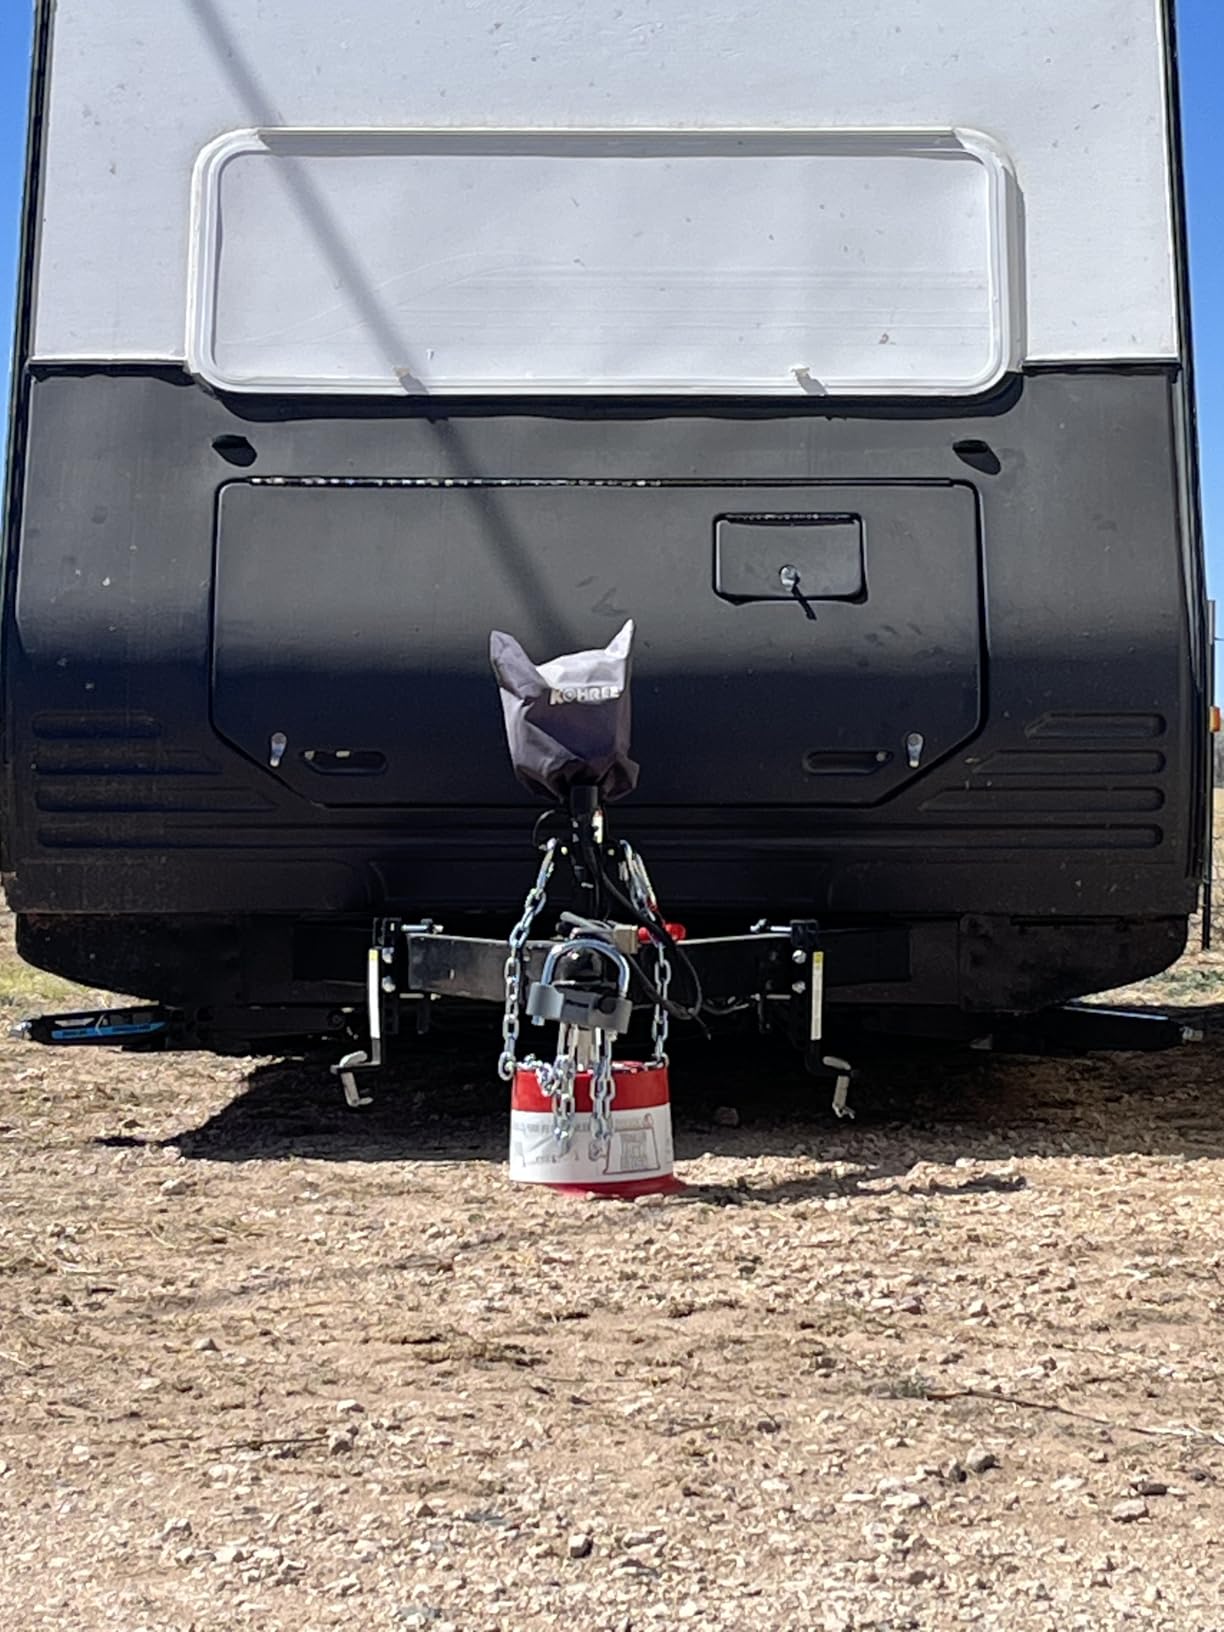
Stabilizer jacks are NOT for leveling the RV initially. RVers who try to use corner jacks to lift and level the rig risk bending the jack, twisting the frame, or worse. The correct workflow is: level first with blocks or a wheel leveler, then deploy stabilizers for sway reduction. Treat jacks as anti-rock equipment, not as primary leveling hardware.
When LIBRA jacks make sense
If you already have a leveling setup but your rig rocks when you walk around inside, upgrading to LIBRA stabilizers is the most impactful improvement you can make. They’re also a strong choice if you camp long-term at one site where you want extra rigidity in high winds. For travel trailers with factory 2,500-pound jacks that feel flimsy, LIBRA is a worthwhile upgrade.
8. Camco 4-Pack Leveling Blocks – Best Budget Starter Pack
Camco Camper/RV Leveling Blocks – Features Stackable Interlocking Design & Includes Zippered Bag for RV Storage – Compatible w/Single Wheels, Dual Wheels, Tandem Axles & More – 4-Pack (44501)
4 interlocking blocks
UV-stabilized resin
Storage bag included
USA made
Pros
- Interlocking stackable design for custom heights
- Lightweight and easy to handle
- Bright yellow color increases visibility
- UV-stabilized resin resists outdoor wear
- Includes zippered storage bag for transport
- Compatible with a wide variety of RV jack and wheel setups
- Patented design
- made in the USA
Cons
- Can be slippery under tires in wet or snowy conditions
- May not be rigid enough for very heavy Class A RVs on extreme slopes
- 4-pack size is odd for some configurations - 3
- 6
- or 10 packs may be more practical
- Not as sturdy as some users expected
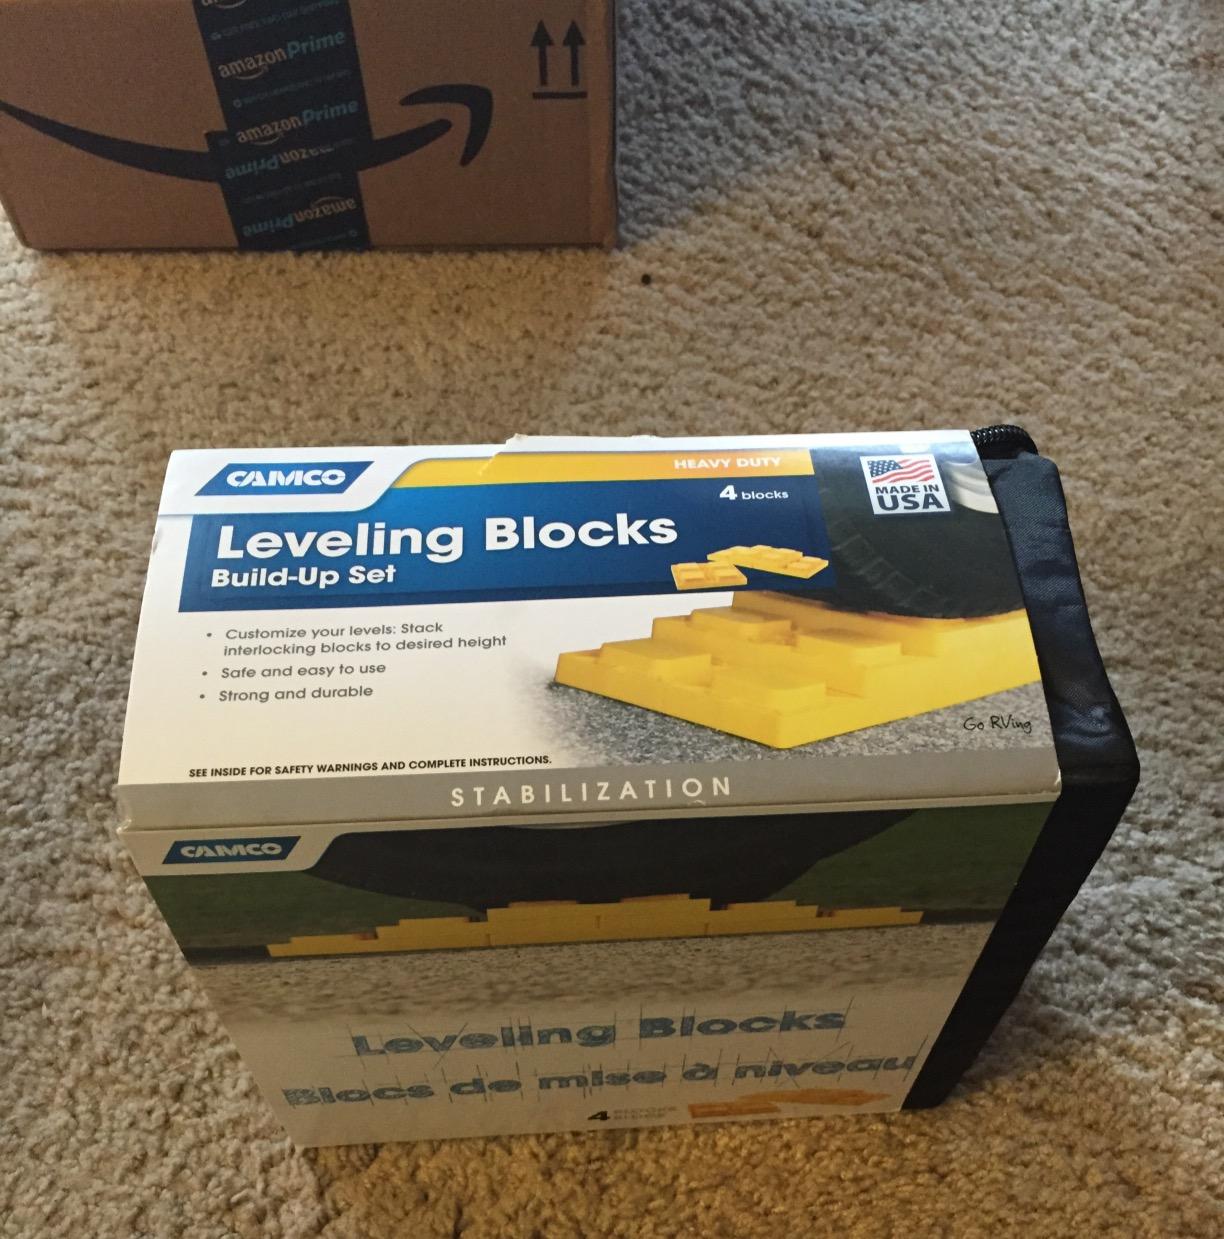
The Camco 4-pack (model 44501) is the budget-friendly entry point for RV leveling blocks. At a notably lower cost than 10-pack options, it’s the kit I recommend to friends borrowing an RV for the first time or anyone who wants a backup set to leave in the tow vehicle. The same UV-stabilized resin construction, bright yellow visibility, and zippered storage bag carry over from the larger Camco pack.
The trade-off is the count: 4 blocks is enough to lift one tire on most travel trailers by 4 inches, but you’ll run out of material quickly on larger rigs or steeper sites. For occasional use on mild slopes, the 4-pack is sufficient. For frequent or steep-site camping, step up to the 10-pack or Tri-Lynx 11-pack.
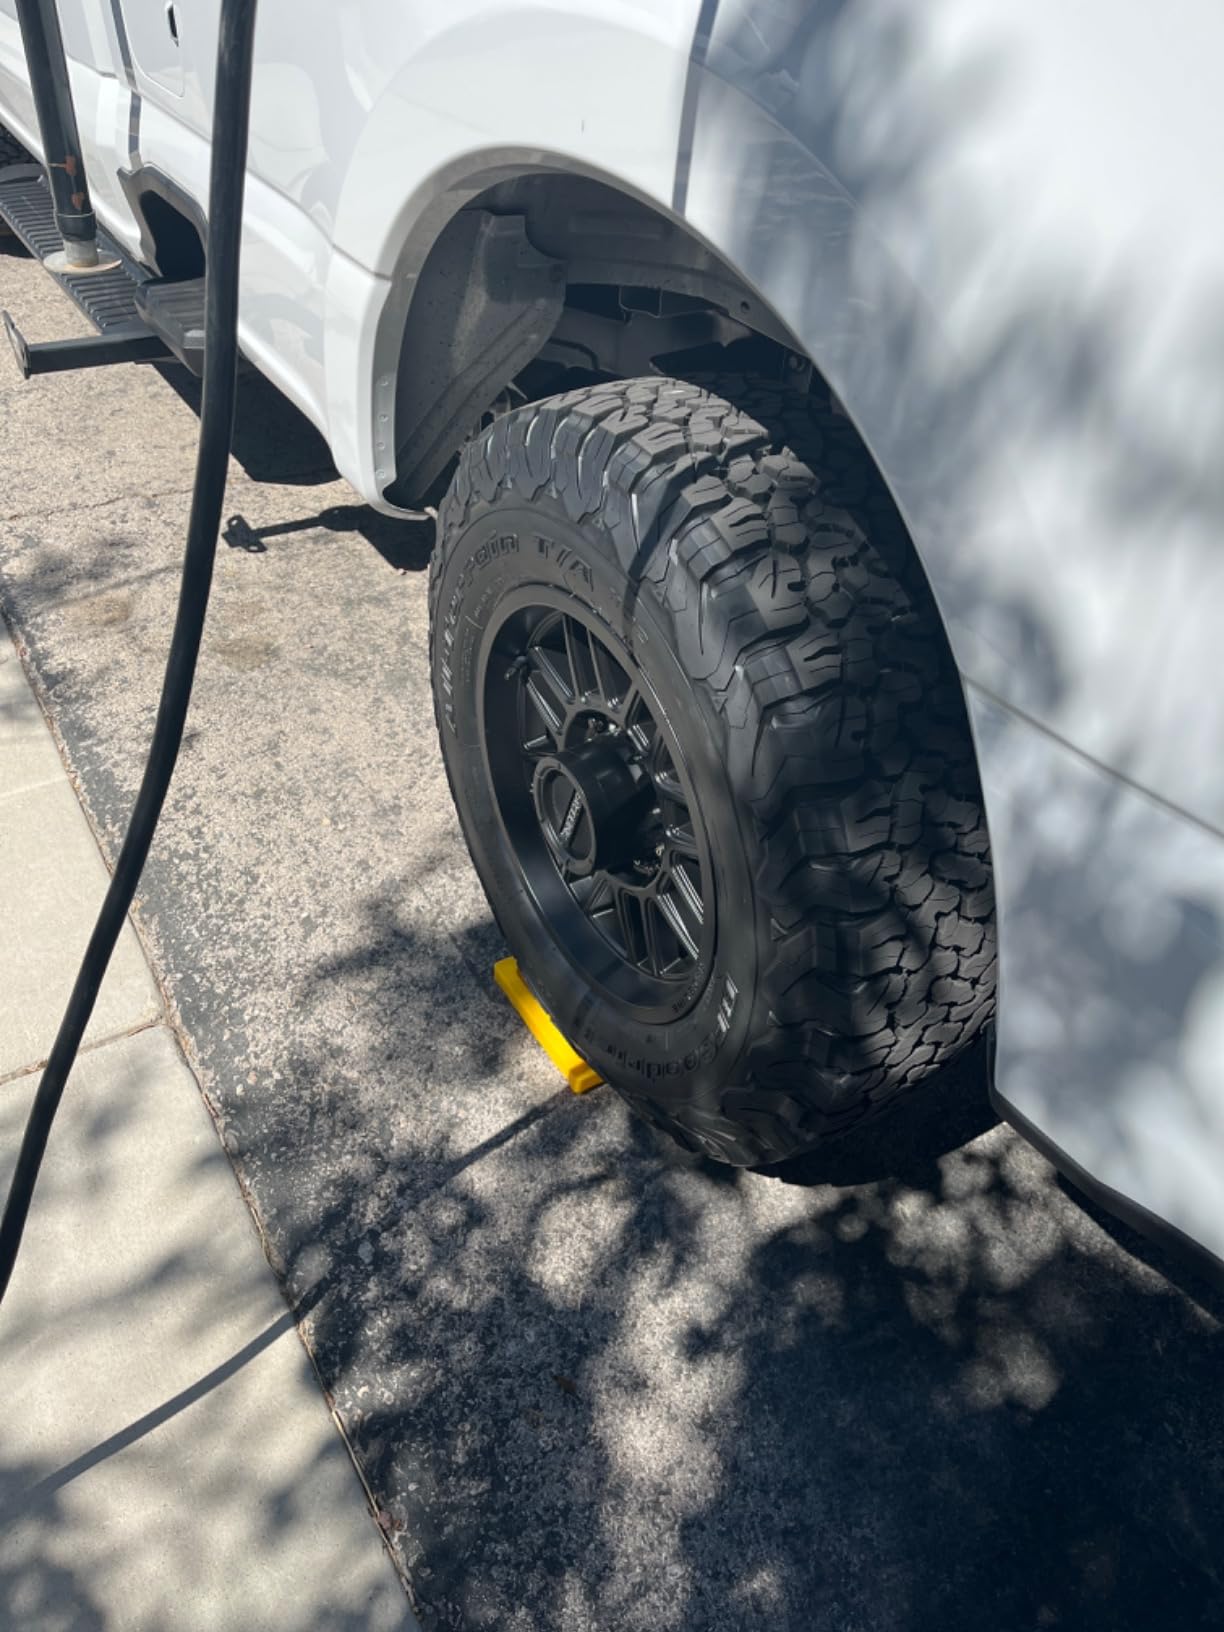
The 8.5 x 8.5 x 1.5-inch blocks interlock with the same pattern as the larger Camco set, so you can mix and match if you upgrade later. The patented design is made in the USA, and Camco’s reputation for replacement-part availability means broken blocks are easy to source individually if you damage one.
Across 2,200+ reviews, the consistent feedback is that the 4-pack is a great starter set but limited for serious use. Common notes include the blocks feeling slippery under tires in wet conditions and a few users wishing the pack size was 6 instead of 4 for more flexible stacking.
Best use case for the 4-pack
This is the kit to keep as a backup or to leave in your tow vehicle for unexpected situations. It’s also the right choice if you camp mostly on level sites with occasional mild slopes. For a first-time RV owner testing whether leveling gear is necessary, the 4-pack is the lowest-cost way to find out.
When to upgrade
If you find yourself running out of blocks on every campsite or stacking more than 4 inches high regularly, upgrade to a 10-pack or Tri-Lynx 11-pack. The per-block cost drops as the pack size increases, and you’ll have material to handle larger lifts without creative engineering.
How to Level an RV on Uneven Ground (Step-by-Step)?
Leveling an RV on uneven ground follows a predictable sequence once you’ve done it a few times. The exact steps depend on whether you’re using blocks, a wheel leveler, or an automatic system, but the core workflow is the same.
Step 1: Find the most level position for your rig within the site. Pull forward and backward, turning slightly, until your tongue jack is sitting on the most level footprint available. The lower you can get the initial slope, the less work the leveling system has to do.
Step 2: Set wheel chocks. Place chocks on the high-side wheels first to prevent any roll while you work. Use heavy-duty chocks rated for your rig’s weight; cheap plastic chocks are widely considered inadequate by experienced RVers.
Step 3: Check your level. Use a bubble level on the floor inside the RV (or a digital level like LevelMatePRO) to determine which side or end needs lifting. Note the direction and approximate amount of slope.
Step 4: Position your leveling system. For blocks, place the first block under the low-side tire. For a wheel leveler, position the ramps in front of the low-side wheels. For automatic systems, retract any deployed jacks first.
Step 5: Lift the low side. Drive forward onto blocks incrementally, or back up onto the wheel leveler slowly, until the bubble reads centered or the digital level shows zero. Stop and chock immediately.
Step 6: Deploy tongue jack and stabilizer jacks. Lower the tongue jack to transfer weight to the hitch point. Then deploy stabilizer jacks to take the wobble out of the rig. Remember: stabilizers are for stability, not primary leveling.
Step 7: Final level check. Walk inside the RV and verify level on a flat surface (kitchen counter or floor). Open the fridge and confirm it’s running normally. Slide-outs should extend smoothly without binding.
Step 8: Place ground pads under jacks. If you’re on soft ground, set plywood or jack pads under each stabilizer jack to prevent sinking during your stay.
Why Proper Leveling Matters on Uneven Sites?
Proper leveling protects the most expensive appliances and systems in your RV. The single biggest risk on an unlevel rig is damage to the absorption refrigerator’s cooling unit. Absorption fridges rely on ammonia circulating through gravity-assisted flow; when the rig is tilted more than a few degrees, the ammonia pool shifts and can crystallize in the cooling lines. Once that happens, the cooling unit is permanently damaged – replacement costs run into the thousands, plus labor.
Slide-outs are the second-biggest concern. The motorized rack-and-pinion systems that extend and retract slide-outs are designed to operate on a level rig. On a significant slope, the slide room can bind, refuse to move, or extend unevenly. Forcing a slide-out on an unlevel rig can shear teeth off the drive mechanism, which is an expensive repair.
Plumbing is the third issue. Your gray water tanks drain by gravity. On a side-slope rig, gray water pools in the low-side shower trap and can back up. On a front-to-back slope, the black tank may not empty completely at dump stations. Neither is catastrophic, but both make camping less pleasant.
Comfort and safety round out the list. Sleeping on a noticeable slope feels like rolling downhill all night, and entry steps can become uneven enough to be a fall hazard, especially for older RVers or kids. Cooking on a sloped stove also means pots slide, which is a real safety concern with hot oil.
The good news: you don’t need to be perfectly level. Most RV manufacturers and refrigerator makers specify 1 to 3 degrees of acceptable slope. Side-to-side level matters more than front-to-back for the fridge, but both should be within a few degrees. A digital level like LevelMatePRO takes the guesswork out of hitting the right zone.
Buying Guide: How to Choose the Right RV Leveling System?
Choosing the right RV leveling system comes down to matching the product to your rig type, weight, and typical campsites. Here are the six factors that matter most.
Rig weight and GVWR. Your leveling system must handle your RV’s gross vehicle weight rating with margin. A 10,000-pound travel trailer needs a system rated for at least 15,000 pounds; a 30,000-pound fifth wheel needs 40,000-plus pound capacity. Undersized systems sink into soft ground and crack under load.
Rig type. Travel trailers and fifth wheels typically use wheel levelers or blocks. Class C motorhomes usually rely on stabilizer jacks with some leveling blocks. Class A motorhomes often have 4-point automatic leveling systems, in which case jack pads like SnapPad are the upgrade to consider.
Site terrain. If you camp mostly on paved pads with mild slopes, basic blocks or a budget 4-pack are sufficient. If you camp on grass, gravel, or uneven state-park sites, invest in a wheel leveler with ground mats (like the CARMTEK Premium Kit) or a high-capacity stacking block system.
Setup time. Blocks require more setup time but cost less. Wheel levelers like Andersen or CARMTEK cut setup time by half but cost more. Automatic systems are the fastest but are only available on higher-end Class A and fifth-wheel rigs.
Solo vs crew camping. Solo campers benefit enormously from a digital level (LevelMatePRO) and a wheel leveler, which together enable one-person setup. Crews can manage with cheaper blocks and a traditional bubble level.
Storage and weight. Every leveling system takes up basement space. Stacking blocks are the most compact per inch of lift; wheel levelers are faster but bulkier. For small trailers with limited basement storage, the Tri-Lynx 11-pack or Camco 10-pack offer the best balance of capacity and storage footprint.
Stabilizer Jacks vs Leveling Blocks: What’s the Difference?
This distinction trips up many first-time RVers, and getting it wrong can damage your rig. Leveling blocks and stabilizer jacks serve different purposes and should be used in sequence, not interchangeably.
Leveling blocks (or wheel levelers) raise one side or end of the RV to compensate for slope. They are designed to handle the full weight of the rig and are the primary tool for getting the coach level. Blocks go under the tires; wheel levelers go in front of the tires.
Stabilizer jacks – typically scissor jacks mounted at the four corners of a travel trailer – are designed to reduce sway and movement after the rig is already level. They are NOT designed to lift the RV or compensate for major slope. Using stabilizer jacks as primary leveling hardware risks bending the jack arms, twisting the trailer frame, or even collapsing the jack entirely.
The correct workflow is always: level first with blocks or a wheel leveler, then deploy stabilizers to reduce wobble. Even heavy-duty stabilizers like the LIBRA 9K set are meant to support the rig after leveling, not to lift it into level position.
Troubleshooting Auto-Level Errors on Uneven Ground
Auto-leveling systems like Lippert Ground Control and Bigfoot are designed to handle moderate unevenness, but they have limits. The most common fault on a really sloped site is the system refusing to complete the level sequence, throwing an error code, or bottoming out before reaching level. Across r/GoRVing and Forest River Forums, this is the single most-discussed leveling complaint.
The root cause is almost always that the initial slope exceeds the system’s correction range. Auto-level systems typically have 4 to 6 inches of total lift per jack, but on a steep cross-slope, one jack may reach its limit before the system reaches level. When that happens, the controller throws a fault to prevent frame damage.
The fix is to pre-level with blocks or a wheel leveler before pressing the auto-level button. Drive the low-side wheels up on blocks or a ramp until the rig is roughly level by eye, then deploy the auto-level system for fine adjustment. This pre-leveling step takes 5 minutes and prevents the frustrating fault cycle.
Other common auto-level issues include jacks sinking into soft ground (solve with jack pads like SnapPad or plywood), one jack failing to extend (check for low battery voltage or a blown fuse), and the system extending unevenly (recalibrate per the manufacturer’s procedure). Most auto-level issues on uneven sites are not actual system failures – they’re the system doing its job by refusing to overextend.
Frequently Asked Questions
How do I level my RV on uneven ground?
The fastest workflow is to first pull into the most-level footprint your campsite offers, set wheel chocks on the high side, then drive the low-side wheels up on leveling blocks or a wheel leveler until your bubble or digital level reads centered. Once roughly level, deploy the tongue jack and stabilizer jacks for fine-tuning and stability. Most rigs are safe to operate within 1 to 3 degrees of side-to-side slope.
What is the best RV auto leveling system?
For Class A motorhomes and high-end fifth wheels with built-in 4-point leveling, the Lippert Ground Control 3.0 and Bigfoot hydraulic systems are the most respected brands. For RVs without factory auto-level, the next best option is a wheel leveler like the Andersen or CARMTEK combined with a digital level like LevelMatePRO, which together deliver near-automatic precision at a fraction of the cost.
What are some common problems with RV leveling systems?
The most frequent issues are: auto-level systems throwing faults on steep cross-slopes (pre-level with blocks first), stabilizer jacks being misused as primary leveling hardware (which can bend the jack or twist the frame), blocks sinking into soft ground without a base pad, cheap plastic chocks failing under load, and wood blocks warping or cracking after a season of use. Always pair leveling gear with a bubble or digital level to confirm the final position.
Is LevelMate Pro worth it?
For solo campers, LevelMatePRO is one of the most useful accessories you can buy. The Bluetooth level shows real-time side-to-side and front-to-back readings to 0.1 degree accuracy on your phone, which eliminates the back-and-forth between your tow vehicle and a bubble level stuck to the trailer. It also remembers your hitch position for easy reconnect. For couples or families who camp with helpers, the value is lower but still meaningful for precision setup.
How high can you stack RV leveling blocks?
Most manufacturers recommend a maximum stack height of 4 to 6 inches per tire for safety. Beyond 6 inches, the stack becomes unstable, especially on soft ground where the bottom block can punch through. For lifts above 4 inches, a wheel leveler like the Andersen (rated to 4 inches) combined with blocks under the jack feet, or a hydraulic auto-leveling system, is the safer choice. Always chock the opposite wheels before driving onto a tall stack.
Does a camper have to be perfectly level?
No. Most RV refrigerators, slide-outs, and plumbing systems are designed to operate within 1 to 3 degrees of level. Side-to-side level matters more than front-to-back for absorption refrigerators. The practical goal is to get the rig within a couple of degrees, which is achievable with any of the systems reviewed here plus a basic level check. Perfectly level is rarely possible without significant effort and is not necessary for safe operation.
Are leveling blocks worth it?
Yes. Even at the budget end, a set of stacking leveling blocks pays for itself the first time you camp on an uneven site. The cost of a single absorption refrigerator repair, which can run into the thousands, far exceeds the cost of a quality block set, and the convenience improvement on every subsequent camping trip is substantial. For most RVers, blocks are the single best dollar-for-dollar upgrade after wheel chocks.
How to choose the right RV leveling blocks?
Match the block system to your rig weight with margin (blocks rated above your GVWR), the terrain you camp on (deeper blocks for soft ground, thinner profiles for storage), and your setup style (stackable for budget, wheel levelers for speed). Look for solid bottoms to prevent sinking, UV-stabilized materials for longevity, and bright colors for campsite visibility. Lifetime or 10-year warranty is a strong quality signal.
Final Verdict
After testing eight different setups across gravel, grass, and sloped pads, the Tri-Lynx Lynx Levelers 11-Pack remains the best RV leveling system for uneven sites overall. The 40,000-pound capacity, modular interlocking design, and 10-year warranty cover every towable RV on the market, and the included storage bag and cap level top round out a complete kit at a price that won’t shock anyone.
If you want the absolute fastest setup, the Andersen Camper Leveler cuts your leveling time in half and is worth the premium for frequent campers. For Class A motorhome owners with auto-leveling systems, SnapPad Xtra permanently eliminates the need to carry separate blocks. And for solo campers who want precision, LevelMatePRO makes one-person setup genuinely easy.
Whichever system you choose, the goal is the same: protect your appliances, sleep on a flat surface, and spend less time wrestling with bubble levels in the dark. The best RV leveling systems for uneven sites all deliver on that promise – pick the one that matches your rig and your camping style, and you’ll never dread a sloped site again. If you want a deeper dive on travel-trailer-specific picks, our travel trailer leveling guide expands on these recommendations with additional options.